Google
 
Showing posts with label coriander. Show all posts

October 7, 2012

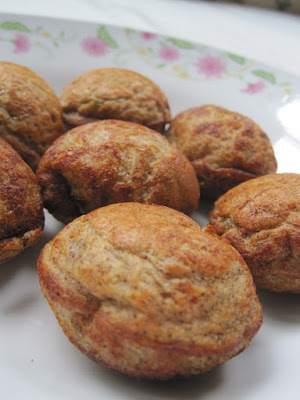
Ragi Appey - Almost Instant Goodness


Last month, we had been to the US to attend my graduation ceremony. Before the ceremony, we spent a few days with S's sister. She told me about making dosas without grinding. She merely added water and salt to a mixture of rice and udad flours and allowed it to ferment. I had tried something similar before, but had added baking soda to the mixture. I liked the idea of natural fermentation. I wanted to try it after we got back.
 

In one of my recent posts, I talked about how our blogs have crossed the boundaries of the blogosphere and how we are all connected via social media. This post and the dish it talks about have come about thanks to a food related discussion on Facebook.
 
Aparna started a discussion asking people about mannchattis. Suddenly, the discussion spilt over to kalchattis and kuzhipaniyaram pans. Then as a continuation of that, there was more talk of neiyappams and their pans. I was drooling. I was hungry. And I had to do something about it.
 
 
I decided to make grind free dosa batter. I tweaked the batter by adding ragi flour to the it. The weather happened to be rainy and not very hot. So natural fermentation may need a bit of a helping hand, I thought. And my idea worked. I was rewarded with a plate of hot appeys.
 
1 cup Udad Flour
1 cup Rice Flour
1 cup Ragi Flour
1 tsp Instant Yeast
Salt
 
Mix the flours and the salt and add enough water to make a dosa like thick batter. Add the yeast and mix well. Allow to ferment for an hour or so.
 
As a variation to this plain batter, I also made the masala variation by adding to the batter:
 
1 Tomato, finely chopped
1 Onion, finely chopped
1 Green Chilli, finely chopped
1/2" piece Ginger, finely chopped
1/4 cup Coriander Leaves, finely chopped
 
Heat the appey kayli and smear a drop of oil onto each mould. Simmer the flame and pour a spoonful of the batter into each mould. Turn each ball after a few minutes using a pick. Enjoy them fresh off the pan.
 
A, who did not care for dosas made from the same batter, loved these. He called them "ball". They're healthy enough for a toddler, are something he can eat  by himself (when sufficiently cooled) and have everything that makes them a meal. What's not to love?

August 6, 2012

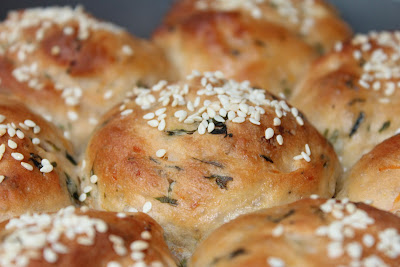
Mixed Vegetable and Butter Bean Buns


The scars left by my "Fruit Bun" baking episode in 1986 have long disappeared. I have not forgotten the episode, but I have simply moved on. After all, in 5 years, Mr. Yeast and I have become fast friends. I now have access to good quality yeast that doesn't need freezing and thawing. Since baking the coriander cream cheese pinwheels, I made another batch of khara buns and cinnamon rolls. The recipe for the cinnamon rolls will come soon.


Little A loved the cinnamon rolls and that is when I realized that I could make a wide variety of buns, especially for him. He is at a stage where he wants to feed himself. So, I decided to make buns for him that could be considered a full meal. Carbohydrates, fats, proteins and vegetables. These buns were the result of my experiment. You could substitute half of the flour with whole wheat flour
as well.


For the dough:

1 1/2 cups Bread Flour/All Purpose Flour
1 1/2 tbsp Oil
1 1/2 tbsp Yeast
1 1/2 tbsp Sugar
3/4 tsp Salt
1/4 cup Boiling water
1/4 cup Milk
2 tbsp Spinach, chopped
2 tbsp Carrot, grated
2 tbsp Beetroot, grated
10 Butterbeans, cooked, peeled and chopped finely
2 tsp Coriander Leaves, chopped
1 Green Chilli, deseeded and chopped finely
1" piece of ginger
2 tsp Sesame Seeds
 
Place the spinach, carrot and beetroot in a microwave safe bowl and sprinkle a little water. Microwave on high for 2 minutes.

Take a huge mixing bowl and place the oil, salt and sugar in it. Add boiling water and mix until the sugar dissolves. Add the milk now to bring the mixture to room temperature. Add the yeast and mix well. Add the mixed vegetables, butter beans, coriander, chilli and ginger. Add the flour and knead into a dough. Place the dough in a greased vessel and cover it with a damp muslin cloth. Allow to rise until double in size (roughly 45-50 minutes).
 
Divide the dough into 16 balls. Place in a buttered baking tin. (I used two 8" cake tins and placed 8 balls of dough in each.) Sprinkle the sesame seeds on top and allow to rise for another hour.
 
Preheat the oven to 400F/200C.

Bake the buns for 12-15 minutes. Brush with a little butter or oil if you like when the buns come out from the oven.


I did really make these for A. But given that they were so tempting, we quickly ate two each ourselves. Soft and full of flavour. These buns, while not spicy like Khara Buns, have a similar flavour. The butter beans and the vegetables up nutrition content. And that little A ate two of these, quite simply, made my day.


June 6, 2011

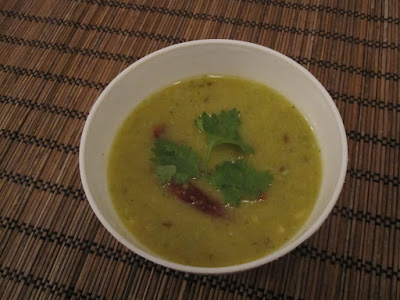
Green Masala Dal


Dal is almost a staple in our house. I don't make it everyday, but I make it very often. On days when it is pasta/noodles or anything other than rice and roti, dal doesn't make an appearance, but it is there to grace our meals on every other occasion.

Growing up, I saw only four varieties of dal being used. Toor dal (red gram dal) was the most common. Moong dal came second and not a close second. Udad and chana dals were relagated to temperings and that was that. Whole udad and whole chana found many uses, as did whole masoor. It is only when I moved out of home that I started stocking every variety of dal available in the market and learnt how to cook with them. Split, unsplit, skin on, skin off, premixed... you get the drift, don't you?

To aid me in my quest for newer dal dishes, I bought myself a pocket book by Tarla Dalal called "Dal". I have tried several recipes of hers from this book and have never been disappointed. This is one such recipe that I have adapted from this book.

1/2 cup Toor Dal
1/2 cup Moong Dal
1/4 tsp Turmeric Powder
1 tbsp Ghee
Salt to taste

Grind to a paste:

1 cup Coriander Leaves, chopped
1/3 cup Coconut, scraped
1 Onion, roughly chopped
1" piece of Ginger
3 Green Chillies
3 cloves Garlic

Combine all the ingredients for the paste and grind to a paste using as little water as necessary.

Cook the dals with the turneric powder, salt and 3 cups of water. Drain the water, reserving 1/2 cup (or save the rest for rasam). Mash the dals well.

Heat the ghee in a pan and add the ground paste. Saute for 4-5 minutes. Add the mashed dal and the 1/2 cup of water. Bring to a boil. Serve hot with rice or rotis.

April 12, 2011

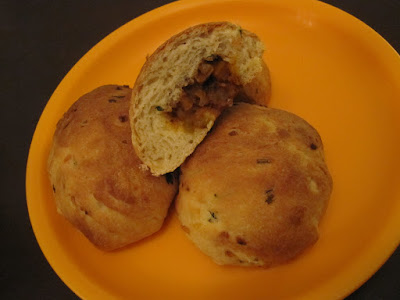
Pav Bhaji Buns


I have resumed baking and suddenly there's no stopping me. I was going through the recipes on this blog and decided to make some stuffed buns since Amma had been mentioning them for a while. I couldn't decide which kind of buns to make.

I remembered that S once ate Vada Pav at the Bombay airport and he told me the vada had been baked inside the pav. I thought that was a great idea. The more I thought about it, the more I felt that Pav Bhaji would be as good a candidate for something like this as Vada Pav was. The idea took shape in my head and soon the buns were taking shape in my hands.

We enjoyed this mess free "pav bhaji" for dinner tonight.

For the dough:
3 cups Bread Flour
3 tbsp Oil
3 tbsp Fresh Yeast/1 Envelope Active Dry Yeast
3 tbsp Sugar
11/2 tsp Salt
1/2 cup Boiling water
1/2 cup Milk
1/4 cup Coriander Leaves, chopped

For the filling:
 
1 large Potato, washed and chopped finely
1 Onion, finely chopped
1/2 Capsicum, finely chopped
1/4 cup Cauliflower, finely chopped
2 tbsp Carrot, finely chopped
2 tbsp Beans, finely chopped
2 tbsp Peas
1 tbsp Tomato paste
1 tbsp Oil
1/4 tsp Garlic Paste
1 tsp Chilli Powder
1/2 tsp Turmeric Powder
1 tsp Cumin-Coriander Powder
1 tsp Pav Bhaji Masala
Salt to taste

Take a huge mixing bowl and place the oil, salt and sugar in it. Add boiling water and mix until the sugar dissolves. Add the milk now to bring the mixture to room temperature. Add the yeast and mix well. Add the flour, coriander leaves, onion-garlic mixture and knead into a dough. Place the dough in a greased vessel and cover it with a damp muslin cloth. Allow to rise until double in size (roughly 45-50 minutes).
 
Knead the dough for a minute and then divide into 16 equal portions.

For the filling:

Pressure cook the peas along with the chopped carrots, beans, cauliflower and potato. Drain.

Heat the oil and add the onions and garlic paste. After a few minutes, add the capsicum and fry for another 2-3 minutes. Add the tomato pasteand fry for a few minutes. Add the other vegetables, salt, chilli, turmeric and cumin-coriander powders. Add the pav bhaji masala and fry for 2-3 minutes. Cover and cook the mixture for 4-5 minutes. Remove the lid and cook until the mixture is dry.

To Proceed:
 
Preheat the oven to 400F.

Take a portion of the dough and spread it on to your palm. Place some stuffing in the centre and bring the edges and seal. Place on a greased baking sheet or tray. Repeat with the other portions.

Allow to rise for 50-60 minutes and then bake for 12-15 minutes.

Cut the buns in half and spread a little butter on them. Enjoy them hot.

This turned out to be the easiest way to eat "Pav Bhaji" sans the mess. I suppose one could mix chopped onions and coriander along with the bhaji and then stuff it into the dough for a more authentic street side experience.

June 3, 2009

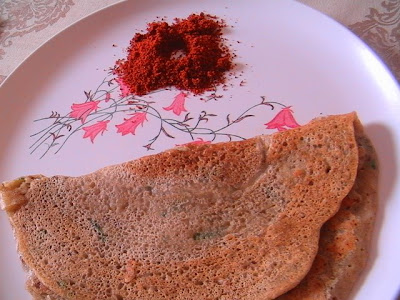
Wheat and Green Gram Doddak


Fusion foods. I somehow always thought of them as very exotic. Like Malabar Parathas with Thai Green Curry that I once had at Cosmo Village in Bangalore. I didn't think of a fusion of two or more Indian cuisines. I made this doddak some time ago. It is only now, when I sat down to blog about it, that I figured out the fusion element in my recipe. The cross between the Andhra Pesarattu and the Konkani Gava Pittye Doddak is what became our tasty breakfast dish.

1/2 cup Wheat Flour
1/2 cup Moong Flour
2 tbsp Cream of Wheat (Rava/Sooji)
2 tbsp Coconut, scraped
1 tsp Green Chilli Paste
1/4 tsp Cumin Seeds
1/4 cup Coriander, chopped
Salt to taste
Oil for frying


For the tempering:
1 tsp Oil
1/4 tsp Mustard Seeds
1/4 tsp Asafoetida
7-8 Curry Leaves


Prepare the tempering in a small kadhai and transfer the contents to a mixing bowl. Add the remaining ingredients except the oil and mix well using a little water. (The batter should not be too watery, just a little thicker than
dosa batter.)


Spread the dough onto a hot griddle and pour a few drops of oil on all sides. Make a slit in the centre using the spatula and pour a few drops into this slit. (This helps the oil reach the centre
and aids in crispening that portion.)Turn over and allow the other side to crispen as well.)

Serve hot with a chutney, podi or sambar on the side. The moong powder makes this a meal by itself. So it is perfect for those weeknight dinners as well.

May 2, 2009

Onion Coriander Mini Muffins and some Gratitude


Food. It has never ceased to amaze me. The flavours, the combinations. The traditional, the fusion foods. Everything about it seems wonderful. I'd be lying if I said I was always interested in cooking. I have been doing it for a long time. I started out of sheer necessity. Baking was a different journey altogether. There was no "need" to bake. There was just a book lying on Amma's bookshelf that intrigued me. After years of sticking to recipes, I have finally started experimenting.

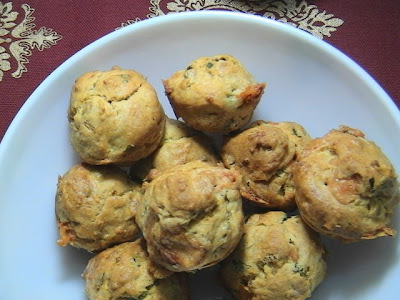
For the first party we threw in a long time, I was sure I didn't want to make any deep fried starters. I made some oven baked aloo tikkis, savoury cookies, and spicy crackers. Somehow, I got the feeling that these may not be enough. So, at the last minute, I decided to make some savoury muffins. I served with these with salsa. They were simply superb.


1/4 cup Oil
1/2 cup Wheat Flour
1 cup Flour
2 tsp Baking Powder
2 tbsp Sugar
1 tsp Salt
1 tsp Chilli Powder
1/2 tsp Turmeric Powder
2 eggs
1/2 cup Milk
1/4 cup Coriander Leaves, chopped

1/2 tsp Green Chilli Paste
1 Onion, chopped
50g Cheese, diced


Preheat the oven to 190 C (375 F). Grease a 24 - mini muffin pan.


Sift the dry ingredients and keep aside. Whisk the eggs, milk and oil. Add the chilli paste, coriander, cheese and onion. Slowly add the dry ingredients and stir gently. Place a spoonful of batter in each cup.


Bake for 25 minutes. Serve warm with some salsa on the side. (I served it with Karen Anand's Mexican Salsa.) Wait for the compliments to pour in.


When I look back, I think of the many opportunities I missed. The many times I could have asked someone how they made a certain dish and written it down, but didn't. The many times I could have come back home and tried to recreate a dish I'd just tasted at a restaurant, only to have forgotten about it over time.


I don't know how many times I bought new notebooks and wrote "Cookbook" on the first page only to forget after the initial enthusiasm faded away. I've lost count of the photocopies I've taken of other peoples' recipe books, only to misplace them during shifting and then forget about them altogether. I've stopped collecting the envelopes on which I've quickly noted down Amma's recipes over long distance calls. I guess that's because I finally got organized when it came to keeping my recipes in tact. Through this blog.


That's all this blog was intended to be. My answer to all those forgotten notebooks, lost photocopies and envelopes thrown in the bin accidentally. My attempt to take down a recipe from Amma or my aunts just once and save them for posterity. It's funny how popular this blog actually turned out to be. I remember telling Nandita in my very first post that I didn't plan on uploading any pictures. Egged on by all the wonderful blogs and the even the more wonderful bloggers, I took pictures, learnt how to make them better, and above all else continually got the energy to keep this blog going. I don't know how to say thanks.


I was never lucky in any sort of "lucky draw". But through the food blogging experience, I won a lovely book from Sig last year. My last minute entry to the AFAM Cherry won me this wonderful handmade gift from Rachel. Thank you for the lovely kitchen set Rachel.


This past year, this blog, and through it, I, have featured in leading newspapers and magazines. The Hindu featured this blog in their Food Bytes section. The Telegraph ran this story in their Sunday edition. In March this year, Ritu interviewed me for this story in Live IT. A couple of glimpses:


A closer look:


You never know where an initiative can take you. From my first newspaper mention for this blog to my first sale of a banana nut loaf, this year has been eventful. Thank you to each and everyone of you for helping me reach 450 posts in 731 days. If it wasn't for each of you, I doubt I'd be saying, "Happy 2nd Birthday, The Singing Chef!"

April 5, 2009

Spicy Crackers


There's a limit to the number of fried snacks you can eat or serve at a party. Pop corn is a good idea as is Bhel Puri. I found that these crackers are great with drinks. They're crisp (sort of like thin thattais) and they're baked, not fried. I found the recipe for this in The Cookie Book and modified it. (The recipe called for curry powder which I don't have. Read this for curry powder related amusement.)

1/2 cup Flour

1/4 tsp Salt

1 tsp Sambar Powder

1/4 tsp Chilli Powder

2 tbsp Coriander, chopped

2 tbsp Water


Preheat the oven to 350F.


Mix all the ingredients to make a firm dough. Knead well and then allow to sit for 5-10 minutes. Divide the dough into 15-20 small balls. Roll out each ball thinly, using a little flour if necessary. Place on a cookie sheet and bake for 12-15 minutes, turning them once when they are halfway through.


These crackers taste great with some salsa on the side. I'm quite sure you could play around with the spices to get different flavours each time. This time, since my crackers have chilli powder and coriander leaves, I'm sending this to FIC: Red and Green. I'm also sending these to JFI: Cilantro.

April 3, 2009

Moong Kosumbari (Yugadi /Rama Navami Pachadi)


This is a very simple dish that is made on Yugadi as well as Rama Navami. It has a nice tang from green mangoes which is probably the reason I enjoy this the most. (Please note that this is not the Ugadi Pachadi that is made in Andhra Pradesh.)


I made this in bulk last week to take to a slightly belated Yugadi celebration at the New Delhi Konkani Sabha on Sunday. I made this for 70 people. I expected to bring back a lot of it. I even joked to S that we could take a box each to work the next day. As it turned out, we did have lots left when people began leaving. Just when I started to close my boxes, a lady walked up to me and said, "If you don't mind, I'd like to take some of this home." I was thrilled. I emptied all the contents of one box into her container. She eyed the next box. I quickly emptied that as well. She said, "I came back quickly because I definitely wasn't going back without the pachadi." I said, "Thanks, I'm honoured." She looked at me and her expression was one of complete surprise. I probably didn't look like one of those people who could (and would) have anything to do cooking. But hey, I was thrilled.

Such encounters always take me back to this topic. But it could just be me. People who know me also know how lazy I can be. Considering I commute from Gurgaon to NOIDA and back everyday, they probably expect that I would not lift a finger. In a way, I'd like for people to think that of me. (The lower the expectations, the happier they'll be with anything I do.)

Coming to my "nearly award winning" recipe:

2-3 tbsp Cucumber, grated or finely chopped
1/2 cup Moong Dal, washed and soaked for an hour
2 tbsp scraped Coconut
1 tsp Green Chilli-Ginger paste
1 small Raw Mango, grated (or juice of 1 Lime)
Salt to Taste
Coriander leaves for garnish


For the tempering:
1 tsp Oil
1/4 tsp Mustard Seeds
1/4 tsp Asafoetida
7-8 Curry Leaves


Grind the coconut along with the chilli-ginger paste and make a rough chutney like paste.


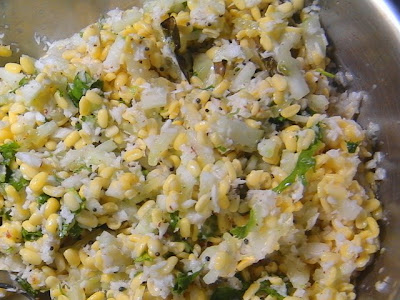
Place the soaked moong dal in a large bowl. Add the ground paste, cucumber, raw mango, salt and mix well. In a small kadhai or frying ladle, heat the oil, add the mustard seeds and asafoetida, and when the mustard splutters, add the curry leaves. Add this to the cucumber mixture.

Your pachadi is ready. Go ahead and make this on Rama Navami and get ready to get appreciation by the truck load. This is the last of the three part series on Rama Navami. I think I have finally gotten around to at least cooking and posting about things festive.

April 1, 2009

Neer Mor


As you must have noticed, I am not the best when it comes to celebrating festivals or cooking festival related food. I shared with all of you my first Gowri-Ganesha celebration. And since then, I have tried to do what Amma did during festivals. I worry that my "celebrations" will soon be limited to cooking alone. Some part of me tells me that there's nothing wrong with that.


Last year, I was alone during Rama Navami. I didn't want to cook a feast for one person. I made two drinks that Amma makes every year on Rama Navami. This year, I hope to make those two along with some of the other things that are traditionally made.

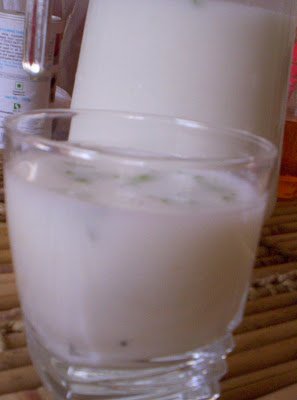
Sitting in my drafts for a year now, I bring to you this simple recipe. Customary on Sri Rama Navami but welcome at any time during the long summer months is this spiced buttermilk: Neer Mor.


1 cup Curd

4 cups Water

2-3 Green Chillies, chopped finely

1 tsp Ginger Paste

3-4 tbsp Coriander Leaves, chopped finely

Salt to taste


Beat the curd until smooth. Blend with the water. Add the salt, coriander leaves, ginger paste and green chillies. Mix well. Serve cold.


I don't wait for this festival to make this drink, but it seemed apt to share this with all of you when the festival is just round the corner.

March 21, 2009

Savoury Cookies


We've finally started having a few get togethers at home. On a regular basis. It isn't like we haven't ever thrown a party before. We just haven't thrown as many as we'd have liked to. And we're attempting to change that.


Some of the parties that we hosted earlier were main meal intensive. I've found that those work best when there is little or no alcohol doing the rounds and/or when there are children at the party. A drink to start with, some soup, a couple of starters, a pulao, a dry side dish, a gravy side dish, rotis, dal, salad and dessert.


This formula doesn't work well for every kind of party though. Many of the parties that we attend and host are snack intensive. By dinner time, no one really wants dinner. There's a limit to the amount of namkeen or chips that one can comsume. "Hot snacks to the rescue" I hear you say. But I don't quite like the idea of slaving over the stove. So I make different kinds of baked cutlets/patties. But then again, there's only so many that one can make. I thought that savoury cookies might make a great snack. And the added benefit was the fact that I could make them much ahead of time and just bring them out at the time of the party.


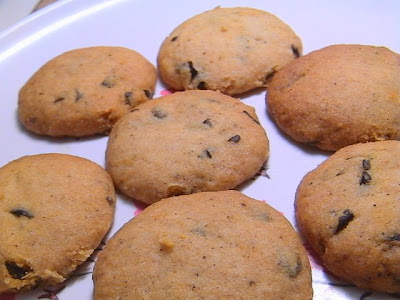
The night that I made these, the plate was empty in no time at all. The first reaction that people had was "butter". I did use butter, but 6 tablespoons of butter that I used in the dough gave me about 60 cookies. So, that's not all bad. Here is the recipe I used (cross between a recipe in the cookie book and Amma's Nankhatai):


1 1/2 cups Flour

1 1/2 tsp Baking Soda

1/4 tsp Salt

6 tbsp Butter

2 tbsp Coriander, chopped

1 tsp Egg Replacer, mixed in 2 tbsp water (Or 1 Egg)

1 tsp Garam Masala

1 tsp Chilli Powder/Paprika


Preheat the oven to 400F.


In a bowl, mix the flour, butter, baking soda, salt, garam masala, chilli powder till the entire mixture resembles bread crumbs. Fold in the egg replacer mixture and the coriander leaves and mix into a soft dough.


Make small balls of this mixture and flatten them on a cookie sheet. Bake for 12-15 minutes.


These are not only great with cocktails, but even with a cup of coffee or tea. A great alternative to sweet biscuits.

February 27, 2009

Coriander Cauliflower Peas Curry


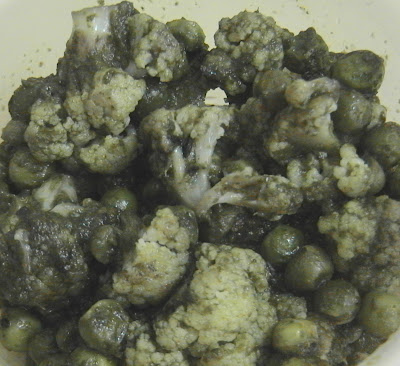
In winter, our vegetable vendor always sends us back home with loads of coriander. While I made Coriander Saar with these leaves, I decided to try this in a curry. I loved it and I'm sure you all will too. It is interesting to take a green curry to work and have everyone ask:

  • Is that saag?
  • Is it palak?
  • You ground the methi?
  • Bathua?


Quite an "Is it a bird? Is it a plane?" kind of situation.


1 cup Cauliflower

1/2 cup Peas

1 cup Coriander Leaves

2 pods Garlic

1" piece Ginger

2 Green Chillies

Salt to taste

1 tsp Oil

1 tsp Cumin Seeds

¼ tsp Asafoetida


Steam the cauliflower and the peas.


Prepare the chutney by grinding the coriander leaves with the garlic, ginger, green chillies and salt together.


Heat the teaspoon of oil and add the cumin seeds and the asafoetida. When the cumin crackles, add the chutney and fry for 3-4 minutes. Add the cauliflower and peas and mix well. Cover and cook for 2-3 minutes.


This goes to Mythreyee of
Paajaka as she hosts this month's edition of JFI: Cauliflower.

January 23, 2009

Tomato-Coriander Chutney


I can't remember the last time I made coconut chutney at home. I have started making thuvayals to go with idlis and dosas. I figured that if I sneak vegetables into the most unusual of dishes, I wouldn't have that much of a problem if one of my meals turned out to be a vegetable less one.


I made this chutney to go with these mixed dal and dalia cutlets. I made it again to go with some onion uttapams. It is full of flavour and I love the fact that we can eat as much chutney as we eat whatever we're eating it with. And not feel guilty!


3 Tomatoes, chopped

1/2 cup Coriander Leaves, chopped

1 tsp Oil

1 Green Chilli, chopped

1 tsp Ginger Paste

2 Pods Garlic, chopped

Salt to taste


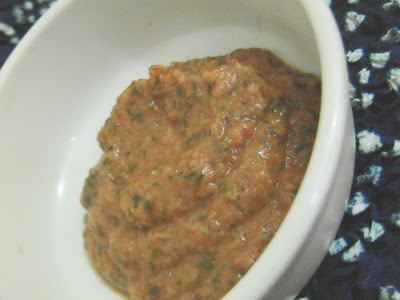
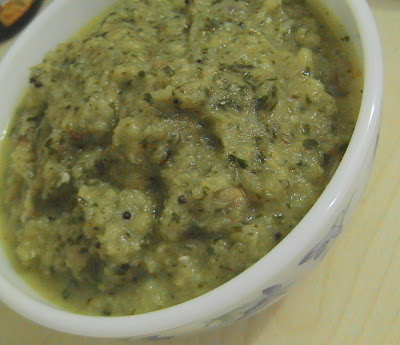
Heat the oil in a pan. Add the chilli, ginger paste and garlic. Fry for a minute. Add the chopped tomatoes and salt. Add the coriander leaves and cook until the leaves wilt. Grind the entire mixture to a fine paste.


The tomato chutney is ready. As a variation, you could also add some mint leaves. In a pinch, I'm sure I could have this chutney with some hot rice as well.


December 25, 2008

Coriander Saar


The first recipe I posted on this blog was for my favourite tomato saar. I have lost count of the number of times I’ve made it. I don’t think it goes very well with rice, but it is great as a soup. When I hosted the MBP Soups and Salads, I tried out Nupur’s Tomato Red pepper Saar. That was a hit too.


When I posted the recipe for tomato saar as part of a discussion thread on food, Mo responded to it and asked me to try a similar recipe. I didn’t know her at all, but as it turns out, we know several people in common and her mother even met my mother, albeit many years ago. While I didn’t know her when she first responded, we have since become friends. I promised that I’d try out her version of saar as soon as I could.


Now that coriander leaves are very much in season, I couldn’t postpone making this any longer. This recipe was enough for just me. I ate nothing else. But otherwise, it would suffice as an appetizer for two.


1 cup Coriander Leaves, roughly chopped
2-3 tbsp Coconut, scraped
1 Green Chilli, slit
1 tbsp Tamarind Paste
Salt to taste


For the Tempering:


1 tsp Oil
¼ tsp Mustard Seeds
¼ tsp Cumin Seeds
A good pinch Asafoetida
1 Red Chilli, broken into bits
7-8 Curry Leaves


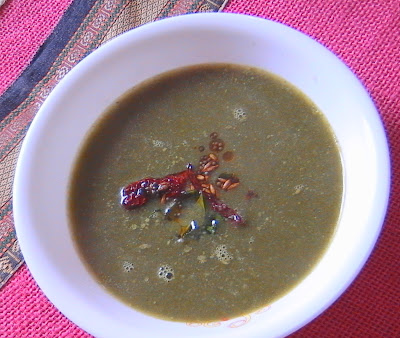
Pressure cook the coriander leaves with the coconut, chilli, tamarind, salt and about 2/3 cup water. Blend in a liquidizer and bring the liquid to boil over a low flame.


In a frying ladle, heat the oil and add the cumin and mustard. When the mustard splutters, add the asafoetida, curry leaves and the red chilli. When the chilli turns bright red, add the tempering to the saar.


The flavours of this saar are familiar yet different. I know that I will make it again before vendors start rationing out coriander leaves. This saar was perfect for a very cold and gloomy afternoon. I am certain this will be a hit at any party. Thanks for a keeper recipe Mo.

Merry Christmas all of you!

November 3, 2008

Vatana Bhaji (Green Peas Curry)


Winter's just around the corner. That means that I can look forward to 6 months of vegetables and greens that I love. Peas are usually the cheapest in January or so. While I do buy fresh peas and shell them for use during the winter months, I always keep stock of frozen peas. They come in handy on days when I wake up late and find no chopped vegetables in the freezer. This dish, one that I can safely call my own, is the best thing to dish out when I wake up at 7 a.m. and know that I have to be out of the house by 7.45 a.m. There's almost no chopping involved and the dish takes about 10 minutes from start to finish.


1 cup Peas


Grind to a Paste:


2 tbsp Coconut, scraped


1 Onion, quartered


4-5 tbsp Coriander Leaves


2 pods Garlic


1 tsp Ginger Paste


3 Green Chillies


Salt to Taste


For the tempering:


1 tsp Oil


1/2 tsp Cumin Seeds


1/4 tsp Asafoetida


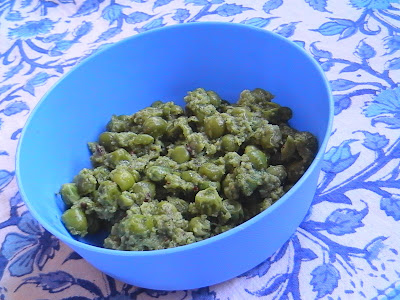
Place the peas in a microwave safe bowl. Sprinkle a little water and cover and cook on high for 3 minutes. In the meanwhile, grind all the ingredients together for the paste.


In a pan, heat the oil and add the add the cumin seeds. When the cumin seeds crackle, add the asafoetida and the paste. Fry the paste for 2-3 minutes. Add the cooked peas and about a tablespoon of water. Mix well, cover and cook for another couple of minutes.


We had this for lunch with rotis. It tasted great even though I didn't get a chance to heat the food at lunch. Quick, easy and made with things you always have on hand. Let me know how you like it.


Today is day 3 of the recipe marathon. Do check out the blogs of these lovely ladies:
DK , Siri, Srivalli, Ranji, PJ, Curry Leaf, Medha, Priya, Bhawna, Raaji, Ruchii, Anu, Kamala, Roopa, Divya Kudua, Rekha, Divya M, Lakshmi.

September 21, 2008

Bhulbhulavani


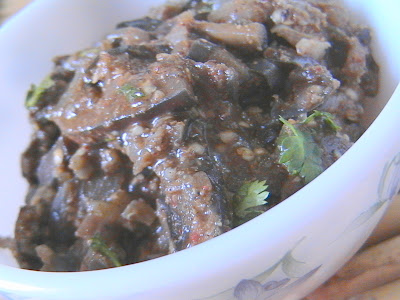
Everyone knows how much I love brinjal. I am always on the lookout for new recipes that I can try out with these little purple beauties. I made this dish many months ago and saved the post for the RCI. This isn't a dish that Amma made. She made it for the first time after I told her about it. I adapted this recipe from Rasachandrika, my konkani cooking encyclopaedia. My maid and my mother-in-law were very skeptical when I started cooking this. They couldn't imagine how a dish could be made without turmeric. I was following a recipe. Modifying it, no doubt, but following it all the same.

1/2 kg Brinjals, finely chopped
2 Onions, finely chopped
2-3 Red Chillies
1/2 tsp Coriander Seeds
2-3 Cloves
1" piece of Cinnamon
2-3 tbsp Coconut, scraped
3-4 tbsp Coriander Leaves, chopped
3-4 Garlic cloves
2 tbsp Oil
Salt to taste


Dip the brinjal pieces in water for 10 minutes and drain. Add salt to the pieces and keep aside.

Heat about 2 teaspoons of oil and fry the chillies, coriander seeds, cloves and cinnamon. Grind together to a fine paste this mixture with the coconut and garlic.

Heat the remaining oil and fry the onions. Add the brinjal pieces and fry for about 2 minutes. Add the ground masala and mix it well. Cook till the brinjals are done. Add the chopped coriander leaves.

We had them with wheat rotis for lunch and with Rice Rotis for dinner. I haven't made it again since only because I have been trying out other dishes with brinjal. But the recipe is a keeper.

Off this goes to Deepa's RCI: Konkani Cuisine.

July 19, 2008

Hara Bhara Paneer


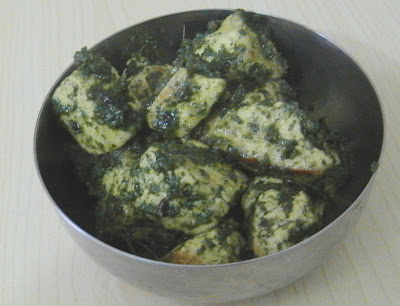
Depending on what time of the day we go shopping for vegetables, we come back with varying amounts of fresh coriander. If we’re the last customers of the day, I think “Uncle”, as S and I call him, would give us as much coriander as the other vegetables we’ve just bought from him. While it looks pretty and I’m super excited with my freebie, I have no clue how to use up these greens. Most folks at work tell me to make chutney out of this. But there’s a limit to how much chutney we can consume. I once made it and spiced up this colour coordinated salad. The next time I made the chutney, I put on my experimenter’s hat and ended up with this dish.

1 cup Paneer Cubes
1 cup Coriander Leaves
2 pods Garlic
1" piece Ginger
2 Green Chillies
Salt to taste
1 tsp Oil + Oil for shallow frying
1 tsp Cumin Seeds
¼ tsp Asafoetida


Prepare the chutney by grinding the coriander leaves with the garlic, ginger, green chillies and salt together.

Heat a skillet. Toast/shallow fry the paneer cubes on this using a few drops of oil. Keep aside.

Heat the teaspoon of oil and add the cumin seeds and the asafoetida. When the cumin crackles, add the chutney and fry for 3-4 minutes. Add the paneer cubes and mix well. Cover and cook for 2-3 minutes.

Serve as a side with rotis or between slices of bread as a toasted sandwich. It tastes great whichever way you eat it.

July 13, 2008

Carrot Peanut Kosumbari


When we have guests over, I usually end up making this carrot kosumbari. But this other version is a personal favourite. I don’t even need rice and dal or any of those things if I’ve made this kosumbari. I am extremely content eating this version by the bowlful. I made this a couple of times when we had some people over and it was a great hit.


2 large Carrots, grated
1 Onion, finely chopped

1/4 cup Roasted Peanuts, coarsely powdered

2 tbsp scraped Coconut

1 tsp Green Chilli-Ginger paste
½ tsp Lime Juice

Salt to Taste

Coriander leaves for garnish


Mix all the ingredients together and garnish with coriander leaves. The addition of roasted peanuts gives this simple salad its crunch. Whenever you’re not in the mood for heavyweight cooking, this salad may just be the answer.

July 11, 2008

Green Tomato Chutney


There was this time when we ran out of tomatoes. I simply continued to cook without using them in my cooking. I either made recipes that didn’t need tomatoes or dropped tomatoes from any recipe that did. Then finally when we did get to go shopping, I didn’t find any tomatoes at all. I was about to give up hope when I found a cart of green tomatoes. I thought something would be better than nothing and picked up a few. But I had no idea what to make with them until I came across this recipe at Lakshmi’s My Rasoi. I modified it a little bit. I decided not to add any tamarind as I thought the green tomatoes would be sour enough. I omitted the garlic from the seasoning, but added an onion to the chutney.


Ultimately, this was the recipe I followed:


4 Green Tomatoes, chopped roughly
1 Onion, chopped
3-4 Green Chillies, slit
1 tsp Cumin
1 tbsp Oil
½ tsp Mustard Seeds
7-8 Curry Leaves
2-3 Red Chillies, broken
Salt to Taste


Heat ½ a tablespoon of oil and add the cumin. When the cumin crackles, add the green chillies and the onions. Fry for about 2-3 minutes and then add the salt and the tomatoes. Cook for about 5-7 minutes and then take off the flame. Grind the mixture and transfer to a bowl.


Heat the other tablespoon of oil in a frying ladle. Add the mustard seeds. When they splutter, add the curry leaves and red chillies. Fry for a minute and pour over the ground mixture.


We had this with some steamed rice for dinner the day I made it and I spread it over my toast for the next three days. Less is definitely more and off this goes to Nupur’s MBP: Less is More. Since this dish makes use of a vegetable (or fruit?) that I can see only in summer, I am sending this to Sia for her edition of WBB: Summer Feast.

July 4, 2008

How Green was my Salad?


Warning: This picture definitely doesn't do justice to this fantastic salad.


OK, so you've all heard me talk about how my pictures are all so bad that they never do justice. But these pictures have been languishing in my drafts and I have to post them now. But when I make this again, I promise to take a better picture and upload that instead of this one!


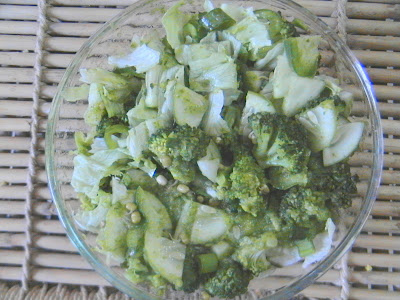
At the start of this year, we were only eating salads for lunch. I still have loads of salad recipes sitting in my drafts and I hope that from August onwards, I'll have new recipes to talk about. This salad caught the attention of several people who'd tasted it. It was one of my first colour coordinated salads. It started off accidentally, but when I found that 5 ingredients that I'd picked up to make the salad were green, I decided to hunt for more green stuff to put in.


1 Cucumber, sliced and quartered

1 Green Capsicum, sliced

1/2 cup Green Chickpeas

1/2 cup Sprouted Moong

2-3 leaves Iceberg Lettuce

1/3 cup Broccoli florets, steamed

1 bunch Spring Onions, chopped

1 tbsp Lime Juice (optional)


For the dressing (chutney)

1 cup Coriander Leaves

1/2 cup Mint Leaves

2 pods Garlic

1" piece Ginger

1 Green Chilli

Salt to taste

Grind together all the ingredients for the chutney. Toss the chutney with the salad. Add some lime juice if you like. Dig in! It is as simple as that!

June 30, 2008

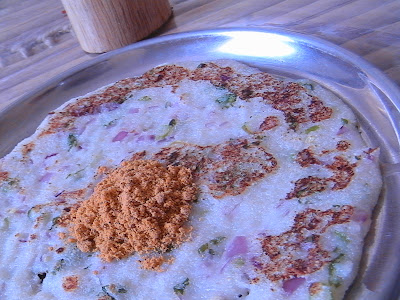
Instant Semolina Dosa


My friend T was telling me about all the different dosas she had been trying out. This is one of her ideas. It reminded me of the Eggless French Toast that Coffee had put up last year. I'd not tasted that version as I ended up making my own. But I think her French Toast would have had the same flavours as this dosa.


1 cup Cream of Wheat/Semolina (Rava/Sooji)

1 Onion, finely chopped

3/4 cup Curds

3 Green Chillies, finely chopped

2 tbsp Coriander, finely chopped

Salt to taste

Oil for frying


Mix all the ingredients together and let the mixture wait for a minute or two.


Pour the dough onto a hot griddle and spread it a little. Pour a few drops of oil on all sides. Make a slit in the centre using the spatula and pour a few drops into this slit. (This helps the oil reach the centre and aids in crispening that portion.)


Turn over and allow the other side to crispen as well.


I think this dosa can be eaten just by itself. However, we had it with some pitti chitni. I know we'll make this more often. It is very easy and really tasty. Most importantly, it takes almost no time. I got around 6-7 dosas from this batter.


So this is off as an entry for this month's WBB: Express Breakfasts. Today is the last date for sending in your entries. Please do dish out a filling breakfast. It shouldn't take more than 15 minutes, should it?