Google
 
Showing posts with label baking. Show all posts

January 1, 2015

Cointreau Pound Cake


Another year gone by. Another broken promise. I attempted to post 40 recipes in 2014. I ended up posting 9. It was a lot more than I'd managed the year before, but nowhere close to what I'd have liked. It wasn't for want of time. The blog was more a victim of circumstances. When I had the time, my computer didn't work. By the time I replaced my computer, I'd also changed jobs. A new job means new teams, new flight schedules and everything else that comes with the territory. And then suddenly, it was the end of the year.

I don't want to sum up 2014 or what it meant to me. As with every year, it had its ups and downs. However, 2014 gave me more than just a fair share of bad news. But I don't wish to dwell on that. I wish to acknowledge the not so good, but focus on the good. I was able to spend time with family and friends. I was able to embrace many good things that this city has to offer. And that is my plan for 2015 as well. To spend my time with family, friends and work. To do as many things as possible that make me happier and healthier.

Baking always makes me happy. Blogging makes me happy too. And blogging about baking should be bang on target. So here's a simple recipe to usher in 2015.


1 1/2 cups Cake Flour/Plain Flour

2 1/2 tsp Baking Powder
1 tsp Salt
3/4 cup Butter, room temperature
1 1/2 cups Ricotta Cheese
1 1/2 cups Sugar
3 Eggs
1 teaspoon Orange Essence
2-3 tbsp Cointreau
Butter and Flour for preparing the cake tin  

Preheat the oven to 180C/350F. Prepare a 10" round tin. (I used a spring form ring mould.) 

Sift the flour with the baking powder and salt. Cream the butter with the sugar and ricotta until the mixture is fluffy. Add the eggs, one at a time, beating well after each addition. Add the orange essence and Cointreau and beat well. 

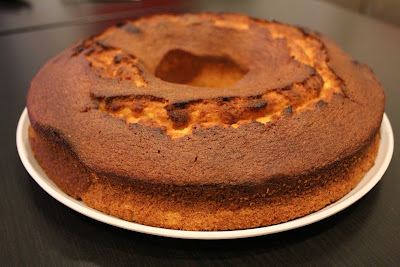
Incorporate the dry ingredients into the batter, adding a little at a time. Pour the mixture into the cake tin and bake for 40-45 minutes or until a knife inserted into the cake comes out clean. Allow the cake to cool a little and cut into pieces.

Enjoy and have a Happy New Year!

August 3, 2014

Apple Cinnamon Cake


Mindless TV viewing for me has to be food related. I'll admit it - being a food blogger, the shows can't make for too much mindless viewing for me. One of the things that surprise me is that, often, people in contests forget basic recipes. It must be the intense pressure of getting it all done in that short amount of time. How else can one forget how to bake a basic sponge cake?

I haven't been in a pressure situation like that when it comes to cooking gourmet food. But for the most part of our stay in Gurgaon, my everyday cooking was done under pressure. Will the vegetable be done in time, will the dal be cooked, will the rice be done, etc. Fortunately, I didn't have to refer to recipes for my everyday meals. 

I also could make one basic cake from memory. Over the years, I have modified the same recipe to yield a variety of cakes. And not one has disappointed. I'm not a big fan of apples, except in apple pie/crumble. I have taken the essence of an apple pie and made it into a cake. The cake was gone in no time at all. And I think it is simply because this has the best of both worlds: You can have your cake and eat your pie too!


1 cup Flour
1/2 cup Sugar
1/4 cup Butter
1/2 cup Milk
1 Egg
1/2 tsp Vanilla
1 1/2 tsp Baking Powder
A pinch of Salt
1 Apple, peeled, cored and thinly sliced
1/2 tsp Cinnamon Powder
2 tbsp Brown Sugar
1 tsp Icing Sugar

Heat the oven to 180C/350F.

Grease an 8" cake tin with butter. Arrange the apple slices on the base to form a pattern. 

Mix the cinnamon powder with the brown sugar. Sprinkle this mixture over the apples.

In a mixing bowl, beat the butter and the sugar. Add the egg and beat well. Add the milk and vanilla and beat again.

Sift the flour with the salt and baking powder. Add this to the sugar-egg mixture and mix until incorporated. Pour this over the apple slices. Place in the oven and bake for 25-30 minutes, or until a knife inserted into the cake comes out clean. 

Transfer the cake to a cooling rack. Sprinkle the icing sugar over the cake.

I do hope you try this and I'll look forward to hearing from you when you do. After all, that is what makes a blogger happy. I started on this journey 7 years ago. My cooking has improved a great deal since. I've also made some amazing friends along the way. 4 years ago, my namesake started talking to me about this idea of holding a food bloggers' meet. There were lots of ideas, a lot of discussions between her, Aparna, and me, and a seed had been planted.

As I type this, the very first Indian Food Blogger's Meet is underway in Bangalore. While I am sitting rather far away and cannot claim to have anything at all to do with it, in many ways it feels like my baby. I've had so many whatsapp chats with Arundati over the past few months that I feel I'm a part of it. I came so close to attending the event myself and am feeling terrible at having missed it. But, nonetheless, I'm on cloud nine myself - to see a dream that I was once a part of, come true. Proud of you! This is a cake to celebrate the IFBM2014 organizers.

But, come August, we also start the celebrations in this household. With the exception of last year, I've always come with a cake to this blog in August. And this year should be no different. The beloved CTO (Chief Tasting Officer) of this blog turns a year older. Our celebrations are postponed to until he returns from this business trip. But let that not stop me from saying, Happy Birthday, Sachin!

May 11, 2014

Oat and Fruit Bars


My little one is obsessed with sticky and chewy sweets. It all started with the Vitamin C supplement that I started to give him. Sometime ago, I handed him a dried apricot and told him it was just like a "sticky sweet". He loved it and asked for more. I then introduced him to raisins, which he enjoyed as well. Then, I got quite excited and bought a whole array of stuff from the dried fruit section. And he soon lost interest.
I wanted to put the stuff to good use. I thought I'd make the jewel blondies again. But since cookies keep better, I decided to look up recipes for dried fruit cookies. I came across this Pillsbury site and decided to try this recipe. I modified the recipe a little and made fruit bars instead of cookies. The next time around I will reduce the sugar in the recipe to maybe 3/4 cup in all.
The end result: bars full of the chewy goodness of oats and dried fruit. This is a keeper recipe and I am sure adding nuts or chocolate/butterscotch chips will work well too.
Ingredients
¾ cup Sugar
¼ cup Brown Sugar
½ cup Butter, softened
½ tsp Vanilla
1 Egg
¾ cup Flour
½ tsp Baking Soda
½ tsp Cinnamon Powder
¼ tsp Salt
1 ½ cups Rolled Oats
1 cup Dried Fruit (I used Apricots, Raisins, Cranberries, Blueberries and Cherries)

Heat the oven to 375 F/190 C. 
Line two cake tins with parchment/baking paper. (I used 9" square tins)
Cream the butter and sugar in a bowl until  fluffy. Add the egg and vanilla beat some more. Add the flour, baking soda, salt and cinnamon and mix well.
Add the oats and the dried fruit. Mix together until well blended.
Divide the mixture equally into the two cake tins. Bake for 8-9 minutes.
Remove from the cake tins and allow to cool a little on a rack. Cut into squares while still warm using a sharp knife or a pizza cutter.
Store in an airtight container when completely cool.
These will go into A's snack box next week and maybe I can now safely say goodbye to the store bought cookies/bars.

May 7, 2014

Apple Cheese Tarts and an itch to celebrate


And I'm back. After what feels like aeons. These past few months have been crazy. I wanted to throw A a homestyle party for his third birthday. For the longest time, I wondered how Amma managed to do everything at home for our birthday parties. Only our birthday cakes came from Adyar Bakey House. Everything else was home made. I also wanted to make his birthday cake from scratch. So, I signed up for a couple of Wilton Method cake decoration classes. 


Many of the things I made for his party warrant individual posts on this blog. We had a jungle themed rainbow cake, lemon ricotta cupcakes, chocolate cupcakes, coriander buns, cheese, jam and chutney sandwiches, potato cheese buns, semia upma, samosas and potato smiles. We had games such as pin the tail on the donkey and musical chairs. In short, I tried to recreate one of my childhood birthday parties for A. We all had a great time.


But all this kept me very busy. And kept me away from the blog. Since I posted the last post on this blog, I've cooked and baked a great deal. I've tried some new recipes, I've tweaked some old ones. I've sometimes fallen into a cooking rut - cooking similar food everyday simply because it doesn't require much thinking. 

However, I had to make the time today. I'm already a good five days late. The Singing Chef turned 7 on May 2nd this year. We hit a milestone barely 5 posts ago when I reached the magic number of 600 posts. And now it is time for another. I will stick to my usual way of celebrating with something sweet. I present to you - Apple Cheese Tarts.

For the pastry:

1 cup Flour
1/3 cup Butter (cold and diced)
2-3 tbsp Ice Cold Water
1/2 tsp Salt

Place the flour, butter and salt in a mixing bowl. Rub the butter into the flour until the mixture resembles breadcrumbs. Gradually add the water and knead into a soft dough. Do not knead too much. Roll out the dough 1/4" thick and stamp out circles slightly bigger than the diameter of a muffin mould.

For the filling:

2 Apples, peeled and diced (I used Granny Smith)
1/4 cup Sugar
1/2 tsp Cinnamon Powder
1/4 cup Cream Cheese

Place the apples and sugar along with the cinnamon powder in a pan. Add 1/4 cup of water and cook over a low flame until the apples are cooked. Stir in the cream cheese. Allow to cool.

To proceed:

Preheat the oven to 200C/400F.

Lightly grease the muffin pan. Place one circle of pastry in each of the moulds. Fill the cups with the filling. Bake in the oven for 20 minutes.

This recipe yielded 12 tarts.

Allow the tarts to cool a little before savouring them. This is the stuff desserts should be made of: a little sweet, a little salty, and a tad bit tart. 

Thank you all for coming along on this wonderful journey. Seven years is a major milestone in any relationship. This one is no different. My cup overflows with joy and gratitude for the friends I've made, the support I've received and the love I've felt. Happy birthday, Singing Chef. I say this a lot and still mean it every time I do: I never expected you to become what you have. But I am so glad you have.

January 26, 2014

Focaccia Caprese


We Knead to Bake! I joined this group last year and dropped out after a couple of months. Did I not enjoy baking bread? Actually, I did enjoy it very much. And I enjoyed baking with a group. There is so much inspiration and motivation that it becomes tough to resist. I dropped out because I knew I would be traveling, had guests at home and at the end of it all, I was so far out that it was tough to come back. I didn't want anyone in the group to think I was dragging my feet.

This year, I thought I could learn to manage my time better. And I definitely wanted to keep trying new breads. So, I signed up again. With encouragement from all of you and the group, I am certain I can keep up. Or at least I know I will try very hard.

This month's bread is the Focaccia Caprese, adapted from The Kitchen Whisperer. It only took me a few minutes to put this together and it was gone equally quickly. The only waiting was the time that the yeast took to get to work.

For the Dough:

2 tsp Instant Yeast
1 1/2 tbsp Sugar
3 1/2 cups Bread Flour
1 tsp Salt
1/4 cup Olive oil
1 1/2 cups Warm water
A little more olive oil for brushing the dough

For the Topping:

2 Tomatoes, sliced thin
1 6” round piece of Fresh Buffalo Mozzarella, cut into1/4” slices
1/2 cup Fresh Basil Leaves, chiffonaded

For the Herbed Oil:

1/4 cup Olive Oil
1 tsp dried Oregano
1 tsp dried Basil
1/2 tsp Red Chilli flakes 
1/2 tsp Garlic Powder
Salt to taste 

In a bottle, add all the ingredients for the herbed oil and shake well.
Oil a baking tin. Heat the oven to 210C/410F.
In a bowl, add the sugar, salt, and olive oil and mix well. Add the warm water and mix until the sugar dissolves. Add the yeast and mix well. Add the bread flour and mix until everything comes together. Knead for a few minutes. The dough will be a bit sticky at this point. Make it into a ball and cover it with oil.
Cover with cling film or a damp cloth and allow it to rise. This will take about 45 minutes to an hour. Divide the dough into 4 parts.
Take one part and stretch it into the prepared baking tin by patting it down. Stretch the dough as it will tend to spring back. Allow it to rise for another 20 minutes.
Make a few depressions all over the dough with a well oiled finger and brush the entire surface with oil.
Bake for 15 - 20 minutes, until the bread is golden brown. 
Lightly drizzle some of the herbed oil over the bread and then evenly arrange some slices of mozzarella over the bread, leaving very little space between them. Arrange the tomato slices over this and a little sprinkle the chiffonaded basil over this. The topping should cover most of the surface of the bread.
Turn the heat of the oven up to 230C/450F. Drizzle more herbed oil over the bread and place it back in the oven for 5-7 minutes.


Cut it into slices while still warm and enjoy it fresh out of the oven. This bread was gone in no time. Given how easy this recipe is, I know I will make it more often.

January 12, 2014

Milk Chocolate Cake


A new year! A time for resolutions. A time for new beginnings. Many people say new year's are overrated, as are resolutions. Personally, I think there is no harm in trying. A few weeks ago, I resumed posting on this blog. At the same time, my namesake and I were chatting. I told her that I would probably not resume the project 365 this year, but would probably think of writing once a week on this blog. Almost two weeks have gone by and I have not yet started. So, maybe this project needs a bit of tweaking. Just to keep things simple and to add a bit of variety, I'm going to go with 10 sweet baked goodies/Indian sweets, 10 savoury baked goodies/Indian snacks, 10 South Indian dishes and 10 North Indian dishes. So, that's 40 for 2014. Whatever else I post here will either be part of something bigger, or quite simply, a bonus.

The one big cooking related thing I started doing in 2013 was baking with A. It really all started with a book we brought from the library: Spot Bakes a Cake. We read and reread the book so many times that one day I just bought him a copy. It remains a favourite. In the story, Spot bakes a chocolate cake for his father's birthday. Usually, whenever A wants to bake a cake, it is chocolate. So far he has asked for a different cake just once.

On weekends, we build Lego sets or play with blocks, go out, play hide and seek or simply bake together. A likes the concept of baking. He loves the concept of sprinkles. And as is probably standard for children his age, he has almost no concept of patience. After I've put the cake in the oven, he'd come by every few minutes and ask, "Is the cake ready yet, Amma?", but when I finally bring the cake out for him to cut, if I ask him, "Would you like a piece?", the answer would most immediately be a "No". To him, cake is food. He feels he can ask for it in place of any meal. It is also his comfort food. Scraped knees causing many tears? Fear not. As long as one can quickly be given a piece of cake, there is no cause for worry.

This morning, we decided to bake. He wanted a chocolate cake. But I've run out of cocoa. We made do with what we had. 

1 cup Flour
1/4 cup Butter
1/2 cup Sugar
1/2 cup Milk
1 Egg
1/2 tsp Vanilla
1 1/2 tsp Baking Powder
A pinch of Salt
10 Cadbury's Dairy Milk miniatures (or 50 g milk chocolate)
Sprinkles and Chocolate Chips (optional)

Preheat the oven to 180C/350F. Prepare an 8" round cake tin.

Melt the milk chocolate miniatures in a microwave safe bowl for 30 seconds. Beat well. Repeat this twice until the chocolate is melted and the texture is creamy.

Sift the flour with the baking powder and salt.

Beat the butter and sugar in a bowl. Add the egg and beat again. Add the milk and vanilla and beat for 30 seconds. Add the sifted dry ingredients and beat until well incorporated. Add the melted chocolate and mix well.

Pour the batter into the prepared cake tin. Decorate with the sprinkles and chocolate chips (this is the part that children seem to enjoy the most). Bake for 30 minutes or until a skewer inserted into the cake comes out clean.

Transfer the cake to a cooling rack and then cut into pieces.

The result, today, was the softest, yet firmest, chocolate cake I've baked in a long long time. A had two pieces fresh out of the oven. I suppose having an able assistant makes all the difference in the world.

Happy New Year, everyone. My heart is filled with gratitude for the love you continue to show.

December 31, 2013

Eggless Indian Mithai Mini Muffins (and a major milestone)


This evening, the sun will go down for the last time in 2013. As far as this blog is concerned, 2013 will go down as the year with the least posts. And I hope to keep it that way. 

When Sig resumed the project 365, I was very tempted to join in. My attempt to do the same in 2010 got derailed for a bunch of reasons. This year, if there’s one thing I have taken to completion, it would be this project. A smartphone, good connectivity and an abundance of subjects resulted in my ability to stick with the project till the end.

On the cooking front, I also signed up for baking 12 breads this year with Aparna. I baked two breads with the group. I did everything with the third “bread”, except post it on the blog. Several things happened in the next three months. Some good, and some not so good. Moments of immense happiness were followed by moments of immeasurable grief. And many plans were derailed. But as I type this, I know that this, too, shall pass.

2013: The year in which

  • We rang in the new year in the company of friends, as always.
  • We took A to India for the first time.
  • We celebrated my parents’ 50th anniversary.
  • We traveled, on work and for fun.
  • We made full use of our Annual membership to USS.
  • I attended a cookie decoration class.
  • I signed up for a cake decoration class.
  • A and I baked and cooked together.
  • We were able to spend a lot of time with friends.
  • We shall welcome the New Year in the company of friends.

I shall be thankful for what I have, and understand that what wasn’t mine, was probably not meant to be. One of the things I will be eternally thankful for is this blog and everything it has given me. If I may say so myself, I am a much better cook today than I was 7 years ago. My interest and enthusiasm for all things food related have not waned, but have, in fact, grown. Today, I am equally at ease making vegetable pies or bisi bele bhat, ricotta cakes or ribbon pakoda. And while S has been a major pillar of support by being the one who appreciates as well as criticizes, I need to acknowledge all of you too. Fellow bloggers and readers have taught me so much and have been so instrumental in expanding my repertoire.

This post is monumental. It is my last post for 2013. It is posted on the last day of 2013. And it is the 600th post on The Singing Chef. I have always said that this blog grew much bigger than I’d ever intended for it to. I’ve caught myself going back to it for inspiration every so often. And it will always be a part of me. And I will always be grateful for that one hot afternoon in May, in sunny and dry Gurgaon, when on an unexpected holiday I started this blog on a whim. From not expecting to put up any photos, to getting an SLR just so I can take better pictures, to ditching everything and clicking photographs with my phone, it has been one heck of a ride. I remember how eagerly I participated in blog events, how excited I was when I got a blogger award and how I even went shopping for pretty plates and bowls just so I could take pictures for the blog. Now, I just take a photo of my plate (the hand me down melamine ones we eat in) before I eat and use that for the blog. At least, that is the intention.

In attempting to keep up with tradition, I leave you with a sweet recipe. One that has been a super duper hit in my family and friends’ circle. While I have yet to master Indian mithai, I have been rather successful in recreating the same flavours through my first love: baking.

1 cup Flour
1 ½ tsp Baking Powder
½ cup Sugar
a Pinch Salt
¼ cup Butter
¼ cup Ricotta Cheese
½ cup Milk
2 tsp Milk Masala Powder (I use Everest)
A few strands of Saffron

Sift all the dry ingredients together.

Preheat the oven to 350F. Prepare the mini muffin pans by lining them with paper muffin cases.

In a bowl, beat the ricotta cheese with the butter and sugar. Add the milk gradually. When the mixture is well blended, add the sifted dry ingredients and mix until just well blended. Add the saffron and the milk masala powder.

Pour the batter into the prepared muffin cases. Bake for 15-20 minutes.

This recipe beats slaving over the stove to make the perfect Indian mithai. No more worrying about one thread or two thread consistency, no need to stir until the mixture leaves the sides of the pan. Just mix, bake and get ready to eat a melt-in-your-mouth piece of goodness.

Make these, pop one in your mouth and reminisce the year that just went by. Dwell on the good, count your blessings, and surround yourself with friends and family. May 2014 take you one step closer to whatever your goals are. Thank you for following this space. Thank you for missing me. Thank you for helping bring this blog back on track. Wishing you and yours a very Happy New Year!

October 24, 2013

Jewel Blondies


I never thought I'd abandon this space. Not even for a few months. Whenever I thought I had been away too long, I'd be back, usually with a vengeance. This time, I realize I've been away for way too long. This blog which had become such an integral part of me, turned six, and I didn't blog about that. I threw a big surprise party for S' birthday. I didn't let any of you on the secret. I knew I always had a truckload of excuses: a new job, a toddler... but honestly, I've had it much worse than this and I blogged through all that.

I think it is just that 2013 has been one heck of a year for me. The never before and never again variety. I restarted the photo a day challenge and have stuck with it. I traveled to more countries in one year than I did in all my life until now. I had the honour of celebrating my parents' 50th wedding anniversary. I also learnt of the depth of my strength as I suffered a great loss. But I have always been the type that tries to take everything in her stride. But, sadly, this blog suffered.

A started school earlier this year and one of my endeavours is to give him homemade snacks. I have to admit I was taken by surprise when I realized that even two year olds suffer from peer pressure. Many of my attempts to create goodies for him has resulted in them being returned as is with an "I want Milo balls" or "I want Chocos".

I wanted to make some blondies for him as I was desperately fighting a chocolate war, and a seemingly fake one at that. I remembered saving a recipe from almost 10 years ago. The source has long been forgotten as this was in my pre-blog era. I modifed it to make a batch of much loved blondies. Even by a two year old.

3/4 cup Butter
1/2 cup Sugar
3/4 cup Brown Sugar
2 Eggs
2 cups Flour
1 tsp Baking Soda
1/2 tsp Salt
1/4 cup Dried Cherries
1/4 cup Dried Blueberries
1/4 cup Dried Apricots
1/4 cup Butterscotch Bits
1/4 cup Chocolate Chips

Preheat the oven to 350F/180C. Grease two 8x8 cake tins.

Cream the butter and the sugars in a bowl. Add the eggs and beat well. Sift together the flour, baking soda and salt. Gradually add to the butter-sugar mixture, beating well after each addition. Stir in the dried fruits, chocolate chips and butterscotch bits.

Divide the mixture into the two pans. Bake for 30 minutes until the top is golden brown. Cool and cut into squares. Enjoy these with a cold glass of milk. These are little bejewelled, bite sized treats for kids and grown ups alike. Try it and let me know what you think.

I turned a year older two days ago. Many friends wished me. Most wished this blog well and hoped for many more recipes. Some wondered what had happened to this space. And then there was one who had been begging me to resume for months now. For the past few weeks, it had turned into a push of sorts. This morning she extracted a promise. Now, there is no way I can let this slip. My dear namesake, this one is just for you. 

March 24, 2013

Hokkaido Milk Bread


Things have been silent here for a while.I have been cooking and trying out new things more than ever, but am finding lesser and lesser time to blog about them and share them with you all. At the very least, I have been taking pictures, so we can hope that the posts could see the light of day at some point.


News on the Baby A front is that we celebrated his second birthday with a little party and a cake. So, he doesn't qualify to be called Baby A anymore. Since none of the established bakeries was willing to make a birthday at CNY, we placed an order with a home baker. We were so stunned by her creation. We asked her to put a few of A's favourite things: Thomas, Spot and Lightning McQueen. A was thrilled! A also started with a playgroup and seems to enjoy it. In his first week, he made pizzas at school! Another foodie in the making?

Earlier this year, I signed up with Aparna to bake 12 breads in 12 months with. I was in India for 3 weeks in February and so I dropped out of February's bread. We enjoyed the pull apart pesto bread so much that I was certain  I simply had to try the others. (OK, let's say the fear of being thrown out of the group also had something to do with the attempt.)

When we returned from India and were unwell for what felt like the longest time. I thought up every excuse in the book to opt out of this one. And then the pictures started pouring in. And I thought it'd be criminal to not even give this a try! So I went along with our credo: We Knead to Bake!

Hokkaido Milk Bread


A little time consuming, but very easy. The original recipe is for this bread is from 65 Degrees Tangzhong “65C Bread Doctor” by Yvonne Chen, and adapted from Kirbie’sCravings.


For The Tangzhong (Flour-Water Roux)

1 1/2 tbsp Flour
1/4 cup Water
1/4 cup Milk 
Whisk together lightly the flour, water and milk in a saucepan until smooth and there are no lumps. Place the saucepan on the stove, and over medium heat, let the roux cook till it starts thickening. Keep stirring/ whisking constantly so no lumps form and the roux is smooth.
Watch the roux/ tangzhong until you start seeing “lines” forming and take the pan off the heat at this point.
Let the roux/ tangzhong cool completely and rest for about 2 to 3 hours at least. It will have the consistency of a soft and creamy crème patisserie.
For The Dough:

 2 1/2 cups Flour
 3 tbsp Sugar
 1tsp Salt
2 tbsp Milk Powder
2 tsp Instant Yeast
1/2 cup Milk
1/8 cup Cream
Tangzhong from the recipe above
25gm Unsalted Butter (cut into small pieces, softened at room temperature)

Put the flour, salt, sugar, powdered milk and instant yeast in a bowl and mix with a hand blender and dough hooks. In another small bowl mix the milk, cream and Tangzhong till smooth and add to the processor bowl. Run on slow speed until the dough comes together. Now add the butter and process till you have a smooth and elastic dough which is just short of sticky.
Knead the dough to make it smooth. If the dough feels firm and not soft to touch, add a couple of tsps of milk till it becomes soft and elastic. When the dough is done, you should be able to stretch the dough without it breaking right away.  When it does break, the break should be form a circle.
Form the dough into a ball and place it in a well-oiled bowl turning it so it is well coated. Cover with a towel, and let the dough rise for about 1 hour or till almost double in volume.  
Place the dough on the working surface. Divide the dough in 3 equal pieces. Roll out each portion of the dough with a rolling pin into an oval shape, about 1/8” thick. Take one end of the dough from the shorter side of the oval and fold it to the middle of the oval. Take the other end and fold so it slightly overlaps the other fold.
Roll this folded dough with the rolling pin so the unfolded edges are stretched out to form a rectangle. Roll the rectangle from one short edge to the other, pinching the edges to seal well. Do this with each of the three larger pieces and place them, sealed edges down, in a well-oiled loaf tin. Cover with a towel and leave the dough to rise for another hour.
Brush the tops of the loaf with cream and bake at 170C (325F) for about 20 to 30 minutes till done and beautifully browned on top. Let the loaf cool in the tin for about 5 minutes and then unmould and transfer to a rack till slightly warm or cool. Slice and enjoy the fruits of your labour!
Soft and so tasty. This is, by far, the best bread I've baked.


December 23, 2012

Black Forest Brownies

Brownies! I barely know of anyone who doesn't like the stuff. Having said that, I must admit that I have hardly ever been tempted to buy these beauties. Especially since I started baking them at home. I have tried different variations through the years, but have never put up recipes. I usually bake these to give away. So, I rarely take pictures and as a result, the recipes are not shared.


While I am yet to start my holiday baking, this seemed like a festive enough way to kickstart the process. We always have a stash of chocolate that is gifted to us throughout the year. While we all love chocolate, we don't eat it as much. Very recently, a friend gifted us a bar of Dairy Milk Black Forest. I just knew that it would also just languish in the pantry unless I rescued it. Now, I think I could do this with other chocolates too.
 
1/2 cup Oil
3/4 cup Sugar
1 teaspoon Vanilla essence
2 Eggs
1/2 cup Flour
200g Dairy Milk Black Forest Bar (Powdered in a mixie jar)
1/4 teaspoon Baking Powder
1/4 teaspoon Salt
 
 
Grease a 9-inch square baking pan. Preheat the oven to 180C/350F.

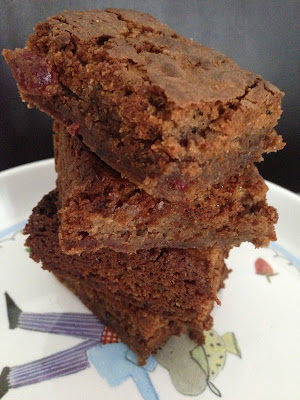
Beat the eggs and add the sugar, vanilla essence and oil. Add the flour, chocolate, baking powder and salt, gradually to the egg mixture. Spread the batter evenly into prepared pan. Bake for 20 to 25 minutes or until brownies begin to pull away from sides of pan. Cool completely in pan on wire rack. Cut into squares and enjoy them.

The black forest chocolate is made with pieces of cherry jelly and biscuits. The surprise is in biting into a chewy brownie and finding an even chewier piece of jelly. Great combination and a keeper recipe.
 
Happy Holidays!


September 22, 2012

Jam Tartlets


I woke up last morning thinking, "Oh dear! Oh dear! I shall be too late!"
 
I was running very late for a tea party. One whose deadline had been extended partly at my request. Could I blame it on jetlag? Could I blame it on two festivals that are very important to me that I absolutely had to prepare for? Could I simply say I forgot? No.

I knew I had to do something about it. I just didn't know what.

'I'm sure I'll take you with pleasure!' the Queen said.
'Twopence a week, and jam every other day.'
Alice couldn't help laughing, as she said,
'I don't want you to hire ME - and I don't care for jam.'
'It's very good jam,' said the Queen.
'Well, I don't want any TO-DAY, at any rate.'
'You couldn't have it if you DID want it,' the Queen said.
'The rule is, jam to-morrow and jam yesterday - but never jam to-day.'
'It MUST come sometimes to "jam to-day,"' Alice objected.
'No, it can't,' said the Queen.
'It's jam every OTHER day: to-day isn't any OTHER day, you know.'
'I don't understand you,' said Alice. 'It's dreadfully confusing!
'

 
Have I confused you enough? There was a time when I thought about mad people in third person. Now I know enough to talk about them in first person.
 

“Do you think I've gone round the bend?"
"I'm afraid so. You're mad, bonkers, completely off your head. 

But I'll tell you a secret. All the best people are.”


Alice, oops Anita, invited us to a Mad Tea Party. I had attended a couple of these in the past. Just around the time when I realized that, I, like everyone else, was a bit mad. But what would I do at a tea party? I, the one that doesn't even drink tea that much.
 
“Take some more tea," the March Hare said to Alice, very earnestly.
"I've had nothing yet," Alice replied in an offended tone, "so I can't take more."
"You mean you can't take less," said the Hatter: "it's very easy to take more than nothing."
"Nobody asked your opinion," said Alice.”


The writing was everywhere. I simply had to attend this tea party and since today is not just any other day, I decided to make jam tartlets.
 
For the pastry:

1/2 cup Flour
1/2 cup Wheat Flour
1/3 cup Butter
2-3 tbsp Ice Cold Water
1/2 tsp Salt


Place the flours, salt and butter in a bowl and mix together till the mixture resembles small peas. Gradually add the water and knead gently till it forms a dough. (Do not knead as you would for chapati/poori dough.) Roll out the dough and stamp out circles.


For the filling:
3 tbsp Jam

To proceed:

Preheat the oven to 200C/400F.

Prepare a mini muffin pan by greasing it a little. I used a non stick mini mufifn pan.

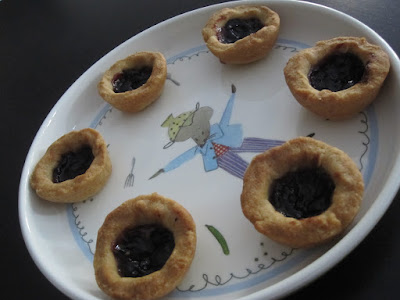
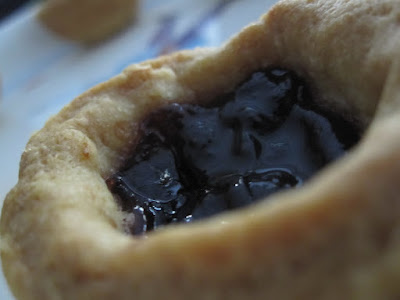
Place the pastry circles in the muffin moulds. Spoon 1/2 tsp of jam into each mould. Bake for 20 minutes. Allow the tartlets to cool a bit.

 
Sit down with a cup of tea or coffee, serve yourself some tarts and have yourself a party. Remember:
 
“Yes, that's it! Said the Hatter with a sigh, it's always tea time.”