Google
 
Showing posts with label blueberry. Show all posts

May 11, 2014

Oat and Fruit Bars


My little one is obsessed with sticky and chewy sweets. It all started with the Vitamin C supplement that I started to give him. Sometime ago, I handed him a dried apricot and told him it was just like a "sticky sweet". He loved it and asked for more. I then introduced him to raisins, which he enjoyed as well. Then, I got quite excited and bought a whole array of stuff from the dried fruit section. And he soon lost interest.
I wanted to put the stuff to good use. I thought I'd make the jewel blondies again. But since cookies keep better, I decided to look up recipes for dried fruit cookies. I came across this Pillsbury site and decided to try this recipe. I modified the recipe a little and made fruit bars instead of cookies. The next time around I will reduce the sugar in the recipe to maybe 3/4 cup in all.
The end result: bars full of the chewy goodness of oats and dried fruit. This is a keeper recipe and I am sure adding nuts or chocolate/butterscotch chips will work well too.
Ingredients
¾ cup Sugar
¼ cup Brown Sugar
½ cup Butter, softened
½ tsp Vanilla
1 Egg
¾ cup Flour
½ tsp Baking Soda
½ tsp Cinnamon Powder
¼ tsp Salt
1 ½ cups Rolled Oats
1 cup Dried Fruit (I used Apricots, Raisins, Cranberries, Blueberries and Cherries)

Heat the oven to 375 F/190 C. 
Line two cake tins with parchment/baking paper. (I used 9" square tins)
Cream the butter and sugar in a bowl until  fluffy. Add the egg and vanilla beat some more. Add the flour, baking soda, salt and cinnamon and mix well.
Add the oats and the dried fruit. Mix together until well blended.
Divide the mixture equally into the two cake tins. Bake for 8-9 minutes.
Remove from the cake tins and allow to cool a little on a rack. Cut into squares while still warm using a sharp knife or a pizza cutter.
Store in an airtight container when completely cool.
These will go into A's snack box next week and maybe I can now safely say goodbye to the store bought cookies/bars.

August 15, 2012

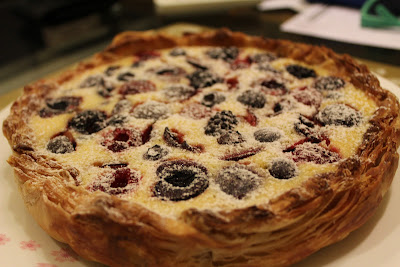
Cherry Berry Yogurt Tart


A few years ago, our blogs were our blogs. Fellow bloggers and other readers would come to our blogs, read our posts and comment on them. I remember very clearly the time when I lived for those comments. Because they were my only connection to my readers. (Julie & Julia, anyone?) I still wait eagerly for comments to posts that I put up. Today they are few and far between. But many lines are blurring and I now have multiple connections with my fellow bloggers and readers. Facebook is one of those connections.

Last year, a few random conversations led to the formation of a Baking Club and all of us made a Mango Cake. I got a little busy in the months that followed and couldn't keep up. Over the next few months, my blog suffered from lack of attention. In the last few months, it has picked up speed again.

 
A more recent chat on Facebook led to the revival of this club. The one I fondly called The Sisterhood of Travelling Cake Tins is now christened that. And since today is the 100th birthday of Julia Child, the theme for this episode is her Baked Yogurt Tart. Keep a lookout in the blogosphere today. You are bound to see multiple yogurt tarts from my dear friends and fellow bloggers. And given that Cook For Julia is being hosted by PBS, you will see many other Julia Child recipes too.

This recipe is adapted from a Julia Child recipe found here. I used readymade frozen puff pastry for the base. You can find my tried and trusted recipe for shortcrust pastry here. I omitted the nuts from the recipe.

1 recipe Shortcrust Pastry dough/Puff Pastry

For the filling:

2 cups Yogurt
3/4 cup Sugar
3 Eggs
3/4 cup Flour
2 tbsp pure Vanilla Extract

1/2 cup Cherries, pitted and halved
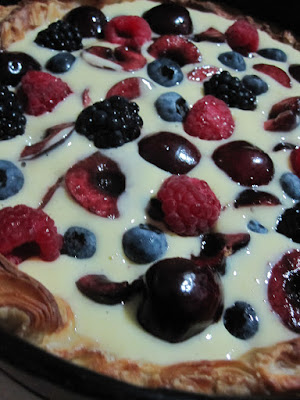
1 cup Mixed Berries (I used raspberries, blackberries and blueberries)

Icing sugar, for dusting

Heat the oven to 400F/200C.


Roll the pastry doughinto a 12 inch circle of 1/4 inch thickness and fit it into a 9" round springform pan. Cover the top with baking paper and blind bake for 20 minutes with pie weights, rice or beans.

Remove the weight and the baking paper and allow the tart shell to cool. Set the oven to 325F/160C.


 In the meanwhile, beat the eggs and the sugar together. Add the yogurt and the vanilla extract and mix well. Add the flour a little by little and fold it into the mixture. Pour the mixture into the cooled tart shell. Do not fill to the brim, only about 2/3. Add the fruit. (The tart will look like this at this stage.) Bake for 30 minutes. Allow to cool. Cut into wedges and serve.

Packed with fruit and the goodness of yogurt, this is one keeper recipe.

Happy 100th birthday Julia! Happy Independence Day! And a toast to dear S and I. We lost our independence this day six years ago when we got engaged formally.

Here are the links to the other posts from the sisterhood:

Aparna: Baked Yogurt Tart (Tarte Au Yaourt) With Fresh Orange & Pistachios, In An Oatmeal Crust
Nandita:Baked Yogurt Berry Tart
Arundathi:
Arundati:Baked Yogurt Tart with Blueberries, Almonds and Orange Zest in an Oatmeal Pie Crust</
Monika:Baked Yogurt Tart with Fresh Figs and Blueberries

August 22, 2011

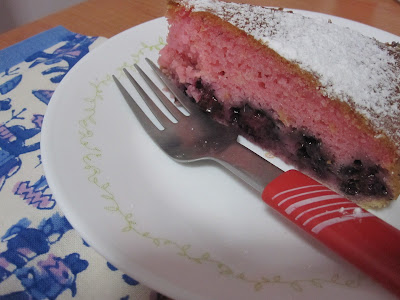
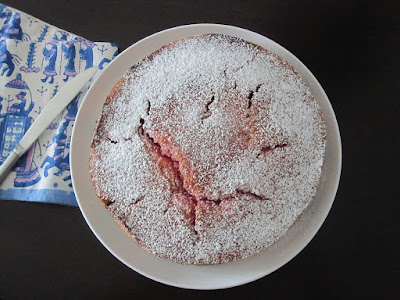
Very Berry Vegan Cake


The cake monsoon is on at The Singing Chef. I would like to believe that the season will change shortly or else I may need a new wardrobe very soon. I am on a baking spree and there is no proverbial light at the end of this tunnel.


I have had a lot of people ask me for eggless versions of my cakes. I have to admit, I never really baked too many eggless cakes. And whenever I absolutely needed to, I used the egg replacer powder that one gets in supermarkets. But for about a month, I was asked by Baby A's paediatrician to stay off certain foods to test if he was allergic to something. When something is denied to you, you tend to miss it the most. No eggs, no nuts, no dairy. Technically, no cake. But I simply wanted it. And I was adamant to find a way out.

Recipes for eggless cakes are easily available. I didn't find too many vegan cake recipes that jumped out at me and said "Bake me!" I decided that I'd find no-egg and no-dairy alternatives and use them in a regular cake. That is what I did. The resulting cake was a tad dense, but otherwise divine. It was just perfect to satisfy that craving for something sweet when I was being denied everything else.

1/4 cup Oil
1 2/3 cups Flour
2 tsp Baking Powder
1/2 tsp Baking Soda
2/3 cup Sugar
1/4 tsp Salt
1 Lemon, zested and juiced
1 cup of Soy milk (approx.)
1/4 cup Silken Tofu, pureed
1 cup Mixed Berries (Blueberries, Strawberries, Raspberries and Blackberries)

A few drops Pink Food Colour (optional)
Icing Sugar for dusting

Pour the lemon juice into a large measuring cup. Add enough soy milk to make 1 cup.

Preheat the oven to 375F. Grease and line an 8" cake tin.
Sift the dry ingredients (flour, baking powder, baking soda, and salt) together.

In a mixing bowl, add the pureed silken tofu and sugar and beat well. Add the oil, curdled soy milk and the lemon zest and beat together. Add the dry ingredients a little at a time, beating well after each addition. Add the colour, if using. Add the berries and mix gently.

Pour the batter into the prepared cake tin. Bake for 30-40 minutes or until a skewer inserted in the cake comes out clean. Dust with icing sugar. Cut into wedges and serve.

April 20, 2011

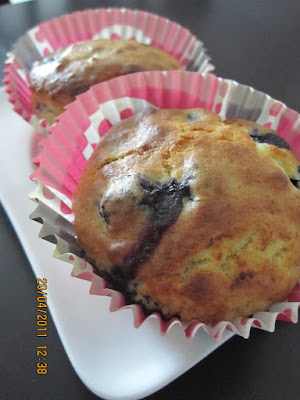
Blueberry Muffins


When we first moved to Singapore, I was dumbstruck by the variety of produce that I saw in the markets. The wet markets, the supermarkets, and the gourmet stores were all filled with every kind of fruit and vegetable. Yes, I'd read about most things, especially since I started blogging. But to see them for real was something else. I was literally the kid in a candy (err... fruit and vegetable) store. I mean, this was the real deal.

A wrong diagnosis during my pregnancy in India led to thinking that I may be developing gestational diabetes. Fortunately, there was no such thing and it was the result of a badly administered glucose tolerance test. But there was a time lag between the wrong diagnosis in India and the correct diagnosis in Singapore. I wanted to be extremely careful and stayed away from most things sweet. I relished the fruits as they were, but didn't dare to use them in baking. I could (and still can) do without the excess sugar and fat.

But now I have an oven. I have the produce. And I do make the time. I have been reading a lot of my cook books to see what I can make with what I get here. I found a packet of blueberries in the supermarket and they were a lot cheaper than they usually are. So, I came home with a packet. I found a great recipe in Nigella Lawson's "How to be a Domestic Goddess", modified it a wee bit and made these beauties today.

1 1/3 cup Flour
2 tsp Baking Powder
1/2 tsp Baking Soda
A pinch of Salt
6 tbsp Oil
1 Egg
3/4 cup plus 2 tbsp Buttermilk
1/4 cup Sugar
1/2 cup Blueberries

Preheat the oven to 400F (200C).

Line a 12-muffin pan with muffin cases.

In a bowl, beat the egg. Add the oil, sugar and buttermilk and whisk together.

In another bowl, sift together the flour, baking powder, baking soda and salt. Make a well in the centre of this mixture and pour in the liquid ingredients. Fold the dry ingredients into the liquid lightly until it all comes together. Fold in the blueberries and mix gently.

Scoop the mixture into the muffin cases and bake for 15-20 minutes or until a toothpick inserted into the muffins comes out clean.

These are light, not cloyingly sweet and would be perfect for breakfast. With some butter and jam!