Google
 
Showing posts with label egg. Show all posts

January 1, 2015

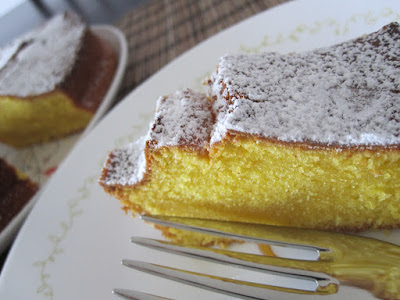
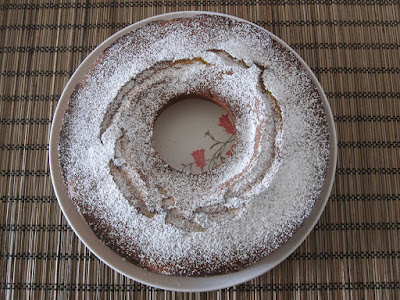
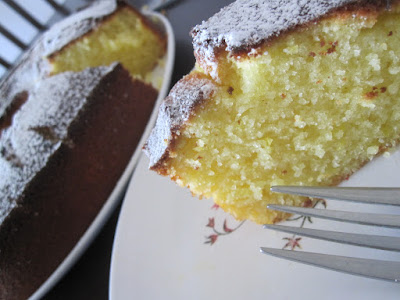
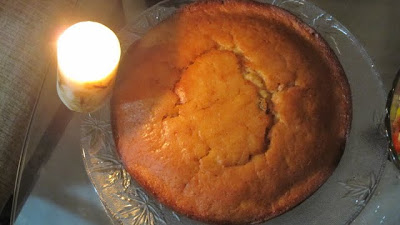
Cointreau Pound Cake


Another year gone by. Another broken promise. I attempted to post 40 recipes in 2014. I ended up posting 9. It was a lot more than I'd managed the year before, but nowhere close to what I'd have liked. It wasn't for want of time. The blog was more a victim of circumstances. When I had the time, my computer didn't work. By the time I replaced my computer, I'd also changed jobs. A new job means new teams, new flight schedules and everything else that comes with the territory. And then suddenly, it was the end of the year.

I don't want to sum up 2014 or what it meant to me. As with every year, it had its ups and downs. However, 2014 gave me more than just a fair share of bad news. But I don't wish to dwell on that. I wish to acknowledge the not so good, but focus on the good. I was able to spend time with family and friends. I was able to embrace many good things that this city has to offer. And that is my plan for 2015 as well. To spend my time with family, friends and work. To do as many things as possible that make me happier and healthier.

Baking always makes me happy. Blogging makes me happy too. And blogging about baking should be bang on target. So here's a simple recipe to usher in 2015.


1 1/2 cups Cake Flour/Plain Flour

2 1/2 tsp Baking Powder
1 tsp Salt
3/4 cup Butter, room temperature
1 1/2 cups Ricotta Cheese
1 1/2 cups Sugar
3 Eggs
1 teaspoon Orange Essence
2-3 tbsp Cointreau
Butter and Flour for preparing the cake tin  

Preheat the oven to 180C/350F. Prepare a 10" round tin. (I used a spring form ring mould.) 

Sift the flour with the baking powder and salt. Cream the butter with the sugar and ricotta until the mixture is fluffy. Add the eggs, one at a time, beating well after each addition. Add the orange essence and Cointreau and beat well. 

Incorporate the dry ingredients into the batter, adding a little at a time. Pour the mixture into the cake tin and bake for 40-45 minutes or until a knife inserted into the cake comes out clean. Allow the cake to cool a little and cut into pieces.

Enjoy and have a Happy New Year!

October 24, 2013

Jewel Blondies


I never thought I'd abandon this space. Not even for a few months. Whenever I thought I had been away too long, I'd be back, usually with a vengeance. This time, I realize I've been away for way too long. This blog which had become such an integral part of me, turned six, and I didn't blog about that. I threw a big surprise party for S' birthday. I didn't let any of you on the secret. I knew I always had a truckload of excuses: a new job, a toddler... but honestly, I've had it much worse than this and I blogged through all that.

I think it is just that 2013 has been one heck of a year for me. The never before and never again variety. I restarted the photo a day challenge and have stuck with it. I traveled to more countries in one year than I did in all my life until now. I had the honour of celebrating my parents' 50th wedding anniversary. I also learnt of the depth of my strength as I suffered a great loss. But I have always been the type that tries to take everything in her stride. But, sadly, this blog suffered.

A started school earlier this year and one of my endeavours is to give him homemade snacks. I have to admit I was taken by surprise when I realized that even two year olds suffer from peer pressure. Many of my attempts to create goodies for him has resulted in them being returned as is with an "I want Milo balls" or "I want Chocos".

I wanted to make some blondies for him as I was desperately fighting a chocolate war, and a seemingly fake one at that. I remembered saving a recipe from almost 10 years ago. The source has long been forgotten as this was in my pre-blog era. I modifed it to make a batch of much loved blondies. Even by a two year old.

3/4 cup Butter
1/2 cup Sugar
3/4 cup Brown Sugar
2 Eggs
2 cups Flour
1 tsp Baking Soda
1/2 tsp Salt
1/4 cup Dried Cherries
1/4 cup Dried Blueberries
1/4 cup Dried Apricots
1/4 cup Butterscotch Bits
1/4 cup Chocolate Chips

Preheat the oven to 350F/180C. Grease two 8x8 cake tins.

Cream the butter and the sugars in a bowl. Add the eggs and beat well. Sift together the flour, baking soda and salt. Gradually add to the butter-sugar mixture, beating well after each addition. Stir in the dried fruits, chocolate chips and butterscotch bits.

Divide the mixture into the two pans. Bake for 30 minutes until the top is golden brown. Cool and cut into squares. Enjoy these with a cold glass of milk. These are little bejewelled, bite sized treats for kids and grown ups alike. Try it and let me know what you think.

I turned a year older two days ago. Many friends wished me. Most wished this blog well and hoped for many more recipes. Some wondered what had happened to this space. And then there was one who had been begging me to resume for months now. For the past few weeks, it had turned into a push of sorts. This morning she extracted a promise. Now, there is no way I can let this slip. My dear namesake, this one is just for you. 

May 2, 2012

An apology, a lot of gratitude and some Lemon Raspberry Muffins

A baby, a full time job, and a second master's...I have had my hands full. It has been 8 months since I posted anything on this blog. I have been cooking a lot. I have even been taking some photographs. But I simply was not able to log in and write a post. I am sorry to have neglected this blog for so long.

I have had a lot of emails from my readers and friends asking if things are fine at my end. I am touched and honoured. Despite not having updated the blog in a long time, I continue to get emails and FB posts (even phone calls) about stuff people cooked from the blog and how the blog helps them decide what to make for dinner. Thank you all.


I am back with more baked treats. I have been baking quite a bit. I baked this batch of muffins over a year ago, but realized that I hadn't posted the recipe on the blog. This recipe has been adapted from Nigella's recipe.

1/4 cup Oil
1 1/3 cups Flour
2 tsp Baking Powder
1/2 tsp Baking Soda
1/2 cup Sugar
1/4 tsp Salt
Grated zest and juice of 1 Lemon
1/2 cup Milk (approx)
1 Egg
1/2 cup Raspberries

Preheat the oven to 400F (200C).

Line a 12-muffin pan with muffin cases.

In a 1 cup measure, place the juice of 1 lemon. Add the milk into this to make the total 1 cup. Add the egg and beat the mixture. Add the oil and sugar and whisk together.

In another bowl, sift together the flour, baking powder, baking soda and salt. Make a well in the centre of this mixture and pour in the liquid ingredients. Fold the dry ingredients into the liquid lightly until it all comes together. Fold in the raspberries and mix gently.

Scoop the mixture into the muffin cases and bake for 15-20 minutes or until a toothpick inserted into the muffins comes out clean.
A simple recipe and a post to help me remember that day 5 years ago, when I sat idly at home, barely 2 days into a new job, starting this blog. I can't thank my lucky stars enough for all the friends it has given me. I never planned this. All I wanted was a place to store my recipes. Now I have that and more. Much more. I hope to keep at it with more regularity.

The Singing Chef completes 5 years today. Thanks to each one of you for your support.

August 3, 2011

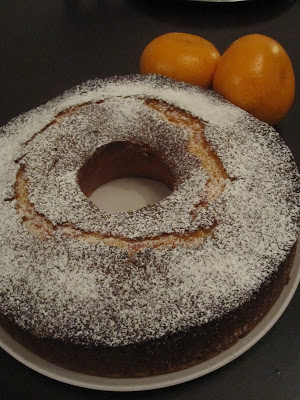
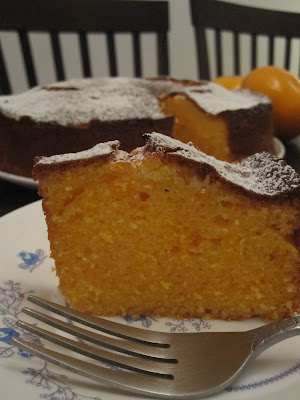
Orange Ricotta Pound Cake to say Happy Birthday!


It is still raining cakes here. It is not as though I have not been cooking. I have been cooking a great deal. We've been eating new versions of old food as well as a lot of new foods. However, I'm also very hardpressed for time. My almost 6 month old is a handful, but I have also taken up studying for another master's degree. So, even if I do remember to take pictures of the food I make, they don't reach the blog very soon. I hope to change that soon.


One of my discoveries of this year was the Ricotta Pound Cake. I knew I had to bake it again (and again). I decided to stick to the very same original Giada recipe. So, this time it was an Orange cake. My favourite variety of oranges, Honey Murcott, is back in season, so the choice was but obvious. Since there were no modifications to my Lemon Ricotta Pound Cake, I knew this was going to smooth sailing. And it was.

1 1/2 cups Cake Flour/Plain Flour
2 1/2 tsp Baking Powder
1 tsp Salt
3/4 cup Butter, room temperature
1 1/2 cups Ricotta Cheese
1 1/2 cups Sugar
3 Eggs
1 teaspoon Vanilla
2 Oranges, zested

A few drops Orange Colour (optional)
Icing sugar, for dusting
Butter and Flour/Spray for preparing the cake tin

Preheat the oven to 180C/350F. Prepare a 10" round tin. (I used a springform ring mould.)


Sift the flour with the baking powder and salt.

Cream the butter with the sugar and ricotta until the mixture is fluffy. Add the eggs, one at a time, beating well after each addition. Add the vanilla and orange zest and beat well. Add the food colour, if using. Incorporate the dry ingredients into the batter, adding a little at a time.

Pour the mixture into the cake tin and bake for 40-45 minutes or until a knife inserted into the cake comes out clean. Allow the cake to cool a little and sieve the icing sugar over it.

 
Ricotta in cakes has to be my discovery of the year! Probably my baking discovery of a lifetime. Afterall, when the spouse who has eaten every kind of cake baked in the last 5 years says, "This is the best cake you've ever made." it must mean something! There couldn't have been a better cake to celebrate today. (However, the real birthday cake is the Chocolate Buttermilk Pound Cake.)


And as I have in the years that have gone by, regardless of how busy I may be, I come back to the blog to say:


Happy Birthday, Dearest Sachin!

June 9, 2011

Chocolate Buttermilk Pound Cake


It's raining cakes on The Singing Chef! It was an unsual Saturday for us. We were to have one couple over for dinner. But A was unwell and we needed to make a trip to the paediatrician. So, we cancelled that dinner. As luck would have it, we weren't able to get an appointment for that day. I was feeling bad that we'd cancelled plans with our friends and were unable to take A to the doctor. Later in the day, S got on the phone with another friend and an impromptu dinner was planned.


I hadn't thought about dinner at all, and now suddenly we had a bunch of people coming over. I've become so comfortable with pizza now that I can whip it from scratch in less than the amount of time it would take me for a regular meal. Yes, I do benefit from living in Singapore as I now have the convenience of pre-grated cheese in different combinations.


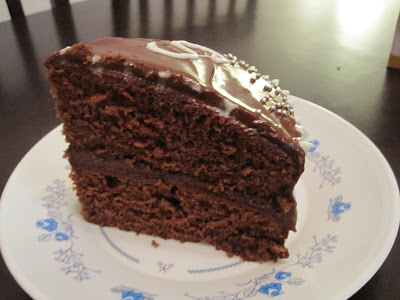
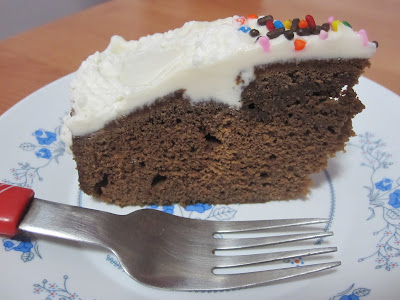
I had just baked the Mango Cardamom Pound Cake. It smelt heavenly and I'd just cut a couple of slices for the photographs as well as to eat. It was after I cut the cake that I realized it was the birthday of one of our guests the following day. So, I had to bake my second cake. I had been browsing Deeba's blog that day and had bookmarked her Chocolate Buttermilk Pound Cake. I decided to make it. S decided to decorate the cake with some store bought cream cheese frosting and some whipped cream.


This has to be best "home made" chocolate cake I have eaten. The photo doesn't do it any justice as I took it the following morning, after the cake had been in the fridge for a good 12 hours. I will make this cake again and upload a better picture. But you have to believe me when I say this cake is as good as it gets.

I followed Deeba's recipe for most part and made some minor changes.

1 1/4 cups Cake Flour
1/2 tsp Baking Powder
1/4 tsp Baking Soda
1/4 cup Cocoa Powder
1 cup Sugar
1/2 cup Unsalted Butter
1/4 tsp Salt
2 Eggs
100 ml Buttermilk
1 tsp Chocolate Essence
Butter and Flour/Spray for preparing the cake tin

Sift together the flour, cocoa, baking powder, baking soda and salt.

Preheat the oven to 180 C/350 F. Prepare a 10" round tin.
Cream the butter with the sugar until the mixture is light and fluffy. Add the eggs, one at a time, beating well after each addition. Add the buttermilk and chocolate essence and beat again. Incorporate the dry ingredients into the batter, adding a little at a time.

Pour the mixture into the prepared cake tin and bake for 30-40 minutes or until a knife inserted into the cake comes out clean. Allow the cake to cool a little and cut into slices when warm using a bread knife.
 
Thanks Deeba. I know I will use baby A as the perfect excuse and make this cake often when he grows up a little.

June 7, 2011

Mango Cardamom Pound Cake


I have often talked about my love for baking. I started baking a couple of years before I started cooking and so there's always been a soft spot for baking. Yes, there are the calories to think about. There's no running away from all that butter and sugar. Over the past few years, I have learnt to substitute oil for butter, jaggery for sugar, etc, in more recent times, I have rediscovered cakes with real butter. In one month, I baked 3 cakes, all of them pound cakes, and all with real butter.

I thought a lot about why I didn't like using butter. For starters, the thought of measuring the butter always put me off. First you thaw the butter. Then you measure it into a cup. That leaves you with a greasy spoon or knife and a greasy cup. Since I am not like the Food Network chefs who just dump the stuff in the sink, I, by sheer force of habit, have to use my hands to try and remove as much butter from the cup, the spoon and that leaves my fingers extremely greasy. I decided to be more organized, to keep soap and towels handy, and just take the plunge.

I was at the supermarket to buy some butter for these cakes. I found some brands that were sold in 250g packs. But I saw some others which were selling in 227g packs. I was a little irritated at first, but bought the 227g pack anyway. I came home and started to bake the cake. Was there a way out of measuring the butter? I ran a search to see how much half a cup of butter in grams would be. As it turns out, half a cup is about 115g. Voila! The 227g pack of butter was effectively 1 cup. I didn't have to measure the butter at all. I just cut my block in 2 pieces and allowed just one half to thaw. That was one more "happy to be living in Singapore" moment for me.

Enough about my well known love for baking. Coming to my well known love for blogging. I agree that this blog was a little abandoned in between. But I was baking the proverbial bun in my oven, so I was entitled to time off from blogging. As soon as I was able to, I resumed cooking. So, within a week of my delivery, I was dishing out at least one meal every couple of days for my family. And as soon as I could manage it, I resumed blogging too. There are many many reasons I love blogging. The biggest reason is the friends it has given me. And a couple of them are as close to me as some of the friends I have made in real life.

In 2007, Nandita and I were chatting and she told me about this mava cake she wanted to try out. She asked me if I would bake it with her. She in her kitchen in Bombay and I in mine in Gurgaon. It seemed like a terribly exciting thing to do back then. I had so much fun. Compating notes, choosing when to post it, and everything else. A couple of weeks ago, Arundati and I were chatting and she happened to be doing a lot of baking that day. I told her about how I was dragging my feet over a batch of chocolate chip cookies and she asked me to bake alongside her. So, there we were, she in Hyderabad and I in Singapore. She baking cupcakes and I making chocolate chip cookies. Even after 4 years of blogging, it still felt terribly exciting.


I mentioned, on Facebook, how much fun it was to be doing this, and before I knew it, the Baking Club gad been formed. Something like the Sisterhood of Traveling Cake Tins! My other namesake, Arundathi, and Aparna were also keen and we decided to celebrate summer by making pound cakes using mango. We picked recipes that appealed to us and made the cakes. This was even more exciting as there were more people involved and lots more notes being compared. So look out for more mango pound cakes in the blogosphere today.
I picked a recipe from the well known food blogger, Divya. Divya has given me so much happiness by regularly cooking stuff from my blog and blogging about it. She even dedicated one entire post to all the recipes she made my blog. I read it from time to time and always end up getting misty eyed. This is what keeps this blog going.


Divya blogged about her Mango Buttermilk Pound Cake a few days ago and I came across this recipe. This being a recipe that she adapted from Deeba's blog, I decided I had to try it. Two friends, one recipe. I can be sure of a hands down winner! I modified Divya's recipe even more and although I've been baking for almost 25 years now, I forgot to add the baking powder. Despite that, this cake was a winner all the way. The next time, I will add the baking powder, and I'm writing down the recipe here without excluding that ingredient.

1 1/2 cups Cake Flour
1/2 tsp Baking Powder
1/4 tsp Baking Soda
1/2 tsp Salt
1 tsp Cardamom, Powdered
1/2 cup Unsalted Butter
3/4 cup Sugar
2 Eggs
100ml Buttermilk
1/2 cup Mango Pulp
Icing sugar, for dusting (I used the canned variety)
Butter and Flour/Spray for preparing the cake tin

Sift together the flour, baking powder, baking soda and salt.

Preheat the oven to 180 C/350 F. Prepare a 10" round tin. (I used a springform ring mould.)
Cream the butter with the sugar until the mixture is light and fluffy. Add the eggs, one at a time, beating well after each addition. Add the buttermilk, mango pulp and cardamom and beat again. Incorporate the dry ingredients into the batter, adding a little at a time.


Pour the mixture into the prepared cake tin and bake for 30-40 minutes or until a knife inserted into the cake comes out clean. Allow the cake to cool a little and sieve the icing sugar over it.

Cut into slices when warm using a bread knife.
This cake was so good that S didn't really want me to share it with others. I, on the other hand, was happy to give the cake to friends because that way I could bake again. And I know I am going to keep baking this one, over and over again.

May 27, 2011

Lemon Ricotta Pound Cake


I am enjoying every minute of living in Singapore. I have not yet stopped going crazy at the grocery stores and keep finding things that had, until now, existed only in the cookbooks. I did have access to Ricotta Cheese and Mascarpone even in Gurgaon, but this is different. I have bought a can of evaporated milk though I can't remember which recipe had asked for it. That's how crazy I've become. I am the proverbial kid in a candy store.

I also like the deals that come up in supermarkets. Anything that is approaching its expiration date or best before date is sold at reduced prices. I wonder what they do in India. It is something I never thought of before. I found a tub of Ricotta Cheese selling at 1/5th the original price because it was "expiring" the next day. I always wanted to make a Lemon Ricotta Cake and so I bought it. This cake was made the very next day. I have only worked with lime in India and it is a pleasure to work with lemons here.

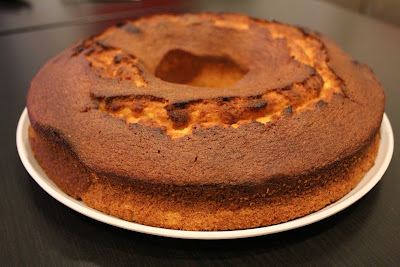
I found a recipe for an Orange Pound Cake by Giada on the Food Network site. I modified it and made this Lemon Ricotta cake. I baked with butter after ages and so so loved the texture of this cake. I know I will make it whenever Ricotta goes on sale!


1 1/2 cups Cake Flour/Plain Flour
2 1/2 tsp Baking Powder
1 tsp Salt
3/4 cup Butter, room temperature
1 1/2 cups Ricotta Cheese
1 1/2 cups Sugar
3 Eggs
1 teaspoon Vanilla
3 Lemons, zested
Icing sugar, for dusting
Butter and Flour/Spray for preparing the cake tin


Preheat the oven to 180C/350F. Prepare a 10" round tin. (I used a springform ring mould.)

Sift the flour with the baking powder and salt.

Cream the butter with the sugar and ricotta until the mixture is fluffy. Add the eggs, one at a time, beating well after each addition. Add the vanilla and lemon zest and beat well. Incorporate the dry ingredients into the batter, adding a little at a time.

Pour the mixture into the cake tin and bake for 40-45 minutes or until a knife inserted into the cake comes out clean. Allow the cake to cool a little and sieve the icing sugar over it.

Cut into slices when warm and just dig in. Memories of an era gone by will come rushing back.

December 9, 2010

Savoury Butternut Squash Waffles with Mushroom Cream Sauce


The last few months were a little crazy for us. Work, the commute, the rains, and the Commonwealth Games. Bang in the middle of all this, came our decision to move to a different country. Work had become more hectic all of a sudden. The unprecedented rains caused traffic snarls that transformed my otherwise 2 hour commute back into a 6 hour commute. The roads caved in for most part. To add to the trauma, the Commonwealth Games meant that one lane in the already congested roads of Delhi was to be cordoned off. Then came the final blow. Our domestic help was asked to leave for a month and return after the games.

My project 365 came to an absolute standstill and this blog saw months go by with just one (and even no) post. There are several factors that have helped revive this blog. The most important of them all is Vitamin T. I am unemployed after more than 11 years of working continuously. I have plenty of time on my hands. I'm based in a truly global city and that means that I have access to plenty of ingredients that I'd have considered exotic earlier. I also have access to the Food Network channel (which I seem to watch almost all the time). I get new ideas and more importantly, I am reminded of my love for cooking.

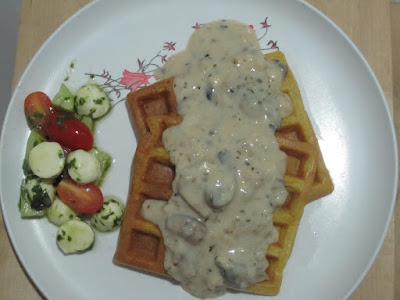
This week started with Amma's birthday and I wanted to celebrate it here. I had several ideas and I also wanted to clean up the (really small) fridge that I have here. I got the idea for savoury waffles from a show on TLC. I combined that idea with a dish I'd eaten many years ago in Chennai: Crepes with Sauteed Mushrooms and Cream Sauce. I decided on savoury butternut squash waffles with and a mushroom cream sauce. I also made a Mini Caprese Salad, sticking to the original recipe for most part and adding a cucumber to the cherry tomatoes.

Butternut Squash Waffles

3/4 cup Butternut Squash (peeled, diced, cooked and drained)
1 Egg
1 tbsp Olive Oil
1 tsp Chilli Flakes
1/2 cup Flour
1/4 tsp Baking Powder
1/4 tsp Baking Soda
1/2 tsp Pumpkin Pie Spice (optional)
Salt to taste

Beat the egg in a bowl. Add the butternut squash and beat until the mixture is well blended. Add the other ingredients and beat for a minute or so. (If the mixture is too thick, you could add a little milk.)

Heat the waffle iron and pour the batter onto it. Cook for about 3-4 minutes. Repeat with the remaining batter.

Mushroom Cream Sauce

1/2 cup Mushrooms, sliced
1 medium Onion, finely chopped
1/4 tsp each of Basil and Parsley
1/4 tsp Chilli Flakes
1 tbsp Butter
1 tbsp Flour
3/4 cup Milk
Salt and Pepper to taste

Melt the butter in a pan and add the chopped onions and fry for a couple of minutes. Add the mushrooms and fry for a couple of minutes. Add the parsley, basil and chilli flakes. Add the flour to the mushroom mixture and pour the milk into this after the flour has fried for 2-3 minutes. Mix well and allow the mixture to thicken. Season with salt and pepper.
 
Place the waffles on a plate and pour the mushroom sauce over the waffles. Dig in. Restaurant style fancy dining guaranteed at home with not much effort. Belated Happy Birthday Amma. I can't wait to cook this for you when you visit.

May 30, 2010

Mini Cauliflower and Cheese Fritattas


A year and a half ago, one of my namesakes posted this recipe on her blog. I wanted to try them instantly. Instant, in this case, turned out to be 18 months or so. Last Saturday, I had everything I needed. Well almost. So, I changed the recipe a bit and they turned out great. I know I will make these often and the next time around, I shall take pictures as they come out of the oven.


While these would taste great on their own, we had them with Zingo. (I received sauce samples from DelMonte long before Zingo and Twango were released into the market and they've both been great hits at home, with the two of us as well as every party we've had.)

For the fritattas:

4 Eggs
1/4 cup Cheese, grated
1 Onion, chopped finely
1/4 cup Cauliflower, grated or chopped finely
1 tsp Southwest Spice Blend (Tortilla Soup Seasoning)
1/8 cup Milk
1 tsp Oil
Salt and Pepper to taste


Pre-heat the oven to 350F. Grease the mufifn trays.

Heat the oil in a pan and fry the onions until golden brown. Add the grated cauliflower and the spice blend. Fry for a minute and add the salt and pepper. Add about a teaspoon or two of water and cover and cook the mixture. After about 2-3 minutes, remove the lid and allow the water to evaporate.

Beat the eggs. Add the milk and beat again. Blend in the cheese and the cauliflower mixture.

Pour into the muffin trays and bake for 15 minutes.

I had some left over pasta which I also threw in along with the cauliflower. We loved every bite of these fritattas and I can't wait to make them again. Thanks Arundathi.

March 23, 2010

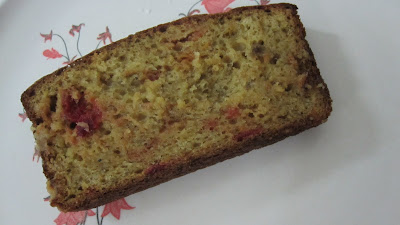
Spiced "Fruit" Cake


This has been one long overdue post. I baked this “healthy” cake for Amma’s birthday in December. I cut it myself while wishing her over the phone and we promptly ate it. I took the cake to work the next day and it was gone in no time. I played around with this cake because I have seen a lot of people blindly bring ingredients together and bake a cake. I have always wanted to stick to a recipe. This time, I tried that and wasn’t in the least disappointed with this cake.

1 cup Flour


¾ cup Wheat Flour


2 tsp Baking Powder


¼ tsp Baking Soda


1 tsp Salt


¾ cup Jaggery, grated


1/3 cup Carrots, grated


1/3 cup Beetroot, grated


3 Bananas (overripe), peeled


1/4 cup Applesauce


¼ tsp Cinnamon


¼ tsp Allspice


2-3 tbsp Oil


2 Eggs


Oil and Flour to dust the tin
Icing Sugar to dust the cake


Heat the oven to 350F. Grease and dust a loaf tin.


Sift the dry ingredients together.


Combine the bananas, eggs, applesauce, oil and jaggery in a bowl. Using an electric mixer, blend all these to a rough paste. Pour this mixture into the dry ingredients and add the grated carrot and beetroot. Mix well and pour into the prepared cake tin.


Bake for 35-40 minutes (or until a skewer inserted into the cake comes out clean). Cool on a rack for a few minutes and dust with icing sugar.

December 31, 2009

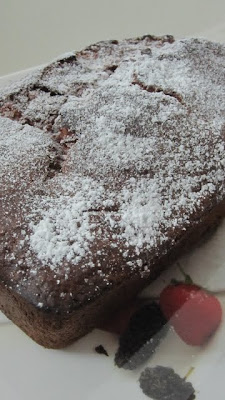
Super Moist Spiced Chocolate and Beetroot Mini Muffins

Good things come in small packages!


That is how I feel about the year that just went by. It was one of those years when nothing "big" happened. But, all the same, it will be remembered as the year with a lot of "small" events, the sumtotal of which is bigger than any "big" event. It has been a year well spent, surrounded by friends and family right from the word go. We started the year with a long drive and will be ending it with yet another. There were several memorable trips in 2009. Karnal, Chandigarh, Amritsar, Ludhiana, Shekhawati, Kasauli, Allahabad and Varanasi. I also made one trip to Chennai in the middle of summer, while S went to Hyderebad at the same time. We traveled to Mumbai to attend the 5th birthday of my niece. We'll end the year with a drive to Mussoorie and ring in the new year in the company of our closest friends. In 2009, my parents visited us twice and my brother also made two trips. We've hosted the maximum number of parties/informal get togethers in 2009. We hosted the karaoke show on weekends, something we both love doing. I got my first payment from Foodbuzz and will soon receive my very first payment from Adsense. It will be remembered as the year in which I closed my housing loan entirely. It will also be the year in which I walked on hot burning coals for the very first time. The year in which I hit 500 posts on this blog.

Little drops of water

Little grains of sand

Make the mighty ocean

And the pleasant land


This is very true and has been my motto all along. And something tells me that t
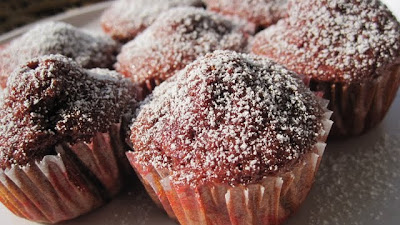
hat must have been the inspiration behind the invention of the mini muffin pan. I end this year with these little beauties. Perfect for a little burst of happiness on an otherwise dull day.

1 1/2 cups Flour

1/3 cup Cocoa Powder

3 tsp Baking Powder

1 cup Sugar

a Pinch Salt

1/2 cup Oil

2 Eggs

1 cup Milk

1 cup Grated Beetroot

1 tsp Cinnamon

1/2 tsp Allspice

Icing Sugar to decorate


Sift all the dry ingredients for the muffins together into a food processor jar with the dough blade. Pour in all the liquid ingredients and run the processor for 2 minutes.


Preheat the oven to 350F.


Prepare the mini muffin pans by lining them with paper muffin cases or spraying them with baking spray.


Stir the grated beetroot into the batter and pour into the prepared muffin cases. Bake for 15-20 minutes. Dust with icing sugar.


I hope that all of you had a good 2009. And I hope that you have chosen to dwell on the good more than on the not so good. Life is what we make it and memories are almost always what we choose to remember. Let us remember all the good that 2009 brought us, all the big and small pieces of happiness. And let us wish that 2010 turns out to be a better year. In every way.


Here's to lots of good health and happiness. May you be surrounded by friends, family and everyone and everything you hold dear. That is my New Year Wish for you and yours. Happy New Year 2010!

December 26, 2009

Carrot and Raisin Cake


At the very last minute, my friend asked me to bring some cake for her birthday party. It was a weeknight and I had very little time. So, I relied on my time tested recipe and modified it. Carrots are in season and I love putting them to use in every way I can. I had some rum soaked raisins at hand, and they added a wonderful flavour to the cake. The cake came together very quickly and was gone just as fast at the party.


1 cup Flour
1/2 cup Sugar
1 1/2 tsp Baking Powder

Pinch of Salt
1/2 cup Milk

1/4 cup Oil
1/2 tsp Orange Essence
1 Egg, beaten

1/2 cup Carrot, grated

1/4 cup Raisins, soaked in rum for 24 hours


Preheat the oven to 400F (200 C).


Prepare an 8 inch cake tin by greasing it and dusting it with flour.


Sift the flour with the baking powder, baking soda and salt.


In a mixing bowl, add the egg, milk, sugar, oil, and orange essence. Beat well together. Add the flour mixture to this and blend well. Fold in the grated carrot and raisins. Pour the batter into the prepared cake tin. Bake for 30 minutes or until a knife/skewer, inserted into the centre of the cake, comes out clean.


Serve warm with a dollop of vanilla ice cream on the side.

December 25, 2009

Savoury Bread Pudding


A few weeks ago, I had almost lost all my enthusiasm to cook. I was excited about being in a new house with a slightly bigger kitchen. But because my kitchen wasn't yet organized, I didn't seem to care that much about cooking. Also, thanks to some new cab routing issues, I was also getting home about an hour later than I used to earlier. So dinner was usually something I tried to "get over with" and lunch was anything that came together in 15 minutes or less.


Then came the end of November. And dear Nupur came up with her 40 recipes in 40 days schedule. She is to blame for a lot of things on this blog. Her series A-Z of Indian Vegetables is probably the very first blog event I ever participated in. Then, she very innocently put up this post about Eating Out While Eating In and that resulted in an entire series on my blog. So, I end this year with a mini 7-day marathon that Nupur is organizing.


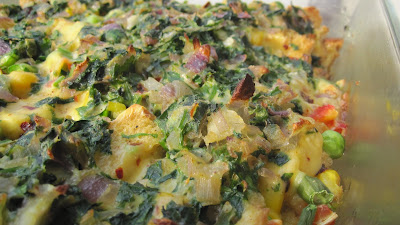
Through Nupur's blog, I landed at Alanna's blog and bookmarked this recipe. Soon after, Nupur made this dish. I made it one winter afternoon, with several modifications, when I didn't feel like making a big lunch. It was a hit!


1 Onion, chopped

1 cup Spinach, chopped

1 tsp Olive Oil

1 Egg

3/4 cup Milk

2 tbsp Cream

1 tsp Mixed Herbs

1 tsp Chilli Flakes

2 tbsp Mustard (Dijon)

5 slices Bread, diced

1 cup Mixed Vegetables (Carrot, Beans, Peas, Corn), diced and cooked

1/4 cup Cheese, grated

Salt and Pepper to Taste

Butter to grease the baking dish


Heat the olive oil in a pan and fry the onion for a minute. Add the spinach and cook for 3-4 minutes. Add the salt, stir well and keep aside. Preheat the oven to 375 F.


In a bowl, beat the egg well. Add the milk and cream along with the mustard. Add the chilli flakes and mixed herbs. Season with salt and pepper. Blend in the spinach onion mixture.


In the greased baking dish, place the bread and the mixed vegetables. Pour the egg-spinach mixture. Cover with grated cheese, season with salt and pepper and bake for 20 minutes.


I thought bread puddings only tasted great sweet, but this recipe is a keeper. Thanks Nupur and Alanna.

October 22, 2009

Cinnamon Sugar Muffins


My new found love seems to be experimenting with flavours. I seem to enjoy giving a little twist to seemingly old tales. I made these cinnamon sugar muffins after fantasizing about cinnamon doughnuts one morning. These aren't quite like the doughnuts, but could come a very close second.


2 cups Flour

3 tsp Baking Powder

1 1/4 cups Sugar

1 tsp Salt

1/2 cup Oil

2 eggs

1 cup Milk

1 tsp Vanilla

1/2 cup Brown Sugar

1 tsp Cinnamon Powder


Preheat the oven to 350F. Prepare the muffin pans by lining them with paper muffin cases. Mix the cinnamon powder and the brown sugar together and keep aside.


Sift all the dry ingredients for the cake together into a food processor jar with the dough blade. Blend for a minute.


Pour in all the liquid ingredients and run the processor until the dry ingredients are moistened. Pour a spoonful the batter into the prepared muffin cases. Sprinkle a little cinnamon-sugar mixture. Top with another spoonful of the batter and sprinkle some more of the cinnamon-sugar mixture on top.


Bake for 15-20 minutes. Enjoy warm.


Soon after a blogging milestone and a wedding anniversary, these little beauties come your way as part of the party fare on my birthday. So, just come over with your birthday hats and get ready to sing: Happy Birthday!

August 16, 2009

Mixed Vegetable Ricotta Quiche


A few weeks ago, S and I were running around to make sure we filed our IT returns in time. We left home after a good breakfast and hoped to return by lunch time. That wasn't to happen. When we were done with all our little errands, including our returns, we were famished. We stopped by for a quick bite at the newly opened coffee shop: Mocha. I've been to Mocha in other cities, but I loved the look and feel of this one, just one street away.


I ordered a garden vegetable pie and loved every bite of it. It came doused in some mushroom bechamel sauce. Absolutely divine! I realised that I hadn't baked savoury pies, tarts or quiches in ages. In fact, the last time I baked a vegetable pie was at least 7-8 years ago. Inspired by that garden vegetable pie and this quiche, I decided to make this quiche for lunch today.


1/2 cup Flour
1/2 cup Whole Wheat Flour / Atta
1/3 cup Margarine
2-3 tbsp Ice Cold Water
1 tsp Chilli Flakes
1 tsp Basil
1 tsp Parsley
1 tsp Salt
Oil for greasing the tart tin

Grease the tart tin.

Place the flours, salt, chilli flakes, herbs, and margarine in a bowl and mix together till the mixture resembles small peas. Gradually add the water and knead gently till it forms a dough. (Do not knead as you would for chapati/poori dough.) Chill the dough for about 20 minutes.

Roll out the dough and place it in the tart tin. Bake at 450 F for 10 minutes. (You may use baking beans to help retain the shape of the tarts. I used some dried lentils and that I use only for this purpose.)


For the filling:


1 Onion, chopped
1/2 cup Mixed Vegetables, chopped and cooked (Carrots, Beans, Potatoes)
1/4 cup Mushrooms, chopped
1 tbsp Olive Oil
1 tbsp Flour
1/2 cup Milk
1/2 tsp Parsley
1/2 tsp Basil
2 tsp Chilli flakes
1/2 tsp Garlic Paste
Salt and Pepper to Taste
1 slice Low Fat Cheese (optional)
1/4 cup Ricotta Cheese

1 Egg
1/4 cup Milk


Heat the olive oil in a saucepan. Add the onion and fry for a minute. Add the parsley, basil and chilli flakes and fry for another minute. Add the flour and fry without browning the flour. Add the mushrooms and fry for about 30 seconds. (Do not fry the mushrooms for too long as the water in them gets released.) Add the vegetables along with the milk and bring the mixture to a boil while stirring continuously. If adding cheese, add it at this point and stir the sauce well. As the sauce thickens, add the salt and pepper. Cool and blend in the ricotta cheese.

In a bowl, beat the egg and add the milk.


To proceed, fill the semi baked quiche shell with the filling. Pour the egg-milk mixture and return to the oven. Bake at 350F for 20-30 minutes or until the top is firm and browned. Carefully remove from the tart tin and serve.

I suppose I could have served this with some bechamel sauce, or with a salad, or something like that. But this was so tempting when it came out of the oven that we cut it up and ate it right away!

May 11, 2009

Sambar Style Egg Curry


Necessity is the mother of invention, they say. And I couldn’t agree more. One evening, I returned home to an almost empty fridge. I don’t like that. I like to be prepared, at least mentally, for what to cook for dinner. I have a long commute back home and I use this time very productively. By thinking of what to cook for dinner!


Whatever vegetables I had in the fridge seemed very uninteresting. I thought of rice and egg curry. The idea seemed very appealing. S loved the idea (he loves any idea that rice is a part of) and I set to work. Suddenly I felt that the usual tomato onion gravy would be too boring. I thought of sambar. Sambar with eggs, nah. Vathal Kuzhambu with eggs, maybe. I ended up with this dish which is part sambar, part vathal kuzhambu, but is really just an egg curry. We loved it. I will make it a little more liquidy the next time I make it. (That only means that I shall stand and watch the dish and not wander away to return to a dry curry.)


4 Eggs, boiled and shelled
1 tbsp Oil
1 Onion, finely chopped
1 tsp Cumin Seeds
¼ tsp Mustard Seeds
¼ tsp Asafoetida
7-8 Curry Leaves
2 Green Chillies, slit
2 tbsp Tamarind Paste
2 tsp Sambar Powder
Salt to taste
Coriander Leaves for garnish


Heat the oil in a kadhai. Add the mustard, cumin and asafoetida. After about half a minute, add the curry leaves and the slit chillies. Add the onions after a minute and fry for another 2-3 minutes. Add the sambar powder and salt and fry for a minute. Add the tamarind paste with about ¾ cup of water and bring the mixture to a boil.


Make incisions in the eggs and add them to the boiling gravy. Allow to thicken a little. Garnish with chopped coriander leaves and enjoy this with some steamed rice.

March 9, 2009

Roasted Bell Pepper and Egg Tarts


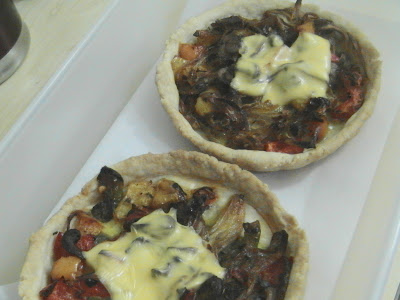
S and I don't host too many dinners or get together. (Have I mentioned before that I am lazy?) So, whenever we are invited to a dinner, I try to take something along. Especially when it is a weeknight and I know that both the people go to work and they don't have a cook. One such Friday evening, we were invited to an impromptu dinner at a friends' place. I made these tarts and took them along. They were great tasting (though the pictures were taken in pretty poor light and make the tarts look so unappetizing).


1/2 cup Flour

1/2 cup Whole Wheat Flour / Atta

1/3 cup Margarine

2-3 tbsp Ice Cold Water

1 tsp Salt

Oil for greasing the tart tins


Grease 4 5" tart tins.


Place the flour, salt and butter in a bowl and mix together till the mixture resembles small peas. Gradually add the water and knead gently till it forms a dough. (Do not knead as you would for chapati/poori dough.) Divide the dough in four portions. Roll out each portion and place it in the tart tin. Bake at 450 F for 10 minutes.


For the filling


2 Onions, sliced thickly
1 each: Red, Green and Yellow Capsicum, chopped

1 tbsp Olive Oil
1/2 tsp Parsley
1/2 tsp Basil
2 tsp Chilli flakes
1/2 tsp Garlic Paste
Salt and Pepper to Taste
1 slice Low Fat Cheese (optional) or 1 cube cheese, grated

2 Eggs, beaten


Heat the olive oil in a saucepan. Add the onion and fry for a minute. Add the parsley, basil and chilli flakes and fry for another minute. Add the capsicum and fry for a couple of minutes. Transfer the vegetables to a foil. Wrap and bake at 400F for 5-6 minutes.


To proceed, fill the semi baked tart shells with the vegetables. Pour the beaten egg over the vegetables and add the cheese, if using. Return to the oven. Bake at 350F for 20 minutes. Carefully remove from the tart tins and serve.


I'm sending these to Roma who is hosting this month's edition of JFI: Wheat.