Google
 

November 30, 2010

Adai


Adai. It has to be one more of those acquired tastes. I have childhood memories of eating Adai with jaggery. As I grew older, the combination didn't seem so attractive. Or maybe Amma didn't give me jaggery anymore with Adais. My "love" for the Dosa probably overshadowed my appetite for any of its many cousins.

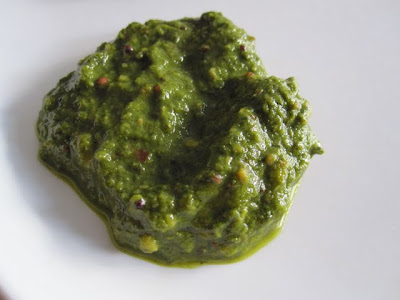
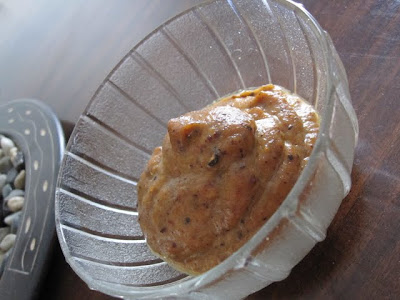
One of my friends, P, told me to make sure that I always have dosa batter of some sort in the fridge. So I started varying the batters that I had on hand. One evening, I came home from work to find that I had a little bit of extra time on my hands. And I also had a bag of mixed chopped vegetables in the freezer. I decided to make some Avial and pair it with the Adais. (The combination is almost as nice as Adai with jaggery.)

1 cup Rice
1/3 cup Udad Dal
1/3 cup Chana Dal
1/3 cup Toor Dal
3-4 Red Chillies
1 Green Chilli
7-8 Curry Leaves
1 tsp Ginger Paste
1/4 tsp Asafoetida
Salt to taste
Soak the rice and the dals together overnight. Grind this to a batter along with the red and green chillies, curry leaves, ginger, and salt. Add the asafoetida to the prepared batter.

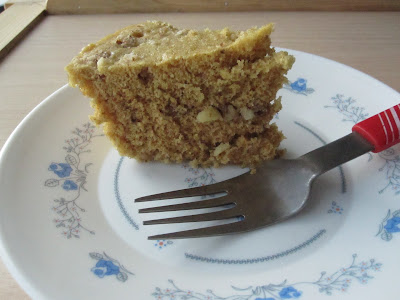
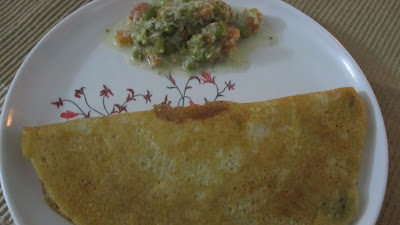
To make the adais, heat a tawa and smear a little oil on it. Simmer the flame and pour a ladleful of the batter in the centre of the tawa. Quickly spread the batter while forming concentric circles (spiral actually!). Add a few drops of oil and allow the adai to crispen. Turn the adai over and cook the other side for a minute or so.

Serve hot with some jaggery or some Avial.

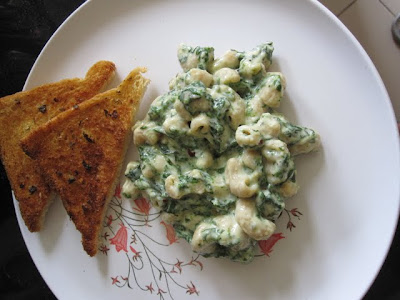
This post has been in my drafts for ages. I had always heard of Adai Avial as a combination, but had never tasted it. This version that I made at home, I really enjoyed. I had this combination outside home for the first time here in Singapore at Ananda Bhavan and was thoroughly disappointed. I like my dosais/adais to be a little crisp (not paper thin). The version I got at the restaurant was very thick and had huge bits of coconut and whole pepper corns and multitude of things that were added to the batter. It was a task to tear a piece of the adai and dip it into the avial and eat it. That prompted me to finish this post and publish it. The next time I want to have this treat again, I'm making it at home!

November 16, 2010

Vendhaya Keerai Thuvayal (Methi Chutney)


I have a whole variety of dishes that I make with fresh fenugreek leaves. Methi Pulao, Methi Mutter Malai, Palak Methi Dal, etc. But I realized I'd almost never tried to use the leaves in any kind of south Indian cooking. This one time that I brought home a fresh bunch, I decided not to go down the Aloo Methi path and tread on my other tried and tested route instead. The route which leads me to the tangy, spicy paste we all know as a thuvayal or thogayal.

1 1/2 cups Fenugreek Leaves, washed and roughly chopped
1 tbsp Oil
1 tsp Mustard Seeds
2 tsp Black Gram Dal
1/4 tsp Asafoetida
2 Green Chillies
1/2 tsp Chilli Flakes
1 tsp Tamarind Paste
Salt to Taste

For the tempering:

1 tsp Oil
1/2 tsp Mustard Seeds
1/2 tsp Black Gram Dal
a pinch Asafoetida
5-6 Curry Leaves


Heat the oil and fry the green chillies, red chilli flakes, mustard, asafoetida and black gram dal for a couple of minutes. Add the fenugreek leaves and fry for 4-5 minutes. Grind the mixture along with the tamarind paste and salt. 

Heat the teaspoon of oil for the tempering in a frying ladle. Add the mustard, black gram dal and the asafoetida. When the mustard splutters, add the curry leaves. Add this tempering to the fenugreek leaves mixture.

Serve this with rice and a little ghee and some papads or vadams on the side. I expected the thuvayal to be a little bitter, but somehow, the flavour of the fenugreek leaves came through with only a hint of the bitterness.


November 12, 2010

Instant Microwave Banana Nut Cake


I've resumed cooking. It was something I had to do to bring in a sense of "normalcy" into my life. Attempting to cook in the serviced apartment without a pressure cooker was an experience in itself. I realized how much I took my kitchen in Gurgaon for granted. But I also realized that healthy meals are possible even if you have almost no appliances and only three utensils.

After we moved into our apartment, the first set of boxes we opened were the ones which would help me start cooking. Slowly, all my appliances came out of their boxes and I was thrilled to see the pressure cookers, the mixer-food processor and my wet grinder. Once I got into the groove of day to day cooking, I started missing baking. And I started missing my oven. For the moment, I only have a basic microwave. I decided to stick with it for the time being and invest in a combination oven in a couple of months. But (my friends know this) I needed to bake to feel really normal.

I've only baked two cakes in the microwave before this. I also don't have a fully stocked pantry as yet. So, I quickly stocked up on baking powder, baking soda and some vanilla essence. I started scouting for more microwave cake recipes with easily available ingredients. My research brought me to cooks.com and I found a banana nut cake recipe that seemed to call out to me. I decided to improvise with what I had on hand and also made several substitutions to make it a very healthy cake.

The final result was fabulous. The cake wasn't crusty on top, but I know not to expect that from a microwave cake. The texture of the cake was as good as, if not better than, most banana cakes I have baked in the past. This recipe is a sure shot keeper.

1/4 cup Oil
1/4 cup Low Fat Milk
1 Egg
1 Ripe Banana
1/2 cup Jaggery, grated
1/2 cup Whole Wheat Flour
1/4 cup Flour (Plain)
1/2 cup Mixed Nuts, chopped
1/4 cup Raisins
3/4 tsp Baking Powder
1/4 tsp Baking Soda

In a blender jar, beat the egg until fluffy. Add the banana and blend until there are no lumps. Add the jaggery, oil and milk and blend again. Add the flours along with the baking powder and baking soda and blend for a minute or two.

Grease a microwave safe baking dish. Pour the batter into the dish and stir in the chopped nuts and raisins. Bake on high (800) for 8 minutes. Allow to stand for 10 minutes. Cut into slices and dig in.

I'm glad to be back to cooking, baking and blogging as well. I'm even happier to be able to send this to an event I regularly participated in: The Monthly Mingle. This month, Deeba of Passionate About Baking is hosting this event and I am sending this to Deeba as my entry to Fruit in Baking.

November 10, 2010

Beetroot Karumadhu


While growing up, how many times did you have to be told to eat something because it is good for you? I've lost count. Of course, I also didn't have to be told such things. I didn't quite know that  there was this option to say, "I don't want this." The only threats/coaxing I ever received had to do with the speed of my eating.

"XYZ's mother says that her hair grows long because she sits down for dinner at 8 and finishes by 8.15."

I still don't have long hair. I am still in touch with XYZ and I know she has long hair. And I know that finishing dinner in 15 minutes cannot be the only secret. And guess what? The world is talking about the benefits of eating slowly. I must admit that I do finish my meals faster than most people.

Beetroots in Indian cooking must have caused (still be causing)  a great deal of stress to children. I suppose that children are either put off by the colour or drawn to it. There cannot be a middle path. Actually, there is no middle path for adults either. What are my views on beets in Indian cooking? Beetroots are best used in salads and cakes, and of course in soups.

As far as Indian food goes, I like beets in things like chutneys. The occasional sambar or rasam with beets is a welcome change. The stir fries/sautes I deal with when I have to. That would explain why this recipe is not exactly a weekly feature in my home.


1/4 kg Beetroot, peeled and diced Steam the beetroot until tender.
1 tsp Oil
1/4 tsp Urad Dal
1/4 tsp Chana Dal
1/4 tsp Mustard Seeds
2 Red Chillies
1/4 tsp Asafoetida
1 tbsp Coconut, scraped
7-8 Curry Leaves
Salt to taste

 
Heat oil in a pan. Add the urad and chana dals, mustard seeds and asafoetida. When the mustard splutters, add the curry leaves and the red chillies. Fry for a minute. Add the chopped beets and the salt. Sprinkle a little water on top. Cover and cook for 2-3 minutes. Add the coconut and mix well.
 
This is a pretty side with the usual rice and sambar/rasam routine. Perfect when you really do need a splash of colour on your plate.


November 9, 2010

Spinach and Cheese Pasta


As an adult, I developed a taste for stuff that I almost always turned up my nose at as a child. Pasta is one of them. Considering how often pasta finds its way into our meals, it feels like my childhood must have been part of another life.

The inspiration for this dish comes from one of the baked dishes I tried almost a decade ago in Madras. It comes together very easily, especially if you always have a stash of processed vegetables in your freezer. For this recipe, I used the Whole Wheat Pasta from Fabindia. I've been hooked to this ever since I tried it for the first time.

1 cup Whole Wheat Elbow Macaroni
1 cup Spinach, chopped and steamed for 5-7 minutes
1 tbsp Butter
1 tbsp Flour
1 cup Milk
1/2 tsp Parsley
1/2 tsp Basil
1 tsp Chilli flakes
1/2 tsp Garlic Paste
Salt and Pepper to Taste
1 slice Low Fat Cheese

Boil the macaroni according to the instructions on the pack.

Heat the butter in a saucepan. Add the spinach and fry for a minute. Add the garlic paste, parsley, basil and chilli flakes and fry for another minute. Add the flour and fry without browning the flour. Add the milk and bring the mixture to a boil while stirring continuously. Add the cheese at this point and stir the sauce well. As the sauce thickens, add the salt and pepper. Add the macaroni and serve hot.

I served this with some garlic toast. A quick dinner. Simple, yet wholesome.

November 8, 2010

Poondu Thuvayal


Garlic. While many people I know would turn their noses up at this bulb, S and I are two of a kind, the other kind. Yes, we'd both firmly fall into the "Mad about garlic" club. A few months ago, S was unwell and his mother said that garlic would help. So, I sat and peeled an entire bulb. (Now I know it will be a long time before I have to sit down and peel an entire bulb. At least I have access to ready peeled garlic here.)

In one weekend, I made several dishes using garlic. I never did really find out if it cured S of his cold and congestion, but we did have one great meal after another.

One of these dishes was the simple thuvayal featuring garlic. 


1/2 cup Garlic cloves, peeled and roughly diced
1 tsp Oil
3-4 Red Chillies
2 tsp Urad Dal
1/2 tbsp Tamarind paste
Salt to taste


For the tempering:
1 tsp Oil
1/2 tsp Mustard Seeds
7-8 Curry Leaves


In a small pan, heat the other teaspoon of oil and add the urad dal. When it turns slightly brown, add the red chillies and fry for a minute. Add the garlic and saute for 5-7 minutes. Grind this mixture along with the tamarind paste and salt.
In a frying ladle, heat the oil for the tempering. Add the mustard. When the mustard splutters, add the curry leaves. Add this to the ground paste.

Mix the thuvayal with some rice. Add a little ghee if need be. Make small balls of the mixture and enjoy each thoroughly.