Google
 

June 29, 2012

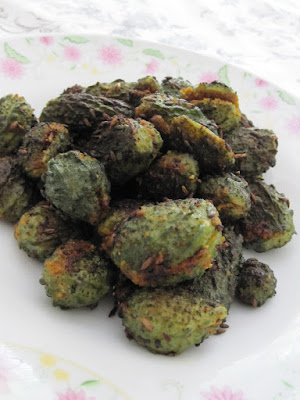
Bharwa Karela (Stuffed Baby Bittergourd)


Bittergourd is one of those vegetables that I am sort of indifferent to. I can't profess undying love for this cucurbit. At the same time, I will not suddenly decide to participate in a 100m dash just because this vegetable shows up on the menu. I have eaten it and enjoyed it in many ways.

Many years ago, a classmate of mine invited me to lunch and made stuffed bittergourd. I was more into baking and western cooking then and so I didn't think about asking her for the recipe. This time when I brought home a bag of baby bittergourds, I decided to try making a stuffed version of my own, taking a cue from my stuffed lady's finger recipe.

1/4 kilo Baby Bittergourd

To be mixed together:

1 tbsp Chopped Garlic
1/4 cup Gram Flour (Besan)
1 tsp Coriander Powder
1 tsp Cumin Powder
1 tsp Red Chilli Powder
½ tsp Turmeric Powder
¼ tsp Garam Masala
1 tsp Bharwan Tawa Masala (optional)
1 tsp Lime Juice
Salt to taste

For the tempering:
2 tsp Oil
1 tsp Cumin Seeds
1/4 tsp Asafoetida

Wash the bitter gourds well and dry on a towel until completely dry. Chop the two ends off for each gourd. Slit each gourd lengthwise and scoop out the seeds. Heat 4 cups of water and add some salt to this. Add the slit gourds and boil for 5 minutes. Drain and cool.

Stuff the prepared mixture into the bittergourds.
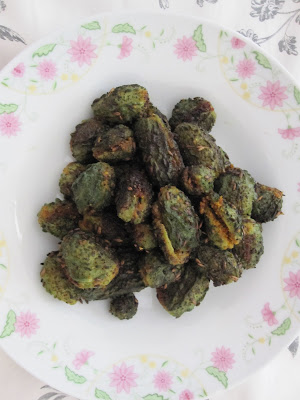

In a pan, heat the oil and add the cumin seeds. When they crackle, add the asafoetida and the stuffed bittergourds. Cover and cook on a low flame till the gourds are done (about 15 minutes). Remove the lid and allow to crispen.

I could eat a bowl of this as it is. That is how good it is. It definitely has some bitterness, which I don't mind. But apart from that, it is tangy and spicy and just what a side dish needs to be.

June 9, 2012

Eggless Chocolate Cake


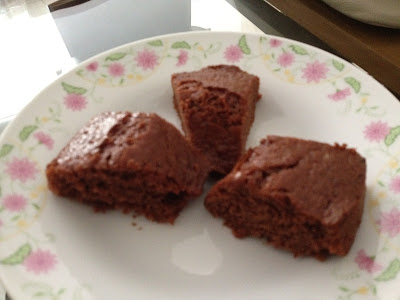
For birthdays, when I have no idea what to gift the person, I try and take a home made cake along. Oftentimes, there is a dietary restriction thanks to allergies or cultural beliefs. Earlier, I would hunt for recipes that would fit the needs of the person, but these days, I find myself more open to experimenting even in baking. This eggless chocolate cake came together very quickly. I used ricotta cheese as an egg substitute. I had meant to use silken tofu, but I realized that I had run out of it. A tip I learnt from the Food Network was to add some instant coffee to enhance the chocolatey flavour of cakes. I tried that too and I must say it worked very well.
1 cup Flour
2 1/2 tbsp Cocoa Powder
1 1/2 tsp Baking Powder
1 tsp Instant Coffee Powder
1/2 cup Sugar
a Pinch Salt
1/4 cup Oil
1/4 cup Ricotta Cheese
1/2 cup Milk
1/2 tsp Vanilla
 
Prepare an 10" ring or 8" round cake tin by greasing and flouring it.
Preheat the oven to 350F (180C).
Beat the ricotta, oil, milk, sugar and vanilla together. Sift the remaining dry ingredients together and add them to the liquid mixture.
Pour the batter into the prepared tin and bake for 30 minutes or until a knife inserted into the cake comes out clean.

Cool on a wire rack and cut into slices. Enjoy with a cup of coffee or tea. This is a perfect eggless chocolate cake and the recipe is a keeper.

June 2, 2012

Banana Ricotta Cake (Eggless)


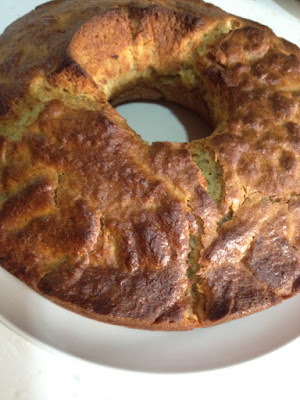
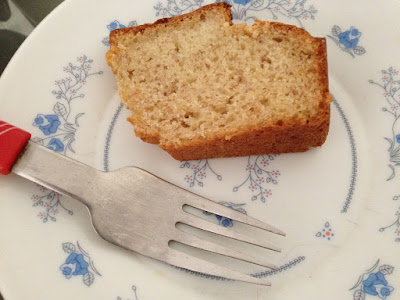
A few years ago I hadn't even tasted a banana cake. Now I have lost count of the number of times I have baked it. I have taken orders for it and have also tried out multiple versions of it. And I am now back with one more. These days, we consume our bananas in a smoothie every morning. Plus baby A loves eating bananas. So, I am very rarely left with bananas that are over ripe, let alone blackened. I deliberately kept a few bananas aside to make this loaf. (There is no limit to one's craziness, I suppose!)
 
 
1 cup Flour
¾ cup Wheat Flour
2 tsp Baking Powder
¼ tsp Baking Soda
1 tsp Salt
¾ cup Jaggery, grated
3-4 Bananas (overripe), peeled
1/3 cup Oil
1/2 cup Ricotta Cheese
Oil and flour for lining and dusting


Heat the oven to 350F. Grease and dust a loaf tin.

Sift the dry ingredients together.

Combine the bananas, ricotta cheese, oil and jaggery in a bowl. Using an electric mixer, blend all these to a rough paste. Pour this mixture into the dry ingredients and add the toasted walnuts. Mix well and pour into the prepared cake tin. Bake for 35-40 minutes (or until a skewer inserted into the cake comes out clean). Cool on a rack for a few minutes.


Cut into slices and serve. This cake doesn't keep very well beyond the second day. I hope you won't need to keep it for two days!

May 30, 2012

Orange Buttermilk Pound Cake


It looks like it is raining cakes at The Singing Chef. Quite like the monsoons! Last year, at about this time, it felt like I was serving cakes for breakfast lunch and dinner. Right now, once again, I have plenty of cake recipes sitting in my drafts. They shall be all be out very soon. I even have a couple of eggless cakes coming your way.

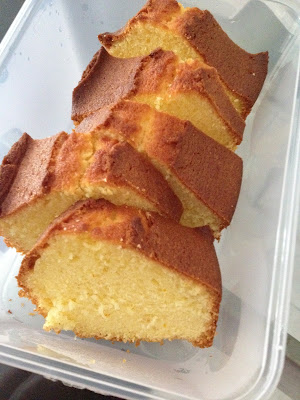
I made this cake at S's request. He had a team meeting at work and wanted to take something for everyone. I had wanted to make the Orange Ricotta Pound Cake, but I was all out of Ricotta Cheese. I did have buttermilk and so I decided to tweak Deeba's recipe. I am left with a winner recipe. The cake was soft and moist, with a crust on top. The flavour of the oranges came through with every bite.
 
1 1/2 cups Flour
1/2 tsp Baking Powder
1/4 tsp Baking Soda
1/2 tsp Salt
1/2 cup Unsalted Butter
1 cup Sugar
2 Eggs
100ml Buttermilk
1 tsp pure Vanilla extract
Juice of 1/2 an Orange
Zest of 1 Orange

Sift together the flour, baking powder, baking soda and salt.

Preheat the oven to 180 C/350 F. Prepare a 10" ring tin.
Cream the butter with the sugar until the mixture is light and fluffy. Add the eggs, at a time, beating well after each addition. Add the buttermilk and vanilla extract and beat again. Add the orange juice  and the zest. Incorporate the dry ingredients into the batter, adding a little at a time.

Pour the mixture into the prepared cake tin and bake for 30-40 minutes or until a knife inserted into the cake comes out clean. Allow the cake to cool a little and cut into slices when warm using a bread knife.
I made this on a busy weekday morning and forgot to take pictures. It was only after I had cut and packed the cake that I remembered. So, the picture is one that I took using my phone.

May 29, 2012

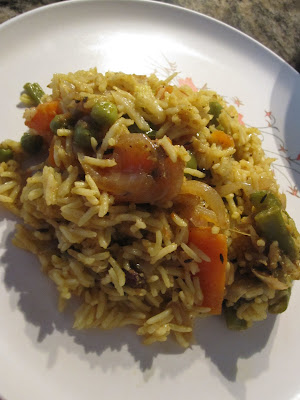
Vegetable Biryani


I used to go snack heavy at parties and stick to one main dish. Five years ago, if I made more than two items at dinner for a party, I didn't have to cook for the next few days. By the time people reached the dinner table, they would have snacked enough. Nowadays, I try to stick to a snack or two and go for a larger spread for the main meal. This biryani works well in both settings.

For the longest time, I couldn't tell the difference between a pulao and a biryani. Now, I have a vague idea. I have had many bloggers tell me the difference and Amma also makes a mean vegetable biryani, which is cooked very differently from her pulaos. This is a recipe that comes very close in taste to some good biryanis that I have had, but is cooked like a pulao. I make this very often, and in the rice cooker. So I use parboiled vegetables. If you are cooking it in a pressure cooker, feel free to use raw vegetables and decrease the water by 1/2 cup.

1 1/2 cups Basmati Rice
3 cups Mixed Vegtetables (Beans, Carrots, Cauliflower, Peas and Potatoes)
1/2 cup Onions, sliced
1/2 cup Curd
2 tbsp Oil
1 tsp Cumin Seeds
3 pods Cardamom
4 Cloves
2 sticks Cinnamon
1/2 tsp Turmeric Powder
2 tsp Chilli Powder
1 tbsp Shahi Biryani Masala (I use Everest)
Salt to taste

Grind to a paste:
2 Onions, roughly chopped
2 Tomatoes, roughly chopped
3 cloves Garlic
1" piece Ginger
2 Green Chillies, roughly chopped

Place the vegetables in a microwave safe bowl with enough water. Cook for 8 - 10 minutes. Drain.

Wash the rice and drain.

Heat the oil in a kadhai. Add the cumin seeds. When they crackle, add the cardamom, cinnamon and cloves. Add the onions and fry for a couple of minutes. Add the tomato-onion paste and fry for a few minutes. Add the salt, turmeric, chilli powder and biryani masala. Fry until the oil separates from the mixture. Add the curd and mix well. Add the vegetables and mix until the vegetables are coated with the mixture.

Add the rice and cook the mixture for a minute. Transfer to the rice cooker and add 3 cups of water. Cook until done.

I usually serve this with some mixed raita and chips/salad. This dish has been as much a hit at weekend lunches as it has been at parties.

May 24, 2012

Oats Doddak


I once blogged about how I could never understand people who ate the same stuff for breakfast every day. Rain or shine. That post was about a mango and melon smoothie. That was about 9-10 months ago. Since then oat and fruit smoothies have become a staple for breakfast. Even baby A loves the smoothies for breakfast. But sometimes he craves something savoury. I made this for him one morning and then ate the stuff for lunch. (If you are making this for children, omit the chillies or use a small portion of deseeded chillies.)
 
The use of oats in this doddak is a healthy twist in the tale. Oats keeps hunger pangs away longer thanks to its lower GI and is also full of fibre.
 
Ingredients:

1 cup Oats, roasted and powdered
1 tbsp Semolina
1/4 cup Coconut, scraped
1/4 cup Coriander, chopped
2 Green chillies, chopped
1" piece Ginger, chopped
Salt to taste
Oil for frying

For the tempering:

1 tsp Oil
1/4 tsp Mustard Seeds
1/4 tsp Cumin Seeds
1/4 tsp Asafoetida
7-8 Curry Leaves

Prepare the tempering in a small kadhai and transfer the contents to a mixing bowl. Add the remaining ingredients except the oil and mix well using a little water. (Do not add too much water. The batter should not be watery.)

Pour the dough onto a hot griddle and spread it a little. Pour a few drops of oil on all sides. Make a slit in the centre using the spatula and pour a few drops into this slit.

Turn over and allow the other side to crispen as well. Serve with pitti chitni and toop or with plain butter.

May 8, 2012

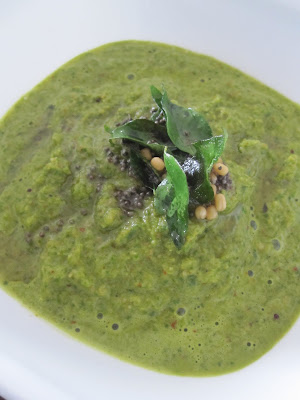
Pok Choy Thuvayal


I have access to a wide variety of greens here. I use them in many ways: stir fries, salads, etc. Sometimes, I simply use a local green in my regular Indian cooking instead of an Indian green. We have had Kai-lan (Chinese Broccoli) Dal, Kangkong (Water Spinach) Sambar etc. I like the idea of throwing in a green leafy vegetable into just any dish. And all of you know about my obsession with Thuvayals. When I found a couple of bunches of Pok Choy that weren't fresh enough for a stir fry, I made a thuvayal with it. It was very tasty and I know we will have it again soon.

 
1 1/2 cups Pok Choy, washed and roughly chopped
2 tbsp Coconut, scraped
1 tbsp Oil
2 Green Chillies
1/2 tsp Chilli Flakes
1 tsp Mustard Seeds
1 tsp Sesame Seeds
1/4 tsp Fenugreek Seeds
1/4 tsp Asafoetida
2 tsp Black Gram Dal
1 tsp Tamarind Paste
Salt to Taste

For the tempering:
1 tsp Oil
1/2 tsp Mustard Seeds
1/2 tsp Black Gram Dal
a pinch Asafoetida
5-6 Curry Leaves
Heat the oil and fry the green chillies, red chilli flakes, mustard seeds, sesame seeds, fenugreek seeds, asafoetida and black gram dal for a couple of minutes. Add the pok choy along with the coconut and fry for 2 minutes. Grind the mixture along with the tamarind paste and salt.

Heat the teaspoon of oil for the tempering in a frying ladle. Add the mustard, black gram dal and the asafoetida. When the mustard splutters, add the curry leaves. Add this tempering to the pok choy mixture.
Mix some rice and ghee/ sesame oil. Add a couple of spoonfuls of the thuvayal. Mix well and get ready for a quick trip to heaven. That's how good this was.