Google
 

August 28, 2012

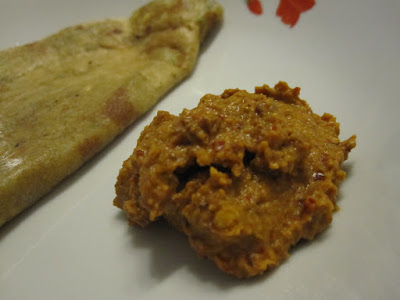
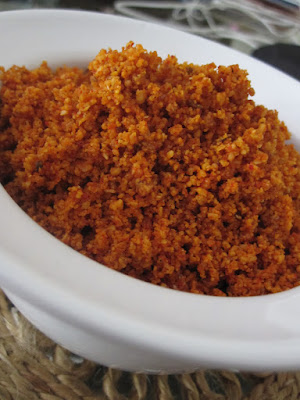
Peanut Sesame Powder


When I was relatively new to the world of blogging, I didn't know too many people. I thought that participation in events was only by invitation. I felt like an outsider. I read about people receiving gifts from other bloggers and wondered how much longer it might be before I would be considered part of the "inner circle".

I then realized that there was no such thing. Most bloggers considered all other bloggers as being in the inner circle. Friendships were formed quickly and before I knew it, I received a lovely package in the email. A letter, some methkut, some murabba, some tea bags, an agarbatti holder and this little bottle of "Sesamum Chutney". The sender was Nandita!
 
S and I were hooked on to this Sesamum Chutney and we savoured even the last speck from the bottle. We ate it with everything. Sprinkled it on buttered toast, ate it with chapattis, had it with dosais and even mixed it with hot rice.
 
I tried to recreate the chutney at home nearly 5 years after I had received the parcel. It turned out quite similar to the original and I will be making this so often.
 
6 Garlic Pods
1 cup Peanuts, roasted and skin removed
1/2 cup Sesame Seeds, roasted
2 tbsp Cumin, roasted
2 tbsp Red Chilli Powder
Salt to taste
1 tbsp Oil
 
Grind the ingredients (except the oil) together. Add the oil a few drops at a time during the grinding. The oil keeps the entire mixture from becoming lumpy.
 
This is a very versatile chutney that can be used in many ways. You could also mix some in a bowl of yogurt for a quick raita. I am certain it will go very well even as a spice mix for vegetables. I must try that next.
 

August 24, 2012

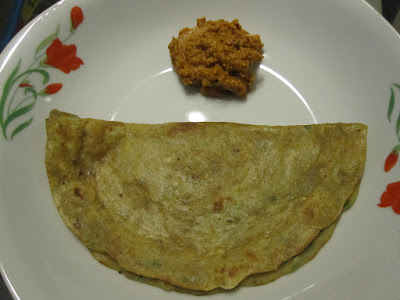
Soraikkai Thuvayal


Meals. At times, they're something I put together in a jiffy. At others, they are painstakingly thought through. Ever since A started eating regular meals, I have started putting more thought into what I put on the table. All the same, I don't want A to have conventional ideas of what a meal must be and must not be. So, it doesn't have to be rice or roti. A meal could be dosai, pasta, soup and a sandwich, rice-dal-sabzi, parathas... as long as it has carbohydrates, proteins, fats and a good portion of vegetables, it is a meal.
 
One night, I decided to make wheat doddaks for dinner. A few years ago, I added moong flour to the batter and have not stopped since. Thus, the wheat and green gram doddak was born. My carb and protein elements had been taken care of. In order to convert it into a full meal, I grated some bottle gourd into the batter and made little doddaks for A. Now, that was a full meal for him. It had all that I wanted in his meal and it was something he wanted too (to be able to eat by himself).

But why all this talk about doddaks in a post about a thuvayal? Because putting in grated bottle gourd into the batter may make it a meal for my little one, but we adults need something to go with the doddaks. And since I have been known to make a thuvayal out of just anything, I decided to make the vegetable element of our meal into a thuvayal.


This recipe deviates from my usual thuvayal but is a keeper recipe.


1 cup Bottle Gourd, peeled and diced
2 tbsp Coconut, scraped
4 Red Chillies
1 tsp Mustard

1 tsp Cumin
3 tsp Urad Dal (Black Gram Dal)

1 tsp Chana Dal
1 tsp Sesame Seeds
1/4 tsp Fenugreek Seeds
1/4 tsp Asafoetida
3 tsp Oil
1 tbsp Tamarind Paste
Salt to taste


Heat the oil and fry the red chillies, mustard seeds, sesame seeds, fenugreek seeds, asafoetida, chana dal and black gram dal for a couple of minutes. Add the bottle gourd and fry for 2 minutes. Cover and cook for 5-7 minutes. Grind the mixture along with the coconut, tamarind paste and salt.

Serve with the doddaks. Serve on buttered toast. Serve with rice. Serve with chapatis. In short, serve it just about any way you like.


August 15, 2012

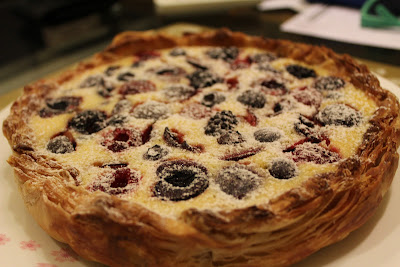
Cherry Berry Yogurt Tart


A few years ago, our blogs were our blogs. Fellow bloggers and other readers would come to our blogs, read our posts and comment on them. I remember very clearly the time when I lived for those comments. Because they were my only connection to my readers. (Julie & Julia, anyone?) I still wait eagerly for comments to posts that I put up. Today they are few and far between. But many lines are blurring and I now have multiple connections with my fellow bloggers and readers. Facebook is one of those connections.

Last year, a few random conversations led to the formation of a Baking Club and all of us made a Mango Cake. I got a little busy in the months that followed and couldn't keep up. Over the next few months, my blog suffered from lack of attention. In the last few months, it has picked up speed again.

 
A more recent chat on Facebook led to the revival of this club. The one I fondly called The Sisterhood of Travelling Cake Tins is now christened that. And since today is the 100th birthday of Julia Child, the theme for this episode is her Baked Yogurt Tart. Keep a lookout in the blogosphere today. You are bound to see multiple yogurt tarts from my dear friends and fellow bloggers. And given that Cook For Julia is being hosted by PBS, you will see many other Julia Child recipes too.

This recipe is adapted from a Julia Child recipe found here. I used readymade frozen puff pastry for the base. You can find my tried and trusted recipe for shortcrust pastry here. I omitted the nuts from the recipe.

1 recipe Shortcrust Pastry dough/Puff Pastry

For the filling:

2 cups Yogurt
3/4 cup Sugar
3 Eggs
3/4 cup Flour
2 tbsp pure Vanilla Extract

1/2 cup Cherries, pitted and halved
1 cup Mixed Berries (I used raspberries, blackberries and blueberries)

Icing sugar, for dusting

Heat the oven to 400F/200C.


Roll the pastry doughinto a 12 inch circle of 1/4 inch thickness and fit it into a 9" round springform pan. Cover the top with baking paper and blind bake for 20 minutes with pie weights, rice or beans.

Remove the weight and the baking paper and allow the tart shell to cool. Set the oven to 325F/160C.


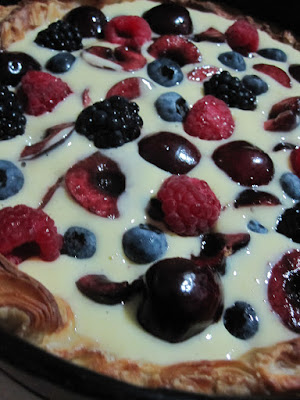
 In the meanwhile, beat the eggs and the sugar together. Add the yogurt and the vanilla extract and mix well. Add the flour a little by little and fold it into the mixture. Pour the mixture into the cooled tart shell. Do not fill to the brim, only about 2/3. Add the fruit. (The tart will look like this at this stage.) Bake for 30 minutes. Allow to cool. Cut into wedges and serve.

Packed with fruit and the goodness of yogurt, this is one keeper recipe.

Happy 100th birthday Julia! Happy Independence Day! And a toast to dear S and I. We lost our independence this day six years ago when we got engaged formally.

Here are the links to the other posts from the sisterhood:

Aparna: Baked Yogurt Tart (Tarte Au Yaourt) With Fresh Orange & Pistachios, In An Oatmeal Crust
Nandita:Baked Yogurt Berry Tart
Arundathi:
Arundati:Baked Yogurt Tart with Blueberries, Almonds and Orange Zest in an Oatmeal Pie Crust</
Monika:Baked Yogurt Tart with Fresh Figs and Blueberries

August 13, 2012

Kesar Pista Kulfi


A couple of weekends ago, we visited a friend for a potluck dinner. I had made a lot of Bisi Bele Huli Anna and my friend decided to make some curd rice. She had also made some very nice sabudana tikkis as a starter. And just when we thought we could eat no more, she brought out some kulfi.


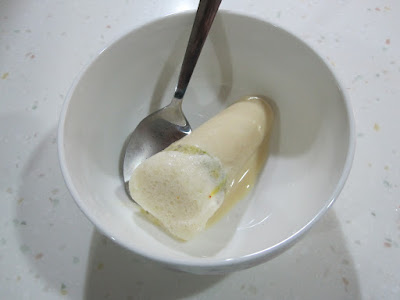
The kulfi tasted so good that I had to try it out at home. The recipe is so simple, it is almost as if there is nothing to it. Also, my traditional way of making kulfi involves boiling the milk with condensed milk. This method involves no cooking. I blended all the ingredients in a blender, but I think I should use a hand whisk the next time. The blending left some froth on the top of my kulfis.


1 can Evaporated Milk
1 can (400g) Sweetened Condensed Milk
1 tin (170g) Cream


For the topping, grind together:

1 tbsp Pistachios
1 tbsp Almonds
a pinch Saffron
1/4 tsp Cardamom


Mix the evaporated milk, condensed milk and cream. Whisk together until well blended. Add the topping and mix again. Fill the kulfi moulds with this mixture and freeze until set. When set, dip the moulds in warm water, unscrew and hold over a plate. The kulfi slides out effortlessly.


This is a keeper recipe for me even if everything came out of a can!

August 11, 2012

Carrot Beetroot Chocolate Mini Muffins


Baking for little children is fun. I find instant approval or disapproval when a child tastes what I have made. No pretense, no niceties. I have rediscovered baking with butter in the past year and I find that the texture of the cakes is really nice. I have nothing against baking cakes with oil, just that once in a while, butter is better. And when I bake for children, I feel I must use butter.


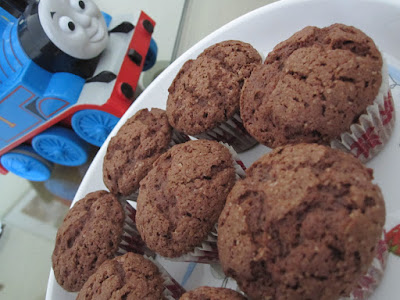
I was on my way to meet a dear friend and remembered that I had promised her daughter chocolate muffins. So I made these very quickly. But then I had just grated some carrots to make parathas for A, so I decided to sneak some in to these muffins as well. Then I thought beets would also make a good addition.


The best part about this entire recipe is that one cannot even taste the carrot or beetroot in the final product. They just seem to make the muffins super moist. I know this one is a keeper.


3/4 cup Flour
1 1/2 tbsp Cocoa Powder
1 1/2 tsp Baking Powder
1/2 cup Sugar
a Pinch Salt
1/4 cup Butter
1 Eggs
1/4 cup Grated  Carrot
1/4 cup Grated Beetroot
1/2 tsp Vanilla

Preheat the oven to 350F/180 C. Sift the flour, cocoa, and baking powder along with the salt.

Cream the butter and the sugar until fluffy. Add the egg and beat again. Add the sugar and vanilla and
beat well together. Fold the flour cocoa mixture into this.

Prepare the mini muffin pans by lining them with paper muffin cases or spraying them with baking spray.

Stir the grated carrot and beetroot into the batter and pour into the prepared muffin cases. Bake for 12-15 minutes.

Little A polished off two of these almost as soon as they were out of the oven. The batter makes 16 mini muffins. I packed some in a box and took them to meet some old friends and their children. Gone in sixty seconds may be a better title for this recipe!

August 9, 2012

Kaju Barfi


Indian sweets is one area I have steered clear of. You could easily blame it on two things. One is the hard work involved and the other is definitely a scar from the olden days. I remember trying to make one sweet which just didn't set. I added sugar, more sugar and then some. At the end of the experiment, all one could taste was sugar and it still had to be eaten using a spoon. My mother was very encouraging and very forgiving. Far more forgiving than I have ever been on myself.

Last year, at Deepavali, I made my version of the 7-cup cake. The recipe will come up soon. It took me another 9 months to try my next Indian sweet. I usually don't stock the amount of sugar and ghee that go into Indian sweets. After years of making cookies and sweet buns for Janmashtami, this year I decided I must introduce little A to mithai as well. I found this recipe in the Milkmaid Gold Collection and modified it a little.

1 1/4 cups Cashews, powdered
150g Khoa, grated
1/2 cup Milk
1/4 cup Flour
1/2 tin Milkmaid
1 tbsp Ghee
1/4 tsp Cardamom powder
a few Saffron strands

Grind all the ingredients except the cardamom and saffron to a fine paste. Grease a heavy bottomed pan with 3/4 tbsp ghee and add the paste. Add the cardamom and the saffron. Heat the mixture over an even medium flame until the mixture comes together as a ball.

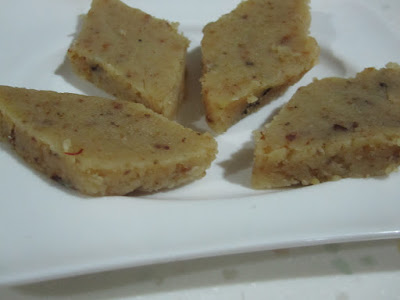
Grease a plate with sides (I used two 8" cake tins as I don't have thalis in my house). Transfer the mixture and spread evenly. Cut into diamond shapes and store in an airtight container.

Since this was my very first attempt, I didn't add any ghee to my pan at the start, which explains the little burnt bits. The original recipe didn't ask for any extra ghee. My barfis needed some extra love.

Happy Janmashtami all of you!

August 8, 2012

Semolina and Vegetable Cutlets


I always quite liked the idea of making food appealing for children. And in doing so, I hope to also let A appreciate a wide variety. To that end, I am quite particular about not making him a paruppu saadam tayir saadam child. (No offense meant to anyone. I just don't believe that food has to be rice and roti.) I would like him to learn that these dishes are food as are many others. By and large, he eats what we eat and I don't have to cook separately for him. From the age of 1, A has wanted to feed himself. I try to give him things that he can hold in his hands and eat. But since he does not want to be fed, I have to ensure that these foods are not mere snacks.

Cutlets are one such item. I remember eating a semolina and vegetable cutlet many years ago at Adyar Bakery's Shakes & Creams. I thought that it would make a good meal for A.

1/4 cup Semolina
2 tbsp Carrots, finely chopped
2 tbsp Beans, finely chopped
2 tbsp Butter Beans, cooked and finely chopped
2 tbsp Onions, finely chopped
1 tbsp Oil
1/4 tsp Turmeric
1/4 tsp Paprika
a pinch Garam Masala
Salt to taste
¼ cup Bread Crumbs
2 tbsp Flour
Oil for frying (deep or shallow)

Steam the carrot and beans until tender. You could place them in a microwave safe bowl and add a little water and microwave on high for 2-3 minutes.

Heat the oil. Fry the onions and fry for a couple of minutes. Add the semolina and roast for 2-3 minutes. Add the carrot and beans along with the butter beans. Add the paprika, salt and turmeric. Add 1/2 cup of water and cover and cook on a slow flame for 3-4 minutes. Add the garam masala and stir well. Turn off the flame and allow the mixture to cool.

Meanwhile, mix the flour with a little water to make a batter. Place the bread crumbs on a plate. Heat the oil for frying.

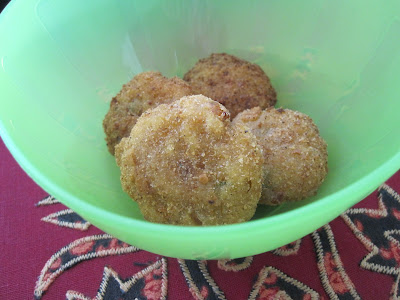
Make small balls of the mixture and flatten them. Coat them with the flour batter and then roll them in the bread crumbs until they are evenly covered.

I tried making these by deep frying as well as shallow frying and both methods work very well. To deep fry, slide each cutlet into the hot oil and fry on each side until brown. To shallow fry, place the cutlets on a greased pan and cook on both sides, adding a few drops of oil as necessary.

Drain on absorbent paper. Serve with tomato ketchup.

Now that I have made these, I think even left over vegetable upma would make very good cutlets.