Google
 

Monday, July 30, 2007

Zucchini Capsicum Makhanwala


It's already time for Z. I asked Nupur what happens when we complete the 26 letters of the alphabet and she said she's not thought about it. Sad as I am to see this event come to an end, I had to make something special to bid the A-Z of Indian vegetables adieu.


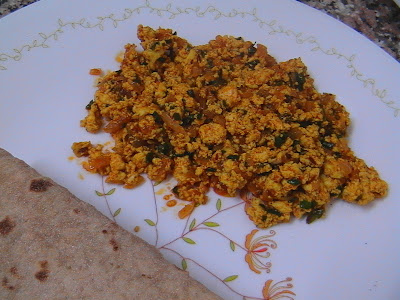
Z is for Zucchini Capsicum Makhanwala and this is my entry to Nupur's A-Z of Indian Vegetables. This dish could easily have qualified for X as well because I'd eaten Zucchini so many times, but had never bothered to eat it. On our trip to Manali last week, we saw Zucchinis at the local market that were bigger than the bottle gourds in that area. My dish, however, used a reasonably small yellow Zucchini.

Ingredients:

1 tbsp Oil (Or ½ tbsp butter and ½ tbsp Oil)

1 Onion, ground to a fine paste

1 Zucchini, sliced

1/2 each of Green, Yellow and Red Capsicum

¼ cup Tomato Puree

¾ cup Slim Milk

½ tsp Turmeric Powder

1 tsp Chilli Powder

1 tsp Kasuri Methi

1 tsp Sugar

Salt to taste


Heat the oil. Add the onion paste and fry for a few minutes. Add the turmeric and chilli powder and fry for another minute. Add the chopped capsicum and zucchini slices and fry for 4-5 minutes. Add the tomato puree and salt. Mix well and cook until the mixture bubbles. Add the milk and bring to a boil while stirring. Add the kasuri methi and sugar. Cook for 5 minutes. Garnish this with coriander leaves if you wish and enjoy with rotis.


I absolutely love the taste of kasuri methi in this dish and consider the absence of it in any makhanwala to be a sign of disrespect. We eat capsicum at least once a week if not more often. S and I both like the flavour it imparts to any dish. Here, the pairing of some sweet capsicum with a normal green one seemed to go very well with the Zucchini and the flavours were rather well blended.

Tuesday, July 24, 2007

Summer Fruit Shake


Summer! I think I have a love-hate relationship with this part of the year. The heat I don't like. No, not even when it is zero degrees and we exist in our houses without heating, central or otherwise. I don't look forward to the nice hot summer months. Nice and hot together would constitute an oxymoron, wouldn't they?


But there are some things I simply love about summer. The fruits. The mangoes, watermelons, peaches, litchis, apricots, jamuns, plums, pears, cherries and apples. We stock them up at home and I can just go on eating fruit. I don't need much else.


Some pictures of fruit taken during our last holiday in Mussoorie.


Yet another breakfast in a glass. I have had to clean my fridge and use up as much of the stuff that's in there. And I also needed to feed myself. So here goes:


1/2 Apple, peeled and chopped

1 Peach, chopped

4 Apricots, chopped

2 Dried Apricots, chopped for garnish

1 cup Milk


Blend all the fruits along with the milk. Pour into a glass and top with dried apricots.


I had a glass of this and drank the remaining milk shake after about 15 minutes. The colour had turned a beautiful orange. I was so carried away that I forgot to take a picture. But it was a filling breakfast and that's all that really matters.


We're traveling for the rest of the week. My cousin and his family are here from London and we're off to the hills to have loads of fun. The doctor said that S could go along too, as long as he isn't driving. So, see you all when I get back.

Monday, July 23, 2007

Filter Coffee


Filter coffee! Whatever I may do, however much I may try, I am not able to recreate the magic of coffee that is served at my mother's place. As a child, I wasn't allowed it. I once threw a tantrum at someone's place because H got to drink coffee while I didn't. (The 5 year age gap meant nothing, you see.) And so, the story goes that the next time we were visiting the same people, even though I was asleep, Amma woke me up and gave me coffee so I wouldn't ever crib again.


At our place, coffee is always brewed fresh. I've found that in many homes, it is kept overnight to brew and that's a complete no-no at ours. Amma has this huge filter from Revere Ware and I remember the aroma that spread throughout the house each morning when boiling hot water was poured over pressed coffee powder.


Over the years, we've switched to the electric coffee makers and regardless of what anyone says, the coffee is just as good. Our blend is 80:20, Peaberry to Plantation "A". Whatever that may be. Someday I'll do my research.


Here's how I brew my daily cuppa in a typical filter:


1/8 cup Coffee Powder (Peaberry 80: Plantation "A" 20)

125 ml Water, boiling hot

150 ml Milk

3/4 tsp Sugar


Place the coffee powder in the top portion of the filter. Use a flat bottomed vessel (like a tumbler) to press the powder down firmly. Place the inverted umbrella like apparatus over the coffee.


Put the sugar in the bottom portion of the filter. Place the top portion over this. Pour the boiling hot water over this and cover with the lid.


When all the water has seeped into the bottom portion, boil the milk in a small vessel. Pour the decoction into the milk and heat the mixture if needed. Sip your coffee leisurely for a wonderful start to the day.


I use only 100% pure coffee even though people say that the chicory version tastes best. When I make coffee in the electric coffee maker, I press the coffee into the filter and add sugar in the bottom vessel. I then add plain water into the coffee maker and my coffee is ready in 5 minutes. The aroma that fills the house is simply superb.


I cannot drink tea. I make it for husband each morning and tend to look at tea as something I will drink when my stomach is really upset... and then, too, only black! But coffee: anyday and at any time. I stick to one cup a day. And that really gets me going.

Saturday, July 21, 2007

Gatte Ki Kadhi


The very first time I ate Gatte ki kadhi was at Mansukh's in Madras. I was enjoying a Gujarati Thali while a colleague was enjoying a Rajasthani Thali. She asked me to try the kadhi and I fell in love with it instantly.


Years later, I sampled more of this spicy dish at Dhola-ri-Dhani, a Rajasthani village theme resort in Hyderabad. Soon, I bought myself a copy of Tarla Dalal's Rajasthani Cookbook. I've tried quite a few recipes from the book. I use a lot less chilli powder than the recipes call for. So you may adjust the spice level according to your taste.


Ingredients:

For the gattas:

3/4 cup

Bengal gram flour 1/2 tsp Chilli Powder
1 tsp fennel seeds
1/8 tsp ajwain
1 tbsp curds
2 tbsp oil
Salt to taste


For the Kadhi:


2 cups C
urds, beaten
1 tablespoon
Bengal gram flour
4 to 6 C
urry leaves
1 teaspoon cumin
1/2 teaspoon mustard seeds
1/2 teaspoon fennel seeds
1/4 teaspoon asafoetida
1 bay leaf
1 clove
1 stick
cinnamon
1 cardamom
1/4 tsp
turmeric powder
1 tsp
chilli powder
2 tsp coriander powder
2 tbsp
oil
Salt to taste


For garnish:
2 tablespoons chopped
coriander


For the Gattas:


Place all the ingredients in a mixing bowl and knead into a firm dough using as little water as necessary. Divide the mixture into eight 3 inch long cylinders.


Heat plenty of water in a vessel and cook the gattas for 8-10 minutes in boiling water. Drain and cut the gattas into half inch pieces.


For the Kadhi:


Mix the curds, gram flour, curry leaves and 1/2 cup of water and mix well.


Heat oil in a kadhai and add the mustard, fennel and cumin seeds, asafoetida, bay leaf, clove, cinnamon and cardamom. When the mustad and cumin seeds crackle, add the turmeric, chilli and coriander powders and fry for a minute. Add the curd mixture, 1 cup of water and salt and bring to a boil while stirring continuously.


Add the prepared gattas and garnish with coriander. Enjoy this with steaming hot rice. I can guarantee you'll fall in love with it.


This is my entry to Weekend Herb Blogging, started by Kalyn and hosted by The Chocolate Lady of In Mol Araan.

This fits in perfectly with my
Eating out while eating in series. The earlier ones in this series being Kothu Roti, French Bread Pizza, Macaroni, Egg Bhurji and Potato Wedges.

Mushroom Soup


The weather in Delhi is rather unpredictable these days. Hot at times, muggy at others, the rain just plays hide and seek with us.


Last Sunday, it was extremely hot when we left for the picnic. But soon after S hurt his foot, it started pouring. We got back home after a trip to the hospital and I wanted some soup. I had a packet of fresh mushrooms in the fridge and decided to make some hearty, filling soup.


Ingredients:


200g Button Mushrooms, chopped
1 tsp Olive Oil
1 large Onion, chopped
1 cup Milk
1/4 tsp Parsley
1/4 tsp Basil
Salt and Pepper to taste


Heat the oil in a saucepan and add the onion. Fry till the pieces turn translucent. Add the mushroom pieces and fry for 1-2 minutes.


Blend the onion mushroom mixture in a liquidizer with a little milk. Transfer this to a vessel and add the remaining milk and bring to a boil. Add the parsley, basil, salt and pepper. Enjoy this soup hot with some Garlic Bread.

Egg Bhurji


Perhaps, the Indian cousin of scrambled eggs. This one, though, has no resemblance to the popular breakfast dish. Eggs, paneer and soya always come in handy when I am hard pressed for time.


Egg bhurji is one of the few egg dishes available in most restaurants and I've eaten this at restaurants and dhabas in Hyderabad. When one vegetarian and one non vegetarian go out for dinner, egg is usually what ends up on the table. Satisfies both! My friend and I used to eat out a lot in Hyderabad and that's where I rediscovered this dish that I'd probably eaten once before when a classmate brought it in her dabba at school.


Continuing with my Eating out while eating in series, I made egg bhurji. The earlier ones in this series being Kothu Roti, French Bread Pizza, Macaroni and Potato Wedges.


Ingredients:

1 Eggs

1 Onion, chopped

tsp Green Chilli Paste

1/2 tsp Ginger Paste

1/4 tsp Chilli Powder

1/4 tsp Turmeric Powder

1/4 tsp Cumin Seeds

1/4 tsp Cumin Powder

1/4 tsp Coriander Powder

1/4 tsp Asafoetida

Salt to taste

1 tsp Oil


Heat the oil in a kadhai or a saucepan. Add the cumin seeds and asafoetida. When the cumin seeds crackle, add the onion and fry till the pieces turn translucent.


Add the cumin, coriander, turmeric and chilli powders and fry for another minute. Add the ginger and chilli pastes and salt and fry for 1-2 minutes.


Break the eggs into the onion spice mixture and whisk thoroughly. Allow the mixture to cook for a few minutes. Garnish with coriander leaves if you like and enjoy it with rotis.

This is one of my entries to the RCI: Punjabi Cuisine which is being guest hosted by Richa of As Dear As Salt.

Tayir Saadam (Curd Rice)


Tayir Saadam. Comfort food to many, health food for some. To me, it’s just an integral part of every meal at home.


I had a Parsi boss in Bombay who loved Curd Rice. One day, my stomach was badly upset and my aunt made curd rice and packed it in my box. My boss wanted to exchange dabbas with me. I was surprised that someone actually wanted to eat Curd Rice. She then told me that she asked her cook to make curd rice and he kept rice and curd in front of her and asked her to mix the two. I told her that’s the way we eat it at home. And she said, “Not with Basmati Rice and Sweet Curd, right?”

Right!


This version of curd rice is also called Bagala Bhaat and is served at weddings. The caterer at my wedding, Pattappa, dishes out the creamiest tayir saadam on the planet.


I, as always, picked this recipe up from Amma. In summers, this is the best thing to eat at lunch time. Very cooling, very easy on the system.


Ingredients:

1 cup Ponni/Sona Masoori Rice

1/2 tsp Green Chilli paste

1/2 tsp Ginger Paste

1 cup Curd

3/4 cup Milk

Salt to taste

For the tempering:
1 tsp Oil
1/4 tsp Mustard Seeds
1/4 tsp Asafoetida
7-8 Curry Leaves


Coriander leaves for garnish


Cook the rice with 4 cups of water and a little salt in a pressure cooker. (I usually cook this for 5-6 whistles). Mash it with a spoon or a masher. Add the ginger and chilli pastes and mix well. Add the curd and mix well. Fold in the milk and mix again.


In a small kadhai, heat the oil. Add the mustard seeds and asafoetida. When the mustard splutters, add the curry leaves. Pour this over the curd-rice mixture. Chill for an hour before serving. Garnish with coriander leaves.


Scrambled Eggs


Versatile, nutritious, filling. Eggs seem to have everything a proper breakfast needs. I don't know where, when and how I learnt to make scrambled eggs, but I did. And I continue to make them. And they continue to keep me happy.


Ingredients:


2 Eggs

1 tbsp Butter

2/3 cup Milk

Salt and Pepper to taste


Melt the butter in a saucepan. Break the eggs into the butter and quickly whisk them in the butter. Add the milk and continue to whisk the mixture until small lumps are formed. Cook for a minute or two.


Transfer on to a plate and add salt and pepper. Savour these eggs with buttered toast.

Semia Upma


I don't work on Saturdays. But S goes to work on odd Saturdays of the month. After a nice party with the neighbours last night, we went to bed only at 1 a.m. or so. I, as usual, woke up early and asked S if he wanted me to make lunch or if he'd get a dabba at work. Initially he said he'd grab a bite at work and that I needn't bother. A little later, he said, "I want to eat Semia Upma for lunch." I had only 15 minutes and so didn't add any vegetables. It was ready in a jiffy.


Semia Upma always brings back memories. Of the first time I tried to make it. And my weekend trips from hostel. Amma had a mental timetable of sorts and would make different things for breakfast everyday, trying not to repeat a dish in a week. And somehow Semia Upma invariably landed on her timetable for Saturday mornings. I was studying in Pondicherry and would come home on most weekends. I'd land up on Saturday morning and find Semia Upma on the table. After a while I asked Amma, "Why don't you make something else?" And she said, "I could. But don't you like this?" I said, "Yeah, but I get this every time I come home." She hadn't realized that I only had breakfast at home on Saturdays and Sundays and thought that she has been dishing out varieties. She then started treating me to different stuff.


But I still love this upma and with roasted vermicelli, it is ready within minutes.


Ingredients:


1 Cup Roasted Vermicelli
1 Onion, chopped
1 tsp Oil
1/4 tsp Mustard Seeds
1/4 tsp Asafoetida
1/4 tsp Urad Dal
1/4 tsp Chana Dal
1 Red Chilli
1 Green Chilli
1/2 tsp Ginger Paste
7-8 Curry Leaves
Salt to taste

Heat the oil in a kadhai and add the urad and chana dals. When the urad dal starts to brown, add the mustard and asafoetida. When the mustard splutters, add the red and green chillies, curry leaves and ginger paste. Add the onions and fry until they turn translucent. Add the vermicelli and fry for 2-3 minutes. Add 1 cup of boiling water to this. Add the salt and mix well. Cover and cook for 5 minutes.

Garnish with coriander and scraped coconut if you like. Team it up with your favourite pickle and get set for the day.

Oatmeal Coffee Cake


Ever since I discovered Ann Pillsbury's Baking Book some 20 years ago, coffee cakes have fascinated me. For a long time, I thought coffee cakes were cakes flavoured with coffee. Over the years, we have more and more information at our disposal. According to Wikipedia:


The term coffee cake can refer to either of the following:


A cake, often sponge cake, which is made with coffee or has a coffee flavour.
A cake served with coffee
or eaten at breakfast. Under this definition, a coffee cake does not necessarily contain coffee. Coffee cakes are typically flavored with cinnamon, nuts, and fruits.


Now, I know better.


All this while I was thinking of making something spicy like a cutlet or tikka with oats. While browsing for breakfast recipes that used oats in some form (other than porridge) I came across this site. It is called Recipe Goldmine and rightly so. I found an interesting coffee cake recipe and modified it to come up with my entry for the Weekend Breakfast Blogging # 13 hosted by Madhuli of My Foodcourt.


The recipe called for brown sugar and I didn't have any in the house and didn't replace it with anything. So, the cake is not too sweet. Works for me as I can then pour maple syrup over it and enjoy my little treat.


Ingredients:

1/2 cup Oatmeal
5/8 cup Hot water
5/8 cup Flour
1/2 cup Granulated Sugar
1/2 tsp Baking powder
1/2 teaspoon Cinnamon
1/4 cup Butter, melted
1 egg
1 tsp Vanilla
Toasted Walnuts for garnish


Cover the oatmeal with hot water and allow it to set for 20 minutes.

Meanwhile, mix together dry ingredients. Add butter, egg, vanilla extract and mix well. Add oatmeal and mix. Pour into a greased and floured pan and bake at 350 degrees F for 30 minutes. The batter is a little more gooey than normal cake batter. The oats must be working its magic.

After about 15 minutes of baking, arrange the toasted walnuts on the cake and continue baking.


Enjoy a slice of this cake along with breakfast on a leisurely weekend morning and discover sheer bliss.

Grilled Garlic Potato Wedges


I've always enjoyed potato wedges. But I'd not been able to get rid of the guilty feeling that I get whenever I bit into one. About 2 years ago, my boss was visiting India from the US and she came home for dinner. I'd cooked a variety of dishes: Tomato Saar, Bisi Bele Huli Anna, Cucumber Pachadi, and Seppankizhangu Fry. I'd promised her a home cooked meal during her last trip and we talked about how the stuff that we get in restaurants, even in India, are so different from the stuff we make at home. She remembered that conversation and more importantly remembered my interest in vegetarian cooking and brought me a nice gift. A book called "Favorite Vegetarian Dishes". It is one of the nicest cook books I have ever owned and cooking from it is just so much fun. Here's one recipe from the book.


Wanting to make something special, I made potato wedges to eat while we played Scrabble. This is my fourth feature on Eating out while eating in. The earlier ones being Kothu Roti, French Bread Pizza, and Macaroni.


What I like best about these wedges is the fact that they aren't deep fried. I modified the recipe that I found in the book.


Ingredients:


3 medium Potatoes, scrubbed and parboiled
2 tbsp Olive Oil
1 tbsp Butter
1 tsp Rosemary
1 tsp Parsley
1 tsp Thyme
1 tsp Chilli Flakes
2 tsp Garlic Powder
Salt and Pepper to taste


Cut the potatoes into wedges. (Leave the skins on.)


Heat the olive oil and butter in a saucepan. Add the parsley, rosemary and thyme and fry for a minute. Add the chilli flakes and the garlic powder and fry another minute. Add the wedges, salt and pepper. Toss the wedges in the spice mixture and transfer them to a foil wrapped grill rack.


Grill for 10-12 minutes and serve with a cheese dip or garlic mayonnaise.

Rava Upma


I can write pages and pages about my love for this dish. I have blogged about several kinds of Upmas. The
perfect cure for any time hunger pangs. This, however, is the basic dish. Amma would add fried cashewnuts and srpinkle coconut over this, but I just eat it with some chivda or pickle.

Ingredients:

1 cup Rava (Sooji/Cream of Wheat)
1 tbsp Oil
1/4 tsp Mustard Seeds
1/4 tsp Asafoetida
1/2 tsp Urad Dal
1/2 tsp Chana Dal
1 Red Chilli
1 Green Chilli
1/2 tsp Ginger Paste
7-8 Curry Leaves
1 tbsp Ghee (Clarified Butter)
Coriander leaves for garnish
1/2 tsp Sugar
Salt to taste

Heat the oil in a kadhai and add the urad and chana dals. When the urad dal starts to brown, add the mustard and asafoetida. When the mustard splutters, add the red and green chillies, curry leaves and ginger paste. Add the rava and fry for 2-3 minutes. Add 2 cups of boiling water to this. Add the salt and sugar and mix well. Cover and cook for 5 minutes. The upma is done when the rava sets and is not sticky.


Add the ghee and mix well. Add chopped coriander and serve with sambar and chutney or any pickle. Or just sprinkle some chivda or sev on the upma and say good bye to hunger pangs.

Kaddu ki Subzi (Pumpkin Curry)


Yellow pumpkin. I have eaten it a lot. But have used it only for 2 things until now. As a vegetable in sambar. In pumpkin pie. In markets here, I couldn't find ash gourd and whatever I asked the guy for, he'd show me yellow pumpkin.


"Bhaiya, yeh to Kaddu hai. Mujhe Petha chahiye." (This is pumpkin, I want AshGourd)


"Arrey Madam, yehi to hai Petha." (This is Ash Gourd)


"Agar yeh Petha hai, to mujhe Kaddu chahiye" (If this is Ash Gourd, I want a Pumpkin)


"Kya Madam, Kaddu Petha, sab ek hi cheez hai." (Both are the same)


"Bhaiya, Agra mein Petha kaun si subzi se banta hai?" (What is the famous Agra sweet Agra Petha made of?)


"Pethe se" (From Petha!)


I am not exactly the epitome of patience. I can get exasperated quite easily. And this kind of conversation that leads nowhere can be more than trying. S asked me to buy it and make sambar and so I did. But the next day, I was adding Richa's blog to my Google Reader and I came across her Kaddu ki Subzi. I had to try it. And I did.

250g Yellow Pumpkin, chopped
1 Onion, chopped
1 Tomato, chopped
1 tsp Green Chilli Paste
1/2 tsp Ginger Paste
1 1/2 tsp Tamarind Paste
1/2 tsp Sugar
Salt to taste
1/2 tsp Turmeric Powder
1 tsp Chilli Powder
2 tbsp Coriander Powder

For the Tempering:
1 1/2 tbsp oil
1/2 tsp Mustard Seeds
1/2 tsp Cumin seeds,
1 tsp Fennel Seeds
7-8 Curry leaves

Heat the oil in the pressure pan. Add the mustard, cumin and fennel seeds. When the mustard splutters, add the curry leaves, green chilli paste, ginger and onion. Saute till onion turns translucent. Add the chopped and fry for a minute. Add the chopped pumpkin and saute for a minute. Add salt, turmeric powder, chilli powder and coriander powder. Add tamarind paste, sugar and 1/2 cup water and pressure cook 2 whistles.


Enjoy this side dish with rotis. It is simply amazing to note that a simple vegetable can taste so good. Thanks Richa.

Chhollia Ghasshi


I mentioned in an earlier post that food blogging does things to you. One of the things that it has done to me is broaden my horizons. While I have always been a non fussy eater, I haven't been a non fussy cook. There is a limited range of vegetables that I can cook. I've made varieties of dishes using those, but now I am willing to try and try some more.


Nupur's A-Z of Indian Vegetables celebrates X this week. She asks us to pick something exotic, something we've never eaten or never cooked with, she asks us to experiment.


So, could I disobey Madam Nupur's orders? No way! I thought a lot about what I could try out. I did try out 2 things this week that I never had an opportunity to earlier. But one's a copy from another blog. So I'm sending this one to Nupur, with loads of love.


Chana Ghasshi is a very popular konkani dish. Ghasshi made with anything is kind of popular. The Chana Ghasshi uses the small black chana which is soaked overnight and cooked. I found Chhollia (fresh green chana) in the market last week and decided that I could use that. I had never cooked with it and had eaten it once or twice in my life (roadside munching).

I thought, why not? If I can put any dry lentil, why not a fresh one? That is how I ended up with a Chhollia Ghasshi on my plate.

Ingredients:

250g Fresh Green Chana (Chhollia), cooked
1/4 cup Scraped Coconut
2-3 Red Chillies
1/2 tsp Kashmiri Chilli powder
1/2 tsp Turmeric Powder
1 tsp Black Gram Dal (Urad Dal)
1 1/2 tsp Coriander Seeds
1/4 tsp Fenugreek Seeds
1 tbsp Tamarind Paste (Add more or less to taste)
Salt to taste
1 tsp Oil

For the tempering:
1 tsp Oil or Ghee
1/4 tsp Mustard Seeds
1/4 tsp Asafoetida
7-8 Curry Leaves

Heat the oil in a small kadhai and fry the chillies, black gram dal, coriander seeds and fenugreek seeds. Grind this together with the chilli powder, turmeric powder, tamarind paste and coconut. Add a handful of cooked chhollia to this and grind to a paste.

In a vessel, combine the cooked chhollia, the paste and salt. Add some water to this and bring to a boil.

In a small kadhai, heat the oil or ghee, add the mustard seeds and asafoetida, and when the mustard splutters, add the curry leaves. Add this to the ghasshi and serve hot with rice and dali saar.

Friday, July 20, 2007

Apple Apricot Shake and a Meme


There are those who for whom breakfast is the most important meal of the day and then there are those who couldn't care less. I fall in the first category and, sadly, S falls in the second. Slowly and steadily, I am changing the way he looks at breakfast. Very often, I pack stuff for him so he can eat it when hunger strikes. On weekends, I am a little lenient. I have a little something and then we have brunch. On Sundays, we have a customary visit to Naivedyam to have Idli Vada, Mysore Masala Dosa and coffee. And a little something like this shake keeps me going until we drive to the restaurant.


Again, I drew inspiration for this from Amma. I helped her modify (read simplify) the recipe and I added some apricots for extra flavour.


Ingredients:


200ml Milk

1 Apple, cored, peeled and chopped

5-6 Apricots


Chop the apricots and microwave them with a tablespoon of water for 1-2 minutes.


Blend these with the apples in a mixer. Add the milk and blend for a minute or so until smooth. Pour it into a glass. Your breakfast in a glass is ready in minutes.


I've been tagged by Priyanka of
Lajawaab Aahar. I was tagged once before and played along at my other blog Random Thoughts. But I thought, "why not?".


  • I started talking when I was 9 months old.
  • I believed that every child had a mother tongue that was different from his/her father tongue.
  • I thought that all fathers were bald, and someone with ample hair on his head couldn't be anyone's father.
  • I have not had the good fortune of knowing my maternal grandparents.
  • I am the youngest of 14 grandchildren and am married to S, who is the youngest of 16 grandchildren.
  • I have had a very interesting career. I started out wanting to be an Immunologist, then decided on Ecology, from there on shifted to Ecotourism and then to Tourism Administration. However, because I was studying Tourism, and was in Pondicherry at the time, I was encouraged to learn foreign languages. That led to a career shift to Translation and Interpretation from where I finally landed in HR. Who knows what lies ahead?
  • My friends call me "Heathrow" because I am the "hub". I am touch with a lot of people regardless of how I came to know them. And because of me, several old friends have reconnected, and people have met and decided to get married.


And I, in turn, tag the following people:

Anita

Cynthia

Archana

Seema

Deepa

Sharmi


Play along if you have the time and inclination..... If you have already been tagged please ignore.


Fried Egg with Curried Mushrooms


Blogging, especially the food variety, does funny things to you. It makes you enthusiastic and sometimes leaves you a little frustrated because you so want to eat some if the stuff you read about, but you can't. Because you don't have the time or the ingredients or even the inclination to get into the kitchen.


I read Meeta's post on An Indian Breakfast. Her lovely egg rolls with a spicy mushroom stuffing made my mouth water. But the next morning, I was in a tearing hurry. I did have some mushrooms at hand and also had some chopped onions, and thought of making my favourite mushroom omelette. But I didn't have the time to beat the eggs and make an omelette. So, I did the next best thing.


I modified the recipe. So much so that it has no resemblance to the original. But it satisfied my craving and my hunger for that morning.


Ingredients:


2-3 small Mushrooms, chopped

1 small Onion, chopped

1 tsp Oil

1/4 tsp Chilli Powder

1/4 tsp Turmeric Powder

1/4 tsp Coriander Powder

1/4 tsp Cumin Powder

Salt to taste


Heat the oil in a frying pan. Add the onion and fry till the pieces turn translucent. Add the mushrooms and saute for a minute. Add the chilli, turmeric, cumin and coriander powders and salt and fry for a minute. Spread the mixture across the pan as much as possible. Break an egg over this. Allow to cook until the egg is set. If you like your sunny side up, take it off the pan. If you like the yolk cooked, then turn the egg over and cook on the other side for a minute or two.


Enjoy the masala fried egg with toast. This is truly yummy in the tummy (as my friend's son puts it).

Wednesday, July 18, 2007

Macaroni and Vegetables in White Sauce


Given the number of times in a month we eat pasta at home, it is difficult to believe that at one time I actually hated the stuff. Rewind to about 23-24 years ago. A time when macaroni wasn't even easily available in India. I always looked at the bottle on the top shelf that had some small twisted straws. I couldn't reach it. But I'd ask her each time I looked up at it, "Amma, taen kallen?" (Amma, what is that?) And she'd tell me, "Macaroni". "Macaroni mhalar kallen?" (What does Macaroni mean?) And she'd try to explain in the best way she could to a 6 year old. Then one day she made it because I was so enthusiastic about it. And I hated it. I ate it, but almost swore never to touch it again.


Almost, but not quite! Many years later, Amma decided to make the dish again. Macaroni and vegetables in white sauce. Suddenly, the same dish, made quite the same way, was yummy to say the least. I make it very often. I have modified the dish greatly from the time I learnt it. At times, my sauce is so creamy that I don't even bother adding cheese to it.


But the recipe is a keeper. Filling, nutritious and tasty. What more can one ask for in a meal?


Ingredients:


1 cup Macaroni (Cooked/Boiled with a little oil and salt)

1 cup Mixed Boiled Vegetables (Carrot, Beans, Peas, Cauliflower, Potato), chopped

1/4 cup Mushrooms, chopped

1/4 cup, Mixed Capsicum, chopped

1 tbsp Butter/Olive Oil

1 tbsp Flour

1 cup Milk

1/2 tsp Parsley

1/2 tsp Basil

1 tsp Chilli flakes

1/2 tsp Garlic Paste

Salt and Pepper to Taste

1 slice Low Fat Cheese (optional)


Heat the butter in a saucepan. Add the capsicum and fry for a minute. Add the garlic paste, parsley, basil and chilli flakes and fry for another minute. Add the flour and fry without browning the flour. Add the mushrooms and fry for about 30 seconds. (Do not fry the mushrooms for too long as the water in them gets released.) Add the milk and bring the mixture to a boil while stirring continuously. If adding cheese, add it at this point and stir the sauce well. As the sauce thickens, add the salt and pepper. Add the boiled vegetables and the macaroni to the sauce.


If you like, you could transfer this to a baking dish, sprinkle grated cheese on top and bake for 10 minutes at 450 F. I go through the trouble only if I am making it at dinner time and can enjoy it with Garlic Bread. This is something S and I have enjoyed at Ten Downing Street. This is my third feature on Eating out while eating in. The earlier ones being Kothu Roti and French Bread Pizza.

This is my entry to Waiter There's Something in My...Sauce, and hosted by Andrew of Spittoon Extra.

Tuesday, July 17, 2007

Kothu Roti


I blame this all on Nupur. She made this post a few days ago about "Eating out while eating in". And that is why I am craving restaurant food.

S broke his leg on Sunday and that rules out eating out for a while. (He actually tore a ligament and I am told that it is worse than having a bone fractured.) We're going to be eating out a lot for the next few days, at home that is! We started with French Bread Pizza and this is my next venture.


I have, very often, come home from a restaurant itching to recreate the dish I've just devoured. One of those has been the Kothu Parotta that I've had at Komala's in Madras. My last trip there was when we'd gone to book accommodation for the groom's party before my wedding. I ordered Kothu Parotta again and was so disappointed. The chef just dumped chilli powder over the parottas and I had to eat the dish with about 10 glasses of water. (Finally, Appa said to order a plate of idlis to undo the damage!)


Someday I'll be able to make parotta all by myself. These are best savoured at roadside shacks and Puru's opposite the Pondicherry University campus will go down in my books as one of the best Parotta Kurma joints. My dear readers may note that a parotta is very different from a paratha and the two are not the same bread. The parotta has saved me on many an occasion from the "the-mess-food-is-lousy-hence-I-will-go-to-bed-hungry" syndrome.


I had some rotis in the fridge. They were made on Saturday morning and we were fully expecting to eat them for lunch. But S went to work and when he came back it was already 4 p.m. I was busy blogging all day and didn't get up to make anything to go with the rotis. When S got home, he quickly made 2 egg rolls and we ate them before heading out. Our rotis usually have no fat in them and that makes eating them any day after they're made, rather difficult.


But then again, I am not given to wasting food or randomly giving it away. So, when I was working from home on Monday, to help S at home, I decided to use rotis instead of parottas and make Kothu Roti instead of Kothu Parotta! I was making this purely from my memory of the taste.


6 Rotis, torn into bits

1 large Onion, sliced

2-3 medium Tomatoes, chopped

1 tbsp Oil

1/4 tsp Mustard Seeds

1/4 tsp Asafoetida

7-8 Curry Leaves

1/2 tsp Turmeric Powder

1 tsp Chilli Powder

1 tsp Cumin Powder

1/2 tsp Coriander Powder

1 tsp Green Chilli paste

1/2 tsp Ginger paste

1 tsp Pav Bhaji Masala (I used MDH)

Salt to Taste


Heat the oil in a kadhai and add the mustard seeds and asafoetida. When the mustard splutters, add the curry leaves, ginger and chilli pastes, and onions. Fry the onions for a couple of minutes. Add the tomatoes and fry for 2-3 minutes. Add the chilli, turmeric, cumin and coriander powders and fry for a minute. Add the pav bhaji masala and fry for another minute or two. Add the salt and the roti bits. Mix well. Cover and cook for a couple of minutes and then cook without the lid for a couple of minutes more.


Enjoy this piping hot. Wash my roti version of Kothu Parotta down with a glass of buttermilk. It'll be a treat, I promise.

Sunday, July 15, 2007

French Bread Pizza


Until a few years ago, there was a quaint little restaurant in Bangalore, near the junction of Residency Road and Brigade Road, that kindled my curiosity enough to walk in and the experience there made me go back. Again and again. This restaurant was French Bread Pizza.


All items on their menu were pizzas. Only they were made using the famous baguette as a base. Think of this as a large, really large piece of garlic bread with all the toppings. They served these little wonders on wooden holders specially designed to hold the baguette. When I finally moved back to Bangalore 2 years ago, the place, much to my utter disappointment, had shut down and given way to a Chettinad restaurant. Maybe it wasn't viable enough a business. I hope they come back into business because they've given me several moments of satiated happiness. The kind that only comes from having eaten a good meal.


Last evening, we went to Galleria, a shopping complex close by and walked in to the Grand Plaza bakery. There we found some fresh baguettes. I remembered that I had everything at home to recreate the French Bread Pizza magic at home. Ever since my trip home last month, I've been preparing to make Amma's signature pizza at home. But the incidents of the past 2 weeks didn't allow me to make anything so elaborate. This seemed perfect.


Ingredients:


1 Baguette

For the sauce:

1 Onion, chopped finely
2-3 medium Tomatoes, chopped finely
1 Capsicum, chopped finely (I used small portions of all 3 colours)
4 Button Mushrooms, chopped finely
2 tbsp Tomato Puree
1 tbsp Tomato Ketchup
1 tsp Sugar
1 tsp Oregano
1/2 tsp Pepper
1/2 tsp Chilli Flakes
1 tbsp Olive Oil
Salt to Taste

2-3 Olives
100g Grated Cheese
Some oil/butter for glazing the bread

Slice the baguette in two and chop in half. You will be left with 4 quarters. Apply some butter or olive oil to the flat surface of each piece and grill for 3 minutes.


In a pan, heat the oil and add the onions. Fry for a minute or two. Add the capsicum and mushrooms and fry for 2-3 minutes. Add the oregano, chilli flakes, salt, sugar and pepper and fry for another minute. Add the tomatoes and fry for 2-3 minutes. Add the puree and ketchup and cook the mixture for a couple of minutes.


Spread the sauce over the grilled bread pieces and add the olives on top.


Sprinkle grated cheese over the slices and bake in an oven at 220 C for 7-8 minutes and then on grill for 3-4 minutes.


Enjoy this when hot with a glass of milk, coke, beer or breezer. I am sure that a glass of iced tea will go very well with this too.


This sauce is Amma's signature sauce and I will soon be putting up the recipe for her pizza as well. Initially, her sauce used to be only onions and tomatoes and any other toppings, we'd put over the sauce and then sprinkle cheese on it. I suggested to her that if she adds them in the sauce, they would imbibe the flavours of the sauce. The addition of ketchup was also my idea. Last night, I went ahead and added some puree and some chilli flakes to the sauce. No one was complaining!

This is my entry to Waiter There's Something in My...Sauce, and hosted by Andrew of Spittoon Extra.

Saturday, July 14, 2007

Muttai Dosai (Egg Dosa)


My brother ate a lot of street food in Madras. I have suffered from a host of allergies and illnesses that put loads of restrictions on my eating. As an adult, I know how to balance my diet and not suffer endlessly because I ate something I shouldn't have. When I was younger, I don't think my parents trusted me enough to judiciously choose.


When H started college, our exposure, as a family, to Madras beyond the IIT campus increased a great deal. He'd come back and tell us about what he ate at the college canteen or at the tea stall opposite Anna University. One day he told me that he ate a Muttai Dosai. I thought that was the Tamil name for an omelette and I thought, "Big deal!"


Years later, when I went to University, I visited a friend's uncle and aunt. When you're a hosteler, everyone is always thinking of feeding you. As soon as I landed up at their place, the lady asked me what I'd like to eat. The poor eater that I am, I always say no to food offered to me at odd times. But she insisted and asked me if I eat eggs. I said yes. She said, "Appo unakku muttai dosai tharen" (Then I'll give you an egg dosa.). I thought I knew what I was getting. After 5 minutes, I got something that looked like a dosa . Wait, it was a dosa. And while the dosa was being made, an egg had been broken over it. So, this was the muttai dosai that H talked so highly of. One bite and I was hooked.

I taught Amma how to make this and she did. But she added her own touch. Read on and you'll find out what she did to make her signature muttai dosai.


Ingredients:


2 eggs, beaten lightly
1 Onion, finely chopped
1 tsp Coriander leaves, finely chopped
1/2 tsp Chilli Paste
1/2 tsp Ginger Paste
Salt to Taste

Oil for frying


Mix the onions, coriander, chilli paste, ginger paste and salt with the beaten eggs and keep aside.


Heat a tawa and proceed to make a dosa as illustrated here. When the dosa begins to brown at the bottom, spoon some of the egg mixture on to it and spread it over the dosa. Pour a little oil around the dosa. When the egg begins to cook, turn the dosa around.


When the egg is cooked, flip the dosa and enjoy it with sauce or chutney or anything you like.

Yelimicha Sevai (Lime and Rice Vermicilli)


When we were growing up, things weren't available as easily as they are today. Things that we take for granted today. Sevai is a dish made out of rice flour and is a super duper hit in most homes. Amma made this quite often and treated us to both Iyengar dishes and the ever popular konkani dish, sevaiya rassu. The effort that went into it was quite enormous and hats off to the lady for doing all of this and more and managing a full career. You can read about the process here.


Nowadays, Concorde instant rice sevai is available in the markets and it really makes life simple. I agree that it isn't 1/10th as tasty as the freshly made sevai, it is less than 1/20th the effort. So, there is a compromise, no doubt.


Lunch is the most challenging meal that I cook. I have to think about stuff that tastes good even when cold (S doesn't have a microwave at his office). I try and pack in as much nutrition as I can, but then I don't bother making every meal a fully balanced one. As long as we're eating the right stuff throughout the day, I think that's fine. But since we take a fruit box and a curd box everyday, regardless of what the main meal consists of, I worry a lot less.


Ingredients:

1 packet Concorde Instant Rice Sevai

Juice of 1 lime

1/2 tsp Turmeric Powder

Salt to taste

For the tempering:

1 tsp Oil

1/4 tsp Mustard seeds

1/4 tsp Asafoetida

7-8 Curry Leaves

1/4 tsp Urad Dal

1/4 tsp Chana Dal

1 Red Chilli

2 Green Chillies, slit

Prepare the rice sevai as per instructions on the pack and keep aside.

Mix the lime juice with the salt and turmeric powder.

Heat the oil in a kadhai. Add the urad and chana dals. When the urad dal begins to change colour, add the mustard and asafoetida. When the mustard splutters, add the curry leaves, green chillies and red chilli. Take it off the stove.

Add the prepared sevai and pour the lime juice mixture over this. Mix well taking care not to mash the sevai. Garnish with coriander if you like.


Y is for Yelimicha Sevai and this is my entry to Nupur's A-Z of Indian Vegetables.


Since this dish uses chillies, this is my entry to the JFI event hosted by Nandita of Saffron Trail featuring chillies.

Vellarikkai Pachadi (Cucumber in Curd)


All of us are always trying to make our meals more interesting. S thinks I am now doing all this because of my food blogging addiction. But by his own admission, I'd not repeated a dish in the first 3 months of our marriage. Not one repetition for any meal. And we didn't even have a gas connection in those days. I had a 45 year old electric stove with no heat regulator that has been passed down from Amma to me. I cooked on that for 3 months. We got our gas connection either in late December or in January of this year. (Yup! We've only been married 9 months.)


So, all I'm really doing differently now is cooking on a 4 burner stove and religiously taking pictures of whatever I make. Here's a dish that doesn't require much cooking. It serves as a great accompaniment to sambar rice, bisi bele huli anna, vangi bhat,etc.
1 Cucumber, peeled and cubed
1 cup Curd
1/2 tsp Chilli paste
1/2 tsp Ginger Paste
For the tempering:
1 tsp Oil
1/4 tsp Mustard Seeds
1/4 tsp Asafoetida
7-8 Curry Leaves
Salt to taste
Whip the curd and add a little water. Add the ginger and chilli pastes and salt and mix well. Add the cucumber pieces.
In a small kadhai, heat the oil. Add the mustard seeds and asafoetida. When the mustard splutters, add the curry leaves. Pour this over the cucumber curd mixture. Chill for an hour before serving. Garnish with coriander leaves if you wish.

Urulaikizhangu Karumadhu (Potato Curry)


Also known as Potato Roast, Potato fry, at my place it is known as Urulaikizhangu Karumadhu. I can safely bet that this is the first dish that is part of a main meal that most kids in Tamil households would learn to make. It is simple and can transport you to heaven and back before you can say 'Potato'.

Ingredients:

4 Potatoes, boiled, peeled and cubed
2 tsp Oil
1/4 tsp Mustard Seeds
1/4 tsp Asafoetida
1/4 tsp Urad Dal
1/4 tsp Chana Dal
7-8 Curry Leaves
1/2 tsp Turmeric Powder
1 tsp Chilli Powder
Salt to taste

Heat the oil in a kadhai. Add the urad and chana dals. When the urad dal begins to change colour, add the mustard and asafoetida. When the mustard splutters, add the curry leaves and the potato pieces.

Add the turmeric powder, chilli powder and salt. Mix well. Cover and cook for 5-7 minutes. Remove the lid and mix the potatoes. Simmer for 10 minutes, tossing the potatoes every 2-3 minutes till the potatoes are nicely browned. This is a great accompaniment to rice with sambar, rasam, dal... in short, a great accompaniment to anything.

Vengaya Sambar (Shallot Sambar)


There are things that I tolerated as a child. Because I was the no-fuss variety. It is not like I loved everything dearly and relished everything Amma put before me. Almost everything, but not everything. Every Sunday, breakfast at our place used to be Idli, Vada, Sambar and Chutney. This used to spill over to Mondays as well. The sambar almost always used to be vengaya sambar (onion sambar). And the onions were always shallots. My brother loved this and now I think that maybe that could have been one of the reasons I disliked it.


We found shallots at the INA market some time ago and decided to bring some home. But we quickly forgot about those. The burglary kind of blanked me out for sometime. S loves sambar and I love dal and rasam. But I can eat sambar. After all, I grew up eating different types of sambar at least 3 times a week.


I decided to make this sambar. But I didn't want to make it the usual way with sambar powder. That evening, my craving was for sambar made with freshly ground masala. So, another call to Amma and I was ready to rule the world.


Ingredients:

1/4 kg Shallots
2/3 cup Toor Dal

For the masala:

1/2 tsp Oil
1 tbsp Urad Dal
1 tsp Asafoetida
3 Red Chillies
1 tbsp Coriander Seeds
2 tbsp Chana Dal
1 tsp Fenugreek Seeds
1 tbsp Cumin Seeds
1/2 tbsp Peppercorns
2 tbsp Scraped Coconut

For the tempering:

1 tsp Oil
1/4 tsp Mustard Seeds
1/4 tsp Asafoetida
7-8 Curry Leaves
1/4 tsp Fenugreek Seeds
1 Green Chilli, slit
1 Red Chilli
4 tbsp Tamarind Paste
Salt to Taste


Cook the dal and shallots in a pressure cooker with enough water.


Heat the 1/2 tsp oil in a small kadhai. Add all the ingredients for the masala except the coconut. Roast for 4-5 minutes on a low flame. Add the coconut and fry for another minute. Grind to a fine paste.


Heat oil in a vessel. Add the mustard seeds and asafoetida. When the mustard splutters, add the curry leaves, fenugreek seeds, red and green chillies and fry for a minute. Add the masala and fry for a couple of minutes more. Add the tamarind paste and salt and bring the mixture to a boil. Add the cooked dal and onions and simmer for 5-10 minutes.

This goes well with idlis and dosas, but can also be eaten with rice and potato curry.

A plateful of steaming hot rice, a spoonful of ghee, ladlefuls of this sambar over it, appalams and potato roast on the side. See you when I'm back from heaven.

Dosa


Preeti, a senior of mine from University, invited me over to her place soon after I got married. I hadn't yet moved to join S in Gurgaon at the time. She was telling me a lot about managing a kitchen and work. I told her that Amma had asked me to take the Ultra Grind tabletop grinder with me to Gurgaon and that I thought it was a waste. I am not the idli-dosa batter making type. She told me to shut up and just carry it along as having dosa batter in the fridge meant that you'll never go hungry.


I am yet to operate the Ultra Grind on my own, but I use my mixer to make dosa batter and while the batter doesn't become as voluminous, the dosas look and taste quite the same. And I can't agree more with Preeti. Having dosa batter in the fridge means that a quick meal is possible at any time of the day. That too when I have a series of thokkus and podis in the pantry.

I don't allow my batter to sour as I love my dosas that way. In fact, I am one of those who can have dosas made out of fresh batter. It's one of those temptations that I cannot resist.

Ingredients:

1/2 cup Urad
1 cup Rice (Boiled or Raw)
1 tsp Fenugreek Seeds
Salt to taste


Oil for frying


Wash the urad and rice. Add the fenugreek seeds and soak in plenty of water overnight. (At least 4-5 hours). Wash well and grind using a little water. Add salt and water to dilute it as required. (Don't add too much water as the dosas will not turn out well.)


Heat a tawa and smear a little oil on it. Simmer the flame and pour a ladleful of the batter in the centre of the tawa. Quickly spread the batter while forming concentric circles (spiral actually!).


Add a little oil on the sides and centre. Usually not more than 1 small spoonful per dosa. When crisp, carefully turn the dosa over and allow the other side to cook a little (this is not done in restaurants, but I prefer to turn my dosas and toast them on both sides).


Turn the dosa back and fold in half. Serve with chutney, sambar, or molaga podi or a combination of all these.

Bread Upkari


Upkari is the konkani name for a curry that's made with tadka, cooked in its own steam and is served with scraped coconut. (At least in my books, that's what it is!)


This is probably called Bread Upma or something like that elsewhere, but for me, it is Bread-a Upkari, which literally means, upkari made with bread.


Usually made with left over bread, I sometimes start craving this when we get a fresh loaf at home. I remember a trip to Adyar Bakery House with Amma many years ago. We came back home with a huge loaf of brown bread and as soon as we got back home, I said to Amma, "Makka atta breada upkari khaunchasa. Karta vey?" (I want to eat Bread Upkari now. Will you make it?) She laughed and said that it is usually made out of old bread and that her mother would have laughed had she known that someone was making it out of fresh bread. Even now, sometimes I feel like making this when we buy a loaf. But I find that there are so many things one can make with a loaf of fresh bread and so I leave this for the third day.


6-8 slices Bread, cut into cubes

1 tbsp Oil

1/4 tsp Mustard Seeds

1/4 tsp Asafoetida

1/4 tsp Urad Dal

1/4 tsp Chana Dal

7-8 Curry Leaves

2-3 Red Chillies

1 tsp Sugar

Salt to taste

Scraped Coconut for garnishing


Heat the oil in a kadhai. Add the mustard seeds, asafoetida, urad and chana dals. When the mustard splutters, add the curry leaves and the red chillies. Add the cut bread pieces and fry for a little while.


Dissolve the sugar and the required amount of salt in a little water and pour over the bread. (Rememner that the bread is already salted). Cover and cook for 2-3 minutes. Remove the lid and allow some pieces of bread to brown. Garnish with scraped coconut and enjoy this at any time of the day.

Usal Pav


I was born in Bombay and have spent countless summers there. Amma was an out and out and Bombay girl until a few years ago when she, maybe because of my influence, became a hard-core Madras ponnu. As with any city, you can take a person out of Bombay, but you can't take Bombay out of a person. Mother and daughter enjoy doing things together in Bombay even today. Drinking sugarcane juice in Matunga, eating Pav Bhaji in Vile Parle, Pani Puri at KP, or Vada Pav near Churchgate. I, on my own, have done a lot more street eating than even some of my cousins who have lived there all their lives. I can tell you where in Nariman Point you get the best Sev Puri and where to go for the best dosas. I suffer from GERS and IBS and have not let any of this affect my eating habits. I am careful where I have to be and carefree at others, but never careless about what, how much and where I eat.


I'd never eaten Usal Pav in Bombay. The first time I had it was in Baroda, at a local joint. Misal, I'd had when my friend Prajakta's dad made it for me in Madras. But a few years ago, my aunt (yet another amazing cook)made Usal Pav with the help of her neighbour for me when I was visiting. (Of all the 14 grandchildren in the house, I'm the youngest but the least finicky about food. That means that all aunts have wanted to make things for me, because they always knew I'd eat without a fuss. Spice, I cannot tolerate beyond a point, but, that apart, I've always been a good girl!)

I was then visiting Bombay from Hyderabad and my aunt gave me a packet of Usal mix. I never used it. I didn't have the heart to open it and try my hand at it. The packet went with me from Bombay to Hyderabad and then to Bangalore before it travelled yet again with my stuff to Gurgaon. I'd been meaning to make Pav Bhaji for ages now, and then I found this packet of Usal mix. Still good after all these years. I chucked the Pav Bhaji idea and settled for Usal Pav. This was going to be my big day.


The packet contained 7 types of lentils. Moong, Matki, Green Chana, Brown Chana, Chawli, Vaal, Vatana. I made a quick call to my mami and asked her how to proceed. She told me I could use any number of mixed lentils and didn't have to rely on a packet of Usal mix.


Ingredients:

500g Mixed Lentils (soaked overnight and cooked)

2-3 Onions, chopped

3-4 pods of Garlic, chopped

1 tbsp Ginger-Chilli-Garlic paste

2 tbsp Oil

2-3 Tomatoes, chopped

1 tsp Turmeric Powder

2 tsp Chilli Powder

1 tsp Garam Masala

Salt to Taste

8 pieces Pav

Butter to roast Pav

To serve:

2 tbsp Coriander, chopped

2 Onions, chopped

200g Sev

Lime wedges


Heat 1 tsp of oil in a kadhai and fry the onions. When the onions turn brown, add 1-2 pods of garlic, chopped. Add the ginger-chilli-garlic paste and fry for 2-3 minutes. Cool this mixture and grind to a fine paste.


Heat the remaining oil. Add the remaining garlic and fry for a minute. Add the ground paste and fry until the oil separates from the paste. Add the turmeric powder, chilli powder and garam masala. Add the chopped tomatoes and fry for 2 minutes. Add plenty of water and salt. Add the cooked lentils and simmer for 10-15 minutes. Mash the mixture a little and add some chopped coriander leaves if you like.


Slit each pav in the centre and smear some butter on the cut surface. Toast on a hot tava untl the sides are brown.


Serve the usal in a bowl. Sprinkle the onions, coriander and sev over this. Serve with toasted pav and lime wedges. (I served everything separately because that way people could mix and match the amount of onions and sev on their own.)

Once the lentils have been soaked, the entire dish doesn't take more than 20-25 minutes to put together. So, this goes to Mallugirl’s Express Cooking challenge.

Watermelon Ginger Punch

I wanted to make a nice konkani dish with watermelon rind for the AFAM event. But the watermelon we bought had almost no white portion. So, I decided to make this easy breezy punch.


This is a very simple drink that I enjoy in the morning.


Ingredients:


1 cup Watermelon cubes, deseeded
1 tsp Ginger paste
Juice of 1/2 a Lime
Sugar or Black Salt to taste


Mix the watermelon, ginger and sugar or black salt in a blender. Add the lime juice and mix well. Add some crushed ice to this if you wish. (Since I have it as a morning drink, I don't add the ice.)


This is my entry to the AFAM event hosted by Jai and Bee of Jugalbandi. The theme for July is Watermelon.

Fruit Stew


My cousin lived in Coonoor, Nilgiris, for a long time. She's one of the most enthusiastic cooks I have met. By self admission, she's also lazy. (Do I see an older version of myself??) During one trip of ours, I remember we bought an assortment of fruits and brought them home. She made this stew with pears, plums, peaches, pineapples and apples and served it with fresh cream. I made it several times since I learnt it, but hadn't made it in years.


Summer is all about fruits, isn't it? I just love the peaches, pears, cherries, apricots and litchis that wrestle for space along with the mangoes. I'd picked up a kilo of cherries to make cherry ice cream for Meeta's Monthly Mingle, but thanks to the burglary, they just got ignored. I also bought some plums last weekend that were extremely sour. So, I decided that they were all going into the stew.


My cousin used to peel and stone all the fruits before putting them in the stew. I need as much fibre as I can lay my hands on and put the fruits in as they were. I told S that we could have a spitting contest later on for the seeds.


I used:

250g Plums

500g Cherries

1 Green Apple, chopped

4-5 tsp Sugar

1 tbsp Fresh Cream


In a large vessel, I added the fruits along with the sugar and enough water to cover the fruits. I allowed this mixture to boil until the fruits became soft. I mashed this mixture with a potato masher and somehow got the seeds out. (I wasn't planning on doing this, but when they all came out sans the flesh, I decided to remove the seeds and ditch the contest.)


I served this with some cream. The next time, I'm going to add all my fruits. There are beautiful pears and peaches out there that would impart a lovely flavour to the stew.

Coriander Rice (Version 2)


On some days I crave things. Things that are unknown to me. There's a taste in my mouth that I want and I have no idea what dish I want. Fortunately for me, the last time happened was on a weekend. So I had time to think about what I might be craving and about what ingredients may go in to the making of that.


The result of this craving and the experiment that followed was a wonderful, aromatic coriander rice.


Ingredients:

1 cup Basmati Rice, washed
To be ground to a paste:

1 bunch Coriander Leaves, destemmed and cleaned
1 Onion
2-3 pods of Garlic
2" piece of Ginger
2-3 Green Chillies
1 tsp Cumin Seeds
Salt to taste

For the tempering:

2 tbsp Oil
1/4 tsp Cumin Seeds
Juice of one lime


Heat the oil in a pressure pan. Add the cumin seeds. When the seeds crackle, add the paste and fry for 2-3 minutes. Add the rice and fry for another minute or two. Add two cups of hot water. Cover and cook for 1 whistle.
When done, open the cooker. Add the lime juice. Mix the rice lightly with a fork. Enjoy with papads or vadams.

Tuesday, July 10, 2007

A Date with Maggi


I still remember the day when Nestle came to our school to launch Maggi. I was in Class 2. They distributed free packets to all the children. It was on that very day, that my lifelong affair with Maggi took its very first baby step.


There was a time when the flavours of Maggi were numerous. Masala, Egg, Chicken, Capsika, Sweet & Sour, Sambar Spice, Lasagna... I relished most of these (my regular readers would know by now which one I hadn't tasted) when I was growing up.


Hostel changed my life in more ways than
one. It was then that I started stocking Maggi packets, both noodles and soup, in my cupboard. I had a room heater and we've cooked full fledged meals when our classes would start and the mess would still be closed. But Maggi was the fallback option. ALWAYS.


In the late 90s, the Tastemaker for Maggi Masala changed considerably. It had a combination of garlic and coriander. I wasn't complaining, but I sure did miss the taste of good ol' Maggi. A few years later, they reverted to the original flavour. Good sense must have prevailed.


Over the years, I have modified the instructions on the packet and have had several successes. With the introduction of Maggi Vegetable Atta Noodles, the feeling that this may be junk food has also slipped into some dark corner. I haven't taken to the Dal Atta Noodles which is supposed to taste like Sambar. To a non native eater maybe, not to a seasoned tongue such as mine.


Here's a simple variation of Maggi Vegetable Atta Noodles.


Ingredients:


1 Packet Maggi Vegetable Atta Noodles

1 small Onion, chopped finely

1/4 of a Capsicum, chopped finely.

1/4 cup Mixed boiled vegetables (Peas, beans, corn, carrots)

1 tbsp Butter

1 slice Low Fat Cheese

1/4 cup Milk

1/4 tsp Garlic Paste

1 tsp Mayonnaise (optional)


Heat the butter in a saucepan and fry the onions and garlic. Add the chopped capsicum and fry for a minute. Add the contents of the tastemaker after 1-2 minutes and fry for a minute. Break the noodles into pieces and add to the mixture and fry for another minute. Add the boiled vegetables.


To this add 1.5 to 2 teacups (225 to 300 ml) of water and bring to a boil. Cook on high till the noodles are soft. Add the milk and cheese and blend in till the dish has a cheesy appearance. Add the mayo if you wish at this point.


Enjoy this as it is, or with toast. You'll begin to see Maggi in a different light after this experience.

Stuffed Capsicum


Despite the fact that its summer here, advancements in agricultural science ensure that we now get nice vegetables all year round in Delhi. In addition to the lauki, kaddu, tinda varieties, we also get carrots (sometimes), beans, capsicum and cauliflower.


S and I are both fond of capsicum and I find it to be a very versatile vegetable. Just one can change the identity of a dish. Add it to sambar and the aroma you get is so totally different. Add it to the normal potato curry and the resultant aloo shimla mirch is simply divine.

This was something I tried with Aloo Mash. It didn't turn out exactly the way I'd envisioned it would (yes, I actually envision my food - and even taste it in my mind - before I actually make it).


Ingredients:


4 Green Capsicum


For the stuffing

1 Cup Aloo Mash (2-3 potatoes, boiled and mashed)
2 Potatoes, boiled and mashed
1 tsp Ginger paste
1 tsp Green Chilli paste
1/4 cup Coriander

1/2 tsp Cumin-Coriander Powder

1/4 tsp Turmeric Powder
1/2 tsp Kashmiri Chilli Powder
Salt to taste


For the tempering:


1 tbsp Oil
1/2 tsp Cumin Seeds
1/4 tsp Asafoetida


Remove the stalks of the capsicum and keep aside.


Mix all the ingredients for the stuffing and fill the capsicum cups.


Heat oil in a kadhai. Add the cumin seeds and asafoetida. When the cumin seeds crackle, place the capsicum cups in the kadhai.


Cover and cook for 4-5 minutes. Uncover and carefully turn each capsicum so that the potato stuffing faces the kadhai..


Allow the tops to brown and crispen. Carefully take each capsicum out and serve.


This goes well with rotis, but I am sure it would go well with dal-rice or make for a nice snack as well.

Monday, July 9, 2007

Potato Curry in a hurry


This is a
very simple potato curry that I learnt from Amma. She makes this whenever she's in a hurry and doesn't have boiled potatoes at hand. She also makes this for long train journeys as this keeps for 1-2 days without going bad.

I made this last week to go with tomato rasam. We had a long residents meeting, at the end of which the only result was terrible hunger. To spend a day at work, travel 30 km to get back home, and spend 2 hours in useless discussions, with nothing ready at home, the last meal had at 1.30 p.m., and before you know it, it is 9.30: is not the best of feelings. Comfort food at its best.

Ingredients:

4 large potatoes, washed and scrubbed
1 tbsp Oil
1 tsp Cumin Seeds
1/4 tsp Mustard Seeds
1/4 tsp Asafoetida
1 tsp Chilli Powder
1/2 tsp Turmeric Powder
1 tsp Cumin-Coriander Powder
Salt to taste

Cut each potato (with the skin on) in two. Cut each half lengthwise in 2 and then cut finely width wise. You will have quarter circles (kind of triangular) pieces.

Heat the oil, add the mustard, asafoetida and cumin seeds. When the mustard splutters, add the chopped potatoes, salt, chilli, turmeric and cumin-coriander powders. Cover and cook for 4-5 minutes. When the potatoes are cooked, remove the lid and allow the potato pieces to crispen to a nice brown.

Enjoy this with hot steamed rice, with chapatis or as an accompaniment to dal or sambar or rasam rice. What I'm saying is: enjoy it anyway you like!

Tomato Rasam


The perfect comfort food for me. Rice and rasam. With a little potato curry in the side, or just papad. Soft, mashed rice on a plate. Hot rasam with loads of tomatoes poured over it. A little curry and papad to add that crunch. Could anyone ask for more?


I usually make rasam fresh. I cook dal with lots of water. Then I use the cooked dal to make sambar and the water to make rasam. Last week, I had some cooked dal and decided to make rasam.


Ingredients:

400 ml Dal Water (Use plain water if need be)

2 tbsp Cooked Dal

2-3 large Tomatoes, chopped (even halved)

1 tbsp Rasam Powder

1/4 tsp Asafoetida

Juice of 1 lime or 1 tbsp Tamarind Paste (I do a half and half)

Coriander Leaves for garnish

Salt to Taste


For the tempering:

1 tsp Oil or Ghee

1/4 tsp Mustard Seeds

7-8 Curry Leaves


In a vessel, take the dal water and dal and add the asafoetida, salt and rasam powder. Add the tomatoes and tamarind paste of and bring to a boil. (If using lime juice, do not add it at this stage. Add it at the very end and boil once.) Simmer it for 4-5 minutes.


In a small kadhai, heat the oil or ghee, add the mustard seeds, and when they splutter, add the curry leaves.

Add this to the rasam. Garnish with chopped coriander leaves.


You can drink this as a soup or have it with rice. One more of those dishes that I can actually eat everyday.

Saturday, July 7, 2007

Tomato Rice


Yet another of my one dish lunch box wonders. Amma's tried and tested recipe. Handed down, modified, and made very very often.

Ingredients:

1 cup Basmati Rice, cooked
2 Onions, sliced
4 Tomatoes, finely chopped
1 tsp Chilli Powder
1 tsp Turmeric Powder
1/2 tsp Green Chilli Paste
1/2 tsp Ginger-Garlic Paste
1 tbsp Oil
1tsp Cumin Seeds
1/2 tsp Mustard Seeds
1/4 tsp Asafoetida
Salt to taste

Heat the oil in a kadhai and add the mustard, asafoetida and cumin seeds. When the mustard splutters, add the onions and fry for 2-3 minutes. Add the chopped tomato and fry for a minute or two more. Add the chilli powder, turmeric powder, green chilli paste, ginger-garlic paste and salt. Add the cooked rice, cover and cook for 5 minutes.
Garnish with coriander leaves if you like.

Jeera Rice


This isn't the usual jeera rice that's served in restaurants. The twist in this recipe is the addition of onions. I made this simple rice to go with Bottle Gourd and Moong Dal.

I'm not sure if this can be eaten as it is, but I am pretty certain that it will go well with most gravies.

Ingredients:

1 Cup Basmati Rice, washed and drained
1 Onion, sliced
1 tbsp Cumin Seeds
1 tbsp Oil
Salt to taste

Heat oil in a pressure pan and add the cumin seeds. When the seeds crackle, add the onions and saute for a minute or two. Add the rice and saute for another minute. Add the salt and 1 3/4 cups of hot water. Cover and cook for 1 whistle. Mix lightly with a fork when done.

Beetroot Chutney Version 2


After the success of my Beetroot Chutney, I decided to try a different version. This, however, is a little more elaborate than the earlier one.


Ingredients:

1 large beetroot, sliced
3 green chillies
3 pods of garlic
1 Onion
Salt to taste

For the Tempering
1 tsp Oil
1/4 tsp Mustard Seeds
1/4 tsp Asafoetida
4-5 Curry Leaves

I cooked the beetroot slices in the microwave for 2-3 minutes with very little water. I ground this with all the ingredients together. In a pan, I prepared the tempering and added the beetroot paste. I cooked this for 2-3 minutes and the resultant mixture was a little dry.
We ate this with rice and it tasted absolutely yummy.
This is my entry to Weekend Herb Blogging, started by Kalyn and hosted by Anna of Anna's Cool Finds.

Bottle Gourd and Moong Dal


Bottle gourd would feature in my list of "always eaten-never made" vegetables. About three years ago, I was spending my first summer in Hyderabad and suffered a mild heatstroke. The doctor who treated me told me to eat a lot of gourds in summer as they were good for health. I came home and called Amma to ask about this dish because I liked it a lot.


This dish isn't usually as watery as this, but since I was serving it with jeera rice, I made it a little watery.


Ingredients:


1 meduim sized Bottle Gourd, peeled and chopped

1/2 cup Moong Dal, washed

1 tsp Oil

1/4 tsp Mustard Seeds

1/4 tsp Cumin Seeds

1/4 tsp Asafoetida

1/2 tsp Green Chilli paste

1/2 tsp Ginger paste

7-8 Curry Leaves

1/4 tsp Turmeric Powder

1/4 tsp Chilli Powder

Salt to taste


Heat the oil in a pressure pan. Add the mustard seeds, cumin seeds and asafoetida. When the mustard splutters, add the curry leaves, ginger and chilli pastes and fry for a minute. Add the dal and saute for another minute before adding the turmeric and chilli powders. Add the bottle gourd pieces and salt. Add 1-1.5 cups of water and cover and cook for 1-2 whistles. Garnish with coriander leaves if you like.


Serve hot with rice or rotis.

Sauteed Corn Niblets


After a sumptuous breakfast of Idli-Vada and Mysore Masala Dosa at Naivedyam, a south Indian restaurant close by, and our weekly grocery shopping, I was in no mood to make lunch. I made Butter Garlic Water Chestnuts. That was over before I knew it. And we were still hungry. I had a can of corn niblets and decided to make a similar saute. I remembered a dish I've had often at Mainland China but that uses batter fried corn niblets and I wasn't about to toil over the stove on a hot afternoon.

I tried this and it came out quite well. Needless to say, this also disappeared before I could say Sauteed Corn.

Ingredients:

1 can Corn niblets, drained
1 Onion, finely chopped
1 tsp Chilli flakes
2 tsp Garlic, finely chopped
1 tsp Soy Sauce
Salt to taste
1 tsp Oil

Heat the oil in a saucepan and add the onion and garlic. Fry for a couple of minutes and add the chilli flakes, salt and soy sauce. Add the corn and saute for 2-3 minutes. Relish it hot as it is or as a topping on canapes.
This is my entry to Weekend Herb Blogging, started by Kalyn and hosted by Kalyn herself.

Dal Palak


A simple, nutritious dal that goes well with rice and rotis alike. If you have cleaned spinach ready, this dal is ready in a jiffy. Else, it can be a bit of a pain.

Ingredients:

½ cup Toor Dal, washed
1 bunch Spinach, cleaned and chopped
1 tsp Oil
1 Onion, sliced
¼ tsp Cumin Seeds
¼ tsp Mustard Seeds
¼ tsp Asafoetida
½ tsp Chilli Powder
¼ tsp Turmeric Powder
1 tsp Green Chilli paste
1 tsp Ginger Paste
½ tsp Coriander Powder
½ tsp Cumin Powder
Salt to taste


Heat the oil in a pressure pan. Add the mustard, cumin and asafoetida. When the mustard splutters, add the onions, ginger and chilli pastes and fry for a couple of minutes. Add the chilli, turmeric, coriander and cumin powders and fry for a minute more. Add the chopped spinach, dal and salt. Fry for a 1-2 minutes and add 1.5 cups of water. Cover and cook for 3-4 whistles. When the pressure is released, open the cooker and mix the dal well. Serve
with rice or rotis.

If you like thicker dal, or would like to make this as a side dish rather than a runny dal, reduce the amount of water in the recipe.

This is one of my entries to the RCI: Punjabi Cuisine which is being guest hosted by Richa of As Dear As Salt.

Paneer Paratha


Another very simple stuffed paratha that makes for a light meal. Breakfast, brunch, lunch or dinner, I can eat these at any time of the day.

Ingredients:

For the dough:
1 cup Whole wheat flour
1 tsp Oil
1/4 tsp Sugar
Salt to taste

For the stuffing:
100g Paneer, crumbled
1 tsp Ginger paste
1 tsp Green Chilli paste
1/4 cup Coriander Leaves, chopped
Salt to Taste

Oil for frying
Flour for rolling


Take a little water in a bowl. Add the salt, sugar and oil. Mix well until the sugar crystals dissolve. Add the flour and mix well. Knead the dough, adding a little water at a time as needed. Keep aside.

Mix all the ingredients for the stuffing.

Roll out small portions of the dough. Place a little bit of the stuffing in the centre and bring the edges together and seal. Roll these using a little flour taking care to ensure that the filling doesn't spill out.


Toast on a tawa on medium flame using a little oil for each paratha. Enjoy with tomato sauce or curd and pickle.


This is one of my entries to the RCI: Punjabi Cuisine which is being guest hosted by Richa of As Dear As Salt.

Also, since W is for Whole Wheat Paneer Parathas, this is my fourth W entry to Nupur's A-Z of Indian Vegetables.

Misi Roti with leftovers


During my trip to Punjab, my friend’s mother made this roti for breakfast. I asked her if this contained besan. She laughed and said, “Among other things”. She said she puts any leftover stuff in it and makes the dough.

A day or two before the burglars cleaned my house, I had decided to clean my fridge and kitchen. I had loads of stuff in my fridge and decided to use them all.


I had some left over wheat atta in the fridge. To this I added some maida, besan, paneer paratha stuffing, the leftover kadhi from gatte ki kadhi, dal palak and moong dal sambar. I kneaded this dough thoroughly and rolled out the rotis. I toasted them evenly on both sides and served them for breakfast with curd and Punjabi mango pickle.
This is one of my entries to the RCI: Punjabi Cuisine which is being guest hosted by Richa of As Dear As Salt.

Wheat Dalia Upma


Here's yet another upma variant. Wheat dalia or bulgur replaces rava in this easy recipe. Sometimes you realize that healthy eating needn’t necessarily mean tasteless food.


1 cup Wheat Dalia
1 Onion, sliced
1 tsp Oil
1 tsp Cumin Seeds
¼ tsp Mustard Seeds
7-8 Curry Leaves
½ tsp Chilli Flakes
1 tsp Green Chilli paste
1 tsp Ginger Paste
Salt to taste

Heat the oil in a kadhai. Add the mustard, cumin and asafoetida. When the mustard splutters, add the curry leaves, onions, ginger and chilli pastes and fry for a couple of minutes. Add the dalia and fry the entire mixture for 3-4 minutes. Add 2 cups of boiling hot water and salt to this. Mix well, cover and cook for 5-7 minutes on a low flame.


Enjoy it as a snack or a light meal. You could team it up with dal, sabzi, or sambar and make it a complete meal.

W is for Wheat Dalia. And this is my third W entry to Nupur's A-Z of Indian Vegetables.

Mixed Vegetable Semia Upma


I must be the biggest upma fan there ever was. Like I mentioned in an earlier post, I can make upma out of anything and eat it. I am itching to make upma out of corn next. I hope to find corn dalia in the market shelves some day and I shall try to make that.

This, however, is a pretty standard upma. But it looks and tastes so good that I can make this every week and not tire of it.

Ingredients:

1 cup Roasted Vermicelli (Semia)
1 Onion, chopped
1 cup Mixed vegetables, chopped and cooked (I used carrots and beans)
1 tbsp Oil
1/2 tsp Urad Dal
1/2 tsp Chana Dal
1/4 tsp Mustard Seeds
1/4 tsp Asafoetida
7-8 Curry Leaves
½ tsp Chilli Powder
¼ tsp Turmeric Powder
1 tsp Green Chilli paste
1 tsp Ginger Paste
Salt to taste
Coriander Leaves for garnish


Heat the oil in a kadhai. Add the urad and chana dals. When the urad dal begins to brown a little, add the mustard and asafoetida. When the mustard splutters, add the curry leaves, onions, ginger and chilli pastes and fry for a couple of minutes. Add the chilli and turmeric powders and fry for a minute more. Add the mixed vegetables and the vermicelli and fry the entire mixture for 1-2 minutes. Add 1 cup of boiling hot water and salt to this. Mix well, cover and cook for 5-7 minutes on a low flame.

Mix well, garnish with coriander leaves and enjoy it as a snack or a light meal.

Paneer in Coconut Milk


I found this recipe in one of Tarla Dalal’s books. I can’t remember which book it was, I can’t remember the name of the recipe, come to think of it, I don’t even actually remember the recipe. The book is at Amma’s place and I make this recipe from memory. It turns out just as nice as I remember it. I add the paneer pieces as they are and don’t fry them first as the recipe calls out.

This dish goes very well with rotis and can be prepared in a matter of minutes if you have the ingredients ready.

Ingredients:

200g Paneer, cubed
200 ml Coconut Milk
1 Onion
1-2 Green Chillies
2 pods of Garlic
1” piece of Ginger
1 tsp Oil
1 tsp Cumin Seeds
¼ tsp Asafoetida
Salt to taste

Grind the onion, green chillies, ginger and garlic together to a paste.


Heat oil, add the cumin seeds and the asafetida. When the cumin seeds crackle, add the onion paste and fry for 2-3 minutes. Add the coconut milk and salt and bring to a boil. Add the paneer cubes and cook for a couple of minutes. Serve hot with rotis.

Cinnamon French Toast


After sampling Eggless Masala French Toast, I wanted to have the usual french toast. But then again, I didn't feel like the usual stuff. So, I decided to bring in a "kahani mein twist" (a twist in the tale). I added cinnamon to the egg-milk mixture and had lovely breakfast this morning. Topped with maple syrup and eaten while hot, can there be a better start to the day?

Ingredients:

4 slices Whole Wheat Brown Bread
2 eggs
1/2 cup Milk
1 tsp Sugar
1 tsp Cinnamon Powder
Butter for frying

Beat the eggs well. Add the sugar, cinnamon powder and milk and mix well. Dip each bread slice in this mixture and then place on a hot tawa. Cook with a little butter. When one side is done, turn the slice over and cook the other side till it browns.


Drizzle some maple syrup over the slices and enjoy them for breakfast.

This is my entry to Weekend Herb Blogging, started by Kalyn and hosted by Anna of Anna's Cool Finds.

Poondu Kuzhambu (Garlic Sambar)


Among Tamil cuisines, I have been exposed to mostly Tamil Brahmin cooking and know very little about other Tamil cuisines. I spent two years at a hostel in Pondicherry and did get a little bit of exposure, but I don't think what we got was anything but the chef's cuisine. All our food was loaded with onions, fennel, chana dal and coconut, so much so that we hardly could identify what vegetable we were eating. For most of my time there, my lunch used to be garlic rasam, rice, papad and curds. To ensure I ate veggies, I made a salad each night. I found a shop in the main town where a lady was willing to sell me 1 carrot, 1 cucumber, 1 tomato and a small piece of cabbage everyday for a fixed price.

One of the things the "chef" made well was kara kuzhambu. I hope to find the recipe to that somewhere. At a Chettinad restaurant in Madras, I once had poondu kuzhambu. I have not hunted for the recipe, but decided last weekend to make it my way. In between police interrogations and visits from fingerprinting experts, I made this dish and we made it a complete meal by eating it with paruppu podi, a salad and curds.


Ingredients:

5-6 Garlic Pods, crushed

1-2 Red Chillies

1 tsp Fenugreek Seeds

1 tsp Mustard Seeds

1/2 tsp Asafoetida

1 tbsp Toor Dal

2 tbsp Tamarind Paste

1 tsp Oil

7-8 Curry Leaves

1 tbsp Sambar Powder

Salt to taste


Heat oil in a vessel and add the mustard seeds, fenugreek seeds, toor dal and asafoetida. When the mustard splutters, add the curry leaves and the chillies. Add the crushed garlic and fry for a minute. Add the sambar powder and fry for another minute. Add the tamarind paste, salt and a cup of water. Bring to a boil. Enjoy this with hot rice and appalams.

This is my entry to Weekend Herb Blogging, started by Kalyn and hosted by Kalyn herself. I found this site that talks about the health benefits of garlic.

Batat Phow


Also known as Batata Pohe or Aloo Poha, this is the amchi name for this dish. A very standard breakfast dish, at my place this becomes a lunch item. We do eat it for breakfast, but very rarely. I have loved this since the first time I ate it and along with Sabudana Khichdi, this is top of the tops when it comes to snacks or light meals for me. I make this with the thicker version of beaten rice that is available.


Ingredients:


1 Cup Beaten Rice (Poha)
2 tsp Oil
1 Onion, sliced
1 Potato, boiled and cubed
1 tsp Mustard Seeds
1 tsp Cumin Seeds
1/4 tsp Asafoetida
7-8 Curry Leaves
1/2 tsp Chilli Paste
1/2 tsp Ginger Paste
1 tsp Kashmiri Chilli Powder
1/2 tsp Turmeric Powder
Salt to Taste
Coriander leaves and scraped Coconut for garnish


Wash the poha in a colander and allow the water to drain. Do not touch this with your fingers. Add the salt, chilli powder and turmeric powder and toss until the poha is coated evenly with these powders. Keep aside.


Heat oil in a pan and add the mustard seeds, cumin seeds and asafoetida. When the mustard splutters, add the green chilli and ginger pastes and the curry leaves. Add the onions and potato and saute for a minute or two. Add the poha and mix well. Sprinkle some water, cover and cook for 5-6 minutes. Mix well and garnish with coriander and coconut and enjoy it hot.

Conchiglie Mushroom Saute


Would an Amchigele (Konkani) con artist be called Conchiglie? Nice thought! But, as I just discovered, this is just the Italian name for shell pasta. Pasta is something I make pretty often. It fits in very well with my concept of 'one dish wonders'. This particular dish is a must try for all mushroom lovers.

Ingredients:

200g Button Mushrooms, chopped
200g Oyster Mushrooms, chopped
200g Shell Pasta, boiled/cooked
1 Onion, finely chopped
1 Garlic pod, finely chopped
1 tbsp Olive Oil
2 tsp Chilli flakes
1/2 tsp Thyme
1 tsp Parsley
Salt and Lime juice to taste


Heat the oil in a pan. Add onion and garlic and fry for a couple of minutes. Add the thyme, parsley and chilli flakes and saute for 1-2 minutes. Add the oyster mushrooms and saute for 2 minutes and then add the button mushrooms. Saute the entire mixture for 2-3 minutes. Add the pasta and salt and cover and cook for a two minutes. Remove from the fire and mix in the lime juice. Enjoy this with Garlic Toast on the side.
This is my entry to Weekend Herb Blogging, started by Kalyn and hosted by Anna of Anna's Cool Finds.

Sabudana Khichdi


This is the dish that took me years to master. I think I came close to perfecting the art this time. The day I made it, I actually ate it 4 times. For breakfast, as a midmorning snack, for lunch and an evening snack.

My entire extended family knows that this is a favourite. I once went to Bombay with a friend and over the two weeks that we were there, we got invited to all my relatives' places for all meals. Whenever it was a lunch or dinner, my aunts served us Avrya Bendi and at snack time we got Batat Phow and sabudana khichdi. I joke that my friend must have believed these to be the entire universe of amchi cooking. But there are some items that I truly never tire of eating.


I once soaked the sago overnight and I got a glue of some sort the next morning instead of a khichdi. I tried soaking for an hour and then making it, it turned out to be too hard on our teeth. Finally, I soaked the sago for 2-3 hours, drained the water and then left it overnight. That seemed to do the trick. And the more oil you use, the better the dish turns out. At these times I always hear my Amma saying, "haath ghatti kornaka, chikke chadavat tael tup sollari, randap chang zatta" (Don't hold your fist too tight, if you use a little extra oil or ghee, your food will turn out tastier.) I did use a little more oil than I normally would and the dish did turn out the way I'd expected it would.

Ingredients:

1 cup Sago (Sabudana)
2 tbsp Oil
1/4 tsp Mustard Seeds
1/4 tsp Cumin Seeds
1/4 tsp Asafoetida
7-8 Curry Leaves
1 tsp Green Chilli paste
1/2 tsp Ginger paste
1/4 cup Roasted Peanut (coarsely powdered)
Salt to taste

Soak the sago for 2-3 hours, drain, and keep aside overnight. (If making in the morning, that is). When you are ready to make the dish, mix the peanut powder with the sago.

Heat oil in a kadhai and add the mustard seeds, cumin seeds and asafoetida. When the mustard splutters, add the green chilli and ginger pastes and the curry leaves. Fry for a minute or two. Add the sago-peanut mixture and salt. Cover and cook for 5-6 minutes.

Remove the lid and allow portions of this to crispen. Those will be the tastiest bits of this dish. Fasting or no fasting, this is one dish I absolutely dig.

Corn Vegetable Salad


The heat has reduced a great deal and Delhi's weather oscillates between heavy rain and sultry hot. Whether it is either extreme or somewhere in between, the last thing I'd want to do is toil over the stove. So, meals these days have simple sautes or even salads instead of a
full fledged subzi.

I had a can of corn niblets and decided to use it one evening. This is a very simple salad flavoured with Indian spices. You can change the spices to suit your meal or palate. We'd been to Mussoorie 2 weekends ago and I was inspired by a roadside chana chat salad that we had while waiting in a traffic jam.

Ingredients:

1 can (400g) Corn niblets
1/2 Red Capsicum, finely chopped
1/2 Yellow Capsicum, finely chopped
1 Onion, finely chopped
1 Tomato, finely chopped
1/2 tsp Green chilli paste
1/2 tsp Ginger paste
1/4 tsp Coriander Powder
1/4 tsp Cumin Powder
1/4 tsp Chat Masala
Salt and lime juice to taste
Coriander leaves for garnish

Mix all the vegetables with the corn. Add the pastes and powders and mix well. Add salt and lime juice and mix thoroughly. Garnish with coriander and enjoy!

Friday, July 6, 2007

Butter Garlic Water Chestnuts


I am back! The last week has been crazy. Meetings, police interrogations, sleepless nights. I hope to recover from this all someday. Just the thought that someone broke into my house and went through my stuff before picking what he wanted is driving me insane. To keep from thinking about the incident, I have been cooking. Because I've had people at home. Because I wanted distraction. Because, I love cooking.

I had this dish a couple of times at Mainland China and wanted to try it out. And ever since I came to know about Nupur's A-Z, I've been wanting to make this dish. I know that she insisted on a vegetable and an Indian dish. Here's a Chinese dish made with a fruit. Forgive me, Nupur.

W is for Water Chestnut. And this is my second W entry to Nupur's A-Z of Indian Vegetables. Water chestnuts are not in season but I found a can in the supermarket. I didn't have a recipe, but decided to go by taste alone.


Ingredients:

1 can (400g) Water Chestnuts, drained and chopped in two
2 tbsp Butter
1-2 tsp Chilli Flakes
3 tsp Garlic, finely chopped
Salt to taste

Melt the butter in a pan and add the garlic. Saute for a minute. Add the chilli flakes and fry for another minute. Add the water chestnuts and salt. Cover and cook for a couple of minutes. Remove the lid and saute for another 5 minutes. Enjoy the dish as a starter or an accompaniment to cold beer on a hot afternoon.

Sunday, July 1, 2007

Burgled

This isn't a food post. I will not be able to be a regular blogger for some time as our house was burgled on Friday. http://onlineraga.blogspot.com/2007/07/compromised.html

I shall spring back to action soon. Until then, good bye.